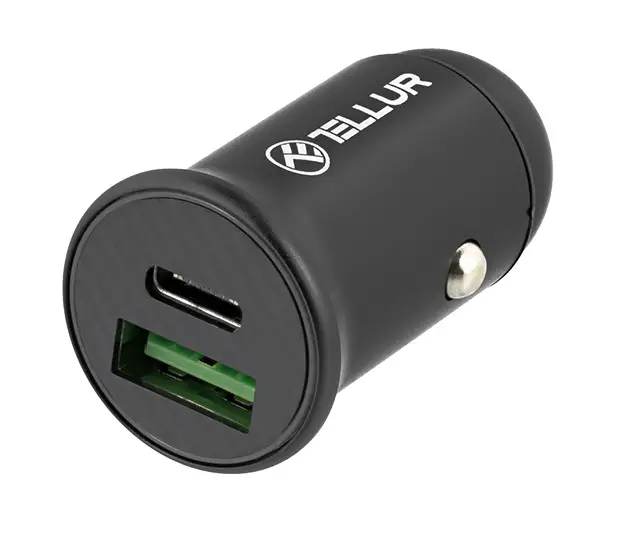
Technical Specifications
- Input:
DC 12-24V - Total output PD 12V:
5V-9V/3A, 12V/2.25A
MAX:
30W - Total output PD 24V:
5V-9V-12V-15V-20V/3A
MAX:
60W - Total output USB-A QC:
5V/3A, 9V/2A,
12V/1.5A MAX: 18W - Total output USB-A Huawei SuperCharge:
5V/4.5A, 4.5V/5A, MAX 22.5W - Total output PD+USB:
2×5V/2.4A, 4.8A/MAX:
24W - Features:
Safety protections: short circuit, over current, over voltage - Size:
46 x 24 x 24mm - Weight:
17g - Material:
Aluminium
Instructions
- Plug the car charger into your car cigarette lighter.
- Connect one end of your charging cable to your device’s charging port.
- Connect the other end to a USB/Type-C port on the car charger.
- Unplug your device when fully charged.
Caution
- NOT waterproof; please keep away from liquid and extreme heat.
- It is normal that the car charger may get a little warm during charging.
Disposal and recycling information
The crossed-out wheeled-bin symbol on your product, battery, literature or packaging reminds you that all electronic products and batteries must be taken to separate waste collection points at the end of their working lives; they must not be disposed of in the normal waste stream with household garbage. It is the responsibility of the user to dispose of the equipment using a designated collection point or service for separate recycling of waste electrical and electronic equipment (WEEE) and batteries according to local laws. Proper collection and recycling of your equipment helps ensure EEE waste is recycled in a manner that conserves valuable materials and protects human health and the environment, improper handling, accidental breakage, damage, and/or improper recycling at the end of its life may be harmful for health and environment.
ABN Systems International
Str. Marinarilor, nr.29
Sector 1, Bucuresti, Romania O 004.021.233.09.95
officeatettur.com
officelBabnsystems.ro
www.tettur.com
Full HD Webcam
User manual
This manual is available in more languages on www.tellur.com
INTO YOUR FUTURE
Features:
- Device Small and lightweight, also easy to install.
- USB interface
- No additional drivers installation needed.
- Built-in microphone, Audio and Video PC Camera.
- Compatible with various of systems: Windows® 10, Windows 8, Windows 7, Windows XP and Mac OS
- Monitor support: laptop, desktop, TV monitor.
- Usage: Facetime, Skype, Video record, You Tube, Facebook, Games etc.
- Manual focus adjustment.
Technical specifications:
Image Sensor: 2MP
Max Resolution: 1080p/30fps
Focus type: Manual
Built-in microphone: Yes
Field of view: 85°
Connection: USB 2.0
Cable length: 150cm
Features: Automatic low light correction
Compatible with: Windows° 10, Windows 8, Windows 7, Windows XP, Mac OS
Dimensions: 109 x 40 x 167 mm
Webcam Setting
Download software Potplayer from website: https://potplayer.en.softonic.com/.
1: Open the software, then go to Open-Device settings and select Webcam
2: For Video capture device please select Device – UVC Camera and Format – 1920*1080 59.94.
3: For Audio capture device please select Device – WASAPI-Capture Input terminal (Hisilicon HD Audio)
4: To apply the above settings please select Open device.
Questions and Answers
Q: Why is there no image when connected to the computer?
Answer: Please check the camera power indicator (red) and try to plug it to another USB port.
Q: Why are the images different?
Answer: Maybe your computer has two cameras, please choose UVC Camera.
Q: Why is there no sound from the microphone?
Answer: Please select the microphone: WASAPI-Capture Input terminal (Hisilicon HD Audio)
Q: Why does the software show 1280 * 720P instead of 1920 * 1080P?
Answer: Because some software does not support 1920 *1080P and automatically selects the best resolution.
Disposal and recycling information
![]() The crossed-out wheeled-bin symbol on your product, battery, literature or packaging reminds you that all electronic products and batteries must be taken to separate waste collection points at the end of their working lives; they must not be disposed of in the normal waste stream with household garbage.
The crossed-out wheeled-bin symbol on your product, battery, literature or packaging reminds you that all electronic products and batteries must be taken to separate waste collection points at the end of their working lives; they must not be disposed of in the normal waste stream with household garbage.
It is the responsibility of the user to dispose of the equipment using a designated collection point or service for separate recycling of waste electrical and electronic equipment (WEEE) and batteries according to local laws.
Proper collection and recycling of your equipment helps ensure EEE waste is recycled in a manner that conserves valuable materials and protects human health and the environment, improper handling, accidental breakage, damage, and/or improper recycling at the end of its life may be harmful for health and environment.
 Str. Marinarilor, nr.29 Sector 1, Bucuresti, Romania
 004.021.233.09.95
 [email protected] [email protected]
 www.tellur.com

![]()

Download and install the Tellur Smart App for either iOS or Android devices.
http://smartapp.tuya.com/tllsmart
https://apps.apple.com/us/app/tellur-smart/id1431862324
http://smartapp.tuya.com/tllsmart
https://play.google.com/store/apps/details?id=com.tllsmrt.smart&hl=en&gl=US
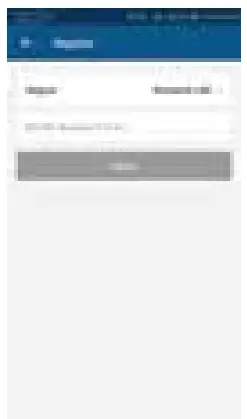
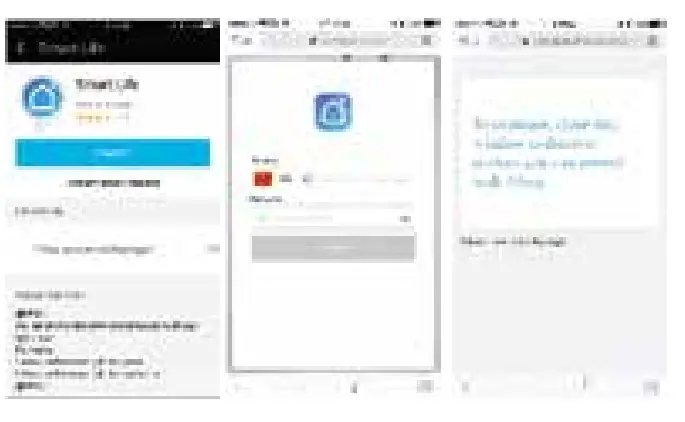
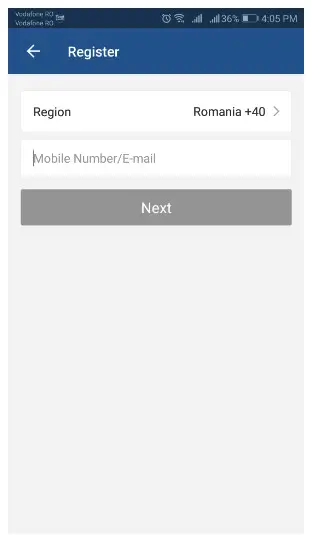
Once downloaded, the app will ask you to register your device. Enter your phone number or email which makes you feel comfortable and select the country you live in. If phone number selected you will receive a text with a registration code. If you choose email you will then create a password.
Input the Registration Code you received via text if phone method has been used or create password if email method chosen.
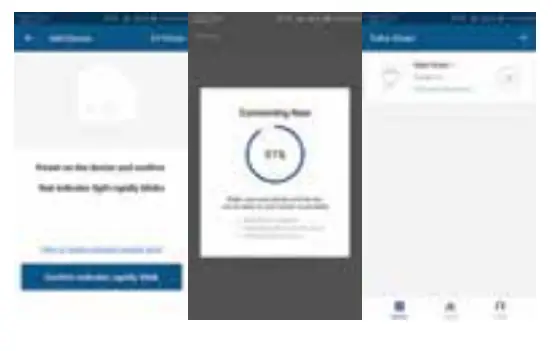
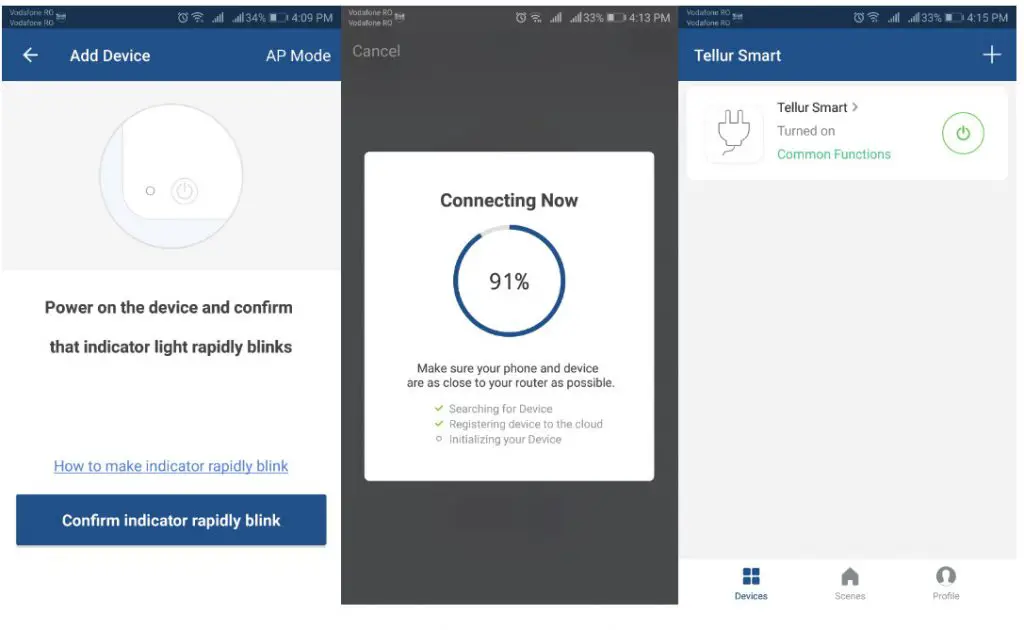
Adding a New Device
- Turn on power of device being paired and make sure light is flashing quickly.
- Open App and Click “+” to add appropriate device.
- Select WiFi network and input password of WiFi then.
- Once connected the App will prompt the connection, then you can rename the device or just click “done”.
- Once App is installed on your device and you have added your smart device to your app you will be able to control it.
Next step is to sync with Alexa or echo:
- Go to Home menu on Alexa App
- Select “Skills” in home menu of Amazon Alexa

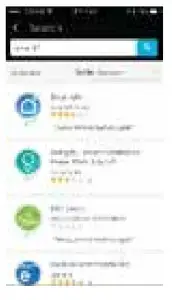
- Type (Smart Life) on search window and find
- Click on the App (Smart Life ) and press Enable to activate “smart life”.
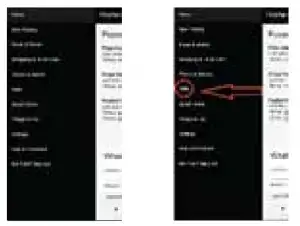
- Then you need to input your account and password that you registered in Tellur Smart . Now you finish the Alexa Link.
- Your (Brightfun) App has been skilled with Alexa, and now you can control any device added to your Tellur Smart App, remember that if you rename the device you added, it must be a simple name that Alexa can recognize.
- Control your smart devices through Alexa Now you can control your smart devices through Alexa. Take bedroom light as the example, the supported voice commands are as below:
“Alexa, turn off bedroom light”
“Alexa, turn on bedroom light”
“Alexa, dim bedroom light”
“Alexa, set bedroom light to red”
Why failed to add device?
- Please check whether device is powered on;
- Whether phone is connected via Wi-Fi;
- Whether device is ready for configuration. To get the device ready before configuration, normally you can manually press on the device to get it ready. Please refer to “Product Instructions” or Device Reset Instruction for details. Notice Each time to add device, reset Wi-Fi to get device ready for configuration and make sure router is working properly.
- Check routers or related: If router is dual-band router, select 2.4G network and add device. You also need to enable router’s broadcasting function. Set up wireless router: Set encryption method as WPA2-PSK and authorization type as AES, or set both as auto. Wireless mode cannot be 11n only. Don’t use Chinese to name router Wi-Fi.To stay strong Wi-Fi signal, please keep device and router within certain distance. Whether connected devices have reached the maximum number of router’s connections. If so, please try by turning o the Wi-Fi connection of some device. Router’s wireless MAC ltering function is enabled. Remove the device from the lter list and make sure that router is not prohibiting device from connection.
- Make sure the password entered in App is correct when adding new device.
EZ and AP connection modes:
Smart devices can be connected using two modes: EZ and AP. EZ represents the easiest way of connecting and enabling a smart device. You will need to have the device, active wireless network through with login password and Tellur Smart APP installed on a
smartphone / tablet. AP mode can be used to configure and enable a smart device first with the smartphone / tablet and later on to the Wi-Fi network.
How to reset device?
- Reset heater, oil heater etc. Long press reset button for 5 seconds until indicator light flashes, representing successful reset; Indicator light quickly flashes (2 times per second), representing quick connect mode; Indicator light slowly flashes (one time per 3 seconds), representing AP mode; Under EZ mode, long press reset button for 5 seconds until indicator light slowly flashes, representing switching to AP mode and vise versa.
- Reset smart light◦ Turn off light first. Switch light with the steps: Switch on-off-on-off-on (time interval cannot exceed 10 seconds), flashing lights represents successful reset; if no light flashes, please repeat the steps above; Quick light flashes (4 times per second), represent EZ mode; Slow light flashes (2 times per 3 seconds) represent AP mode; Under EZ mode, turn off lights and then switch light with the steps: Switch on – off – on – off – on (time interval cannot exceed 10
seconds). Light begins to slowly flash, representing that it has switched to AP mode and vise versa.
How to add device under EZ mode?
- Make sure that indicator light or light quickly flash;
- Phone has connected to Wi-Fi router and been able to connect to Internet;
- Tap “Add device” in app and enter correct Wi-Fi pass-word. Touch to search device around;
- In the device list, select and add the device.
How to add device under AP mode?
- Make sure that indicator light quickly flashes or light slowly flashes;
- Tap “Add device” in App and then “AP mode” in the top right corner. Connect to device hotspot first and then Wi-Fi.
- Tap “Next” to add device.
Can I control device with 2G/3G/4G network?
When adding device for the first time, it requires that device and phone need to be under the same Wi-Fi environment. After successfully adding device, you can remote control device with 2G/3G/4G network
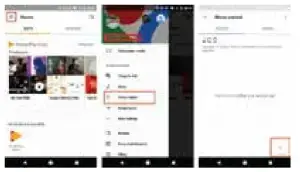
How can I share my device with family?
Open App, go to “Profile” > “Device Sharing” > “Sharings Sent”, tap “Add Sharing”, then you can share the device with the added family members.
How can I manage the devices shared by others?
Open App, go to “Profile” > “Device Sharing” > “Sharings Received”, then you can find the devices shared by other users. It also allows to add remarks to users or delete certain sharings by long pressing or swiping left.
Quick Guide of Using Google Home to Control Smart Devices
- What you need to get started
Before using Google Home to control your devices, make sure you meet the following conditions.- A Google Home device, or Android phone with Google Assistant.
- Latest Google Home app.
- Latest Google app (Android only)
- A Google account.
- The device display language must be set to English US.
- brightfun app and a related account.
- Smart devices.
Add devices in Tellur Smart App (Refer to App Instruction) You can skip this part if you’ve already add some devices to your Tellur Smart account, and in the meantime the devices’name are easily recognized.
- Download Tellur Smart App
You can scan the QR code below to download the Tellur Smart App:
http://smartapp.tuya.com/tllsmart
You can also search Tellur Smart App in either App Store or Google Play to install the app. Register a Tellur Smart account and sign in the app (Refer to App Instruction) Open the Tellur Smart app, tap “Register” to register an account, then sign in the app. - Add device and change device’s name (Refer to App Instruction) Sign in with the Tellur Smart account, add the device, then change device name to a easily recognized word or phrase, like “bedroom light”.
Link account in Home Control
- Tap “Home Control” in the hamburger menu on the Google Home app’s home page, then tap “+”.
- Find in the list. In the new window, select your Smart Life account’s region,type your Tellur Smart account and password, then tap “Link Now”.After you assign rooms for devices, your devices will be listed in the Home Control page.
Control your smart devices through Google Home Now you can control your smart devices through Google Home. Take bedroom light as the example, the supported voice commands are as below:
- Ok Google, turn on/off bedroom light.
- Ok Google, set bedroom light to 50 percent.
- Ok Google, brighten bedroom light.
- Ok Google, dim bedroom light.
- Ok Google, set bedroom light to red.
Declaration of conformity
We, ABN SYSTEMS INTERNATIONAL S.R.L., Bucharest, Sector 1, Marinarilor street, nr. 31, we declare on own responsibility that the product below:
| Product description | Brand | Product code |
| WiFi Smart Bulb E27, 10W, white/warm, dimmer | Tellur | TLL331001 |
| WiFi Smart Bulb E27, 10W, white/warm/RGB,
dimmer |
Tellur | TLL331011 |
It does not endanger life, health, work safety, does not have a negative impact on the environment and corresponds to the standards stated in the manufacturer’s declaration of conformity. The product is in compliance with the following standards and / or other normative documents:
RED – 2014/53/EU
Applied standards:
EN 62479 (Health)
EN 60950-1 (Safety)
EN 301 489-1/-17 (EMC)
EN 300 328 (Radio)
RoHS – 2011/65/EU
We, ABN SYSTEMS INTERNATIONAL S.R.L., Bucharest, Sector 1, Marinarilor street, nr. 31, we declare on own responsibility that the product below:
| Product description | Brand | Product code |
| WiFi AC Plug, USB 1A, 2400W, 10A | Tellur | TLL331021 |
| WiFi Power Strip,
3 Outlets, 4*USB 4A, 2200W, 10A, 1.8m |
Tellur | TLL331031 |
| WiFi switch, 1 port, 1800W, 10A | Tellur | TLL331041 |
| WiFi switch, 2 ports, 1800W, 10A | Tellur | TLL331051 |
It does not endanger life, health, work safety, does not have a negative impact on the environment and corresponds to the standards stated in the manufacturer’s declaration of conformity.
The product is in compliance with the following standards and / or other normative documents:
RED – 2014/53/EU
Applied standards:
EN 60950-1:2006+A2:2013 (Safety) EN 62311:2008
EN 301 489-1 V2.2.0 (2017-03) (EMC)
EN 301 489-17 V3.2.0 (2017-03)
EN 300 328 V2.1.1 (2016-11) (Radio)
RoHS – 2011/65/EU
Disposal and recycling information
 The crossed-out wheeled-bin symbol on your product, battery, literature or packaging reminds you that all electronic products and batteries must be taken to separate waste collection points at the end of their working lives; they must not be disposed of in the normal waste stream with household garbage. It is the responsibility of the user to dispose of the equipment using a designated collection point or service for separate recycling of waste electrical and electronic equipment (WEEE) and batteries according to local laws. Proper collection and recycling of your equipment helps ensure EEE waste is recycled in a manner that conserves valuable materials and protects human health and the environment, improper handling, accidental breakage, damage, and/or improper recycling at the end of its life may be harmful for health and environment.
The product bears CE mark, applied in 2018
Name: George Barbu
Function: General manager
Place and date:
Bucharest, 02-05-2018

WiFi LED Ceiling Light
TLL 331131 / TLL331141
USER MANUAL
TLL331131
SPECIFICATIONS
Input voltage: AC220-240V 50Hz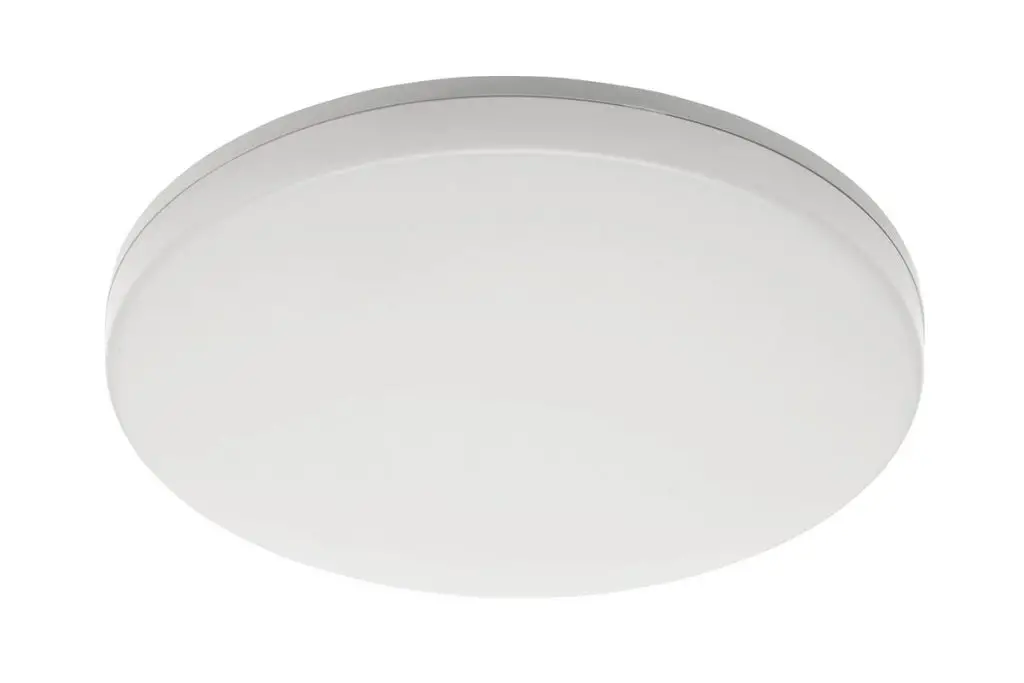
Color temperature: 3000-6500K
Power: 24W
Lumens: Up to 2400lm
Beam angle: 120°
Lifetime: 15000h
Wireless frequency: 2.4GHz
WiFi standard: IEEE 802.11b/g/n
Security: WPA-PSK/ WPA2-PSK /WPA/WPA2/WEP/WPS2/WAPI
Encryption type: WEP/TKIP/AES
CRI: Ra>80
Dimmable: Yes
Waterproof/Dustproof: IP54 standard
Compatibility: Devices with Android 4.1 / iOS 8 or higher
Dimensions: 33cm x 5cm
Weight: 880g
Color: White
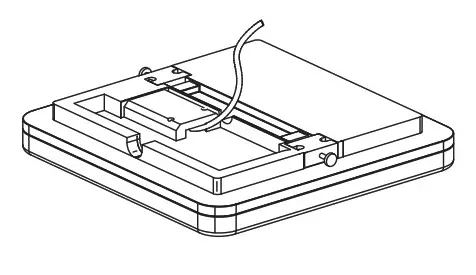
PRODUCT INSTALLATION
Warning: Make sure to switch off the power supply before installing or maintaining the product!
- Switch off the power supply before installation

- Press the buttons on both sides at the same time and take out the bracket

- Route the bracket through the power cord and secure it to the wall

- Open the cover of the junction box

- Connect the power cord to the terminal
- Close the junction box

- Secure the lamp to the bracket and ensure it is well fixed

- Switch on the power supply
- Switch off the power supply before installation
- Press the buttons on both sides at the same time and take out the bracket

- Route the bracket through the power cord and secure it to the wall
- Open the cover of the junction box
- Connect the power cord to the terminal
- Close the junction box
- Secure the lamp to the bracket and ensure it is well fixed
- Switch on the power supply
WARNING
• To avoid the risk of fire or electric shock, please make sure you install the product following its electrical rating (AC220-240V).
• The installation of the LED Ceiling Light requires electrical knowledge of luminaries. Please ask a qualified electrician for help.
• To avoid wiring damage or abrasion, do not expose the wire to edges of metal or other sharp objects.
• Never touch the LED Ceiling Light while it is connected to the electric power system.
• Before installing or maintaining the LED Ceiling Light, wait until the product has cooled down.
APP INTEGRATION
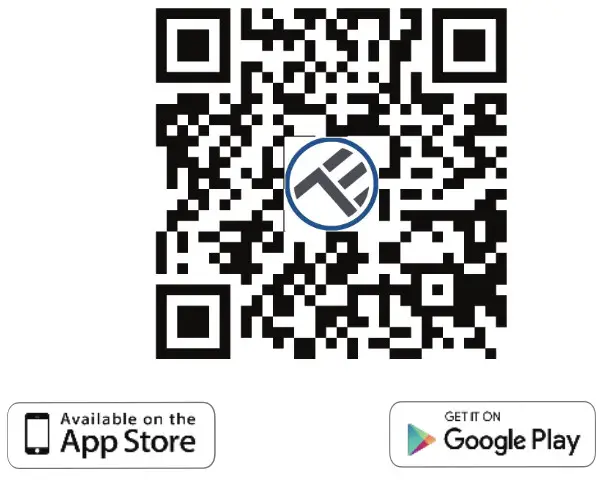
Download and install the Tellur Smart App for either iOS or Android devices.
 https://smartapp.tuya.com/tllsmart
Once downloaded, the app will ask you to register your device. Enter your phone number or email and select the country you live in. If you register by phone number, you will receive a text message with a registration code. Input the code to finish your registration. If you register by email, please create a password for your Tellur Smart account.
 Adding a New Device
• Turn on the power of device being paired and make sure light is flashing quickly.
• Open App and Click “+” to add an appropriate device.
• Select WiFi network and input password of WiFi then.
• Once connected the App will prompt the connection, then you can rename the device or just click “done”.

 • Once App is installed on your device and you have added your smart device to your app you will be able to control it.
Alexa integration:
- Go to Home menu on Alexa app.
- Select “Skills” / “Skills & Games”.’

- Type Tellur Smart in the search bar.

- Select Tellur Smart and click “Enable” to activate Tellur Smart.

- Then you need to input your account and password that you registered in Tellur Smart . Now you finish the Alexa Link.
- Your App has been skilled with Alexa, and now you can control any device added to your Tellur Smart App, remember that if you rename the device you added, it must be a simple name that Alexa can recognize.
- Control your smart devices through Alexa Now you can control your smart devices through Alexa. Take bedroom light as the example, the supported voice commands are as below:
“Alexa, turn off bedroom light”
“Alexa, turn on bedroom light”
“Alexa, dim bedroom light”
“Alexa, set bedroom light to red”
Failed to add a device?
- Make sure the device is powered on.
- Check the WiFi connection of your phone.
- Check if the device is in pairing mode.
Reset your smart device to enter pairing mode. Please refer to the “How to reset device” section below. - Check router or related:
If you use a dual-band router, select the 2.4GHz network to add the device. You also need to enable the router’s broadcasting function. Set encryption method as WPA2- PSK and authorization type as AES, or set both on “auto”. - Check if the WiFi signal is strong enough.
To maintain the signal strength, keep your router and the smart device as close as possible. - The wireless mode should be 802.11.b/g/n
- Make sure you don’t exceed the maximum number of registered devices supported by the app (150).
- Check if the router’s MAC filtering function is enabled. If so, remove the device from the filter list and make sure the router is not prohibiting the device connection.
- Make sure the WiFi password entered in the app is correct.
EZ and AP connection modes:
Smart devices can be connected using two modes: EZ and AP.
EZ represents the easiest way of connecting and enabling a smart device. You will need to have the device, active wireless network through with login password and Tellur Smart APP installed on a smartphone/tablet. AP mode can be used to configure and enable a smart device first with the smartphone/tablet and later on to the Wi-Fi network.
How to reset the device?
- Reset procedure for devices with reset button (power strip, aroma diffuser, plugs, etc.) -> Long press the reset button for 5 seconds until the LED indicator flashes, indicating successful reset. If the LED indicator flashes quickly (2 times per second), the device has entered EZ pairing mode. If the indicator flashes slowly (one time /3 seconds), the device has entered AP pairing mode. Under EZ mode, press the reset button for 5 seconds until the LED flashes slowly, indicating the AP mode (and vice versa).
- Reset procedure for lighting devices -> Start by turning off the lights. Switch light following these exact steps: on-off-on-off-on (the time interval between switches should not exceed 10 seconds). When the lights are flashing, the device has been successfully reset. If the light isn’t flashing, repeat the steps above. When the lights flash quickly (4 times/second), the device is in EZ mode. If the lights flash slowly (2 times/3 seconds), the device is in AP mode. Under EZ mode, repeat the steps above until the light starts flashing slowly, indicating that the device has entered AP mode (and vice versa).APP INTEGRATION
APP INTEGRATION
How to add a device under EZ mode?
Make sure the LED indicator/light flashes quickly.
- Make sure the phone is connected to WiFi.
- Tap “Add device” in the Tellur Smart app and enter the WiFi’s network password.
- In the device list, select the device you want to pair and add it.
How to add a device under AP mode?
- Make sure the LED indicator/light flashes slowly.
- Tap “Add device” in the Tellur Smart app and select “AP mode” from the top-right corner. Connect to the device’s hotspot first and then proceed to connect it to the WiFi network.
- Tap “Next” to add a device.
Can I control the device with a 2G/3G/4G network?
When adding the device for the first time, the device and the phone need to be connected to the same WiFi network. Once the device has been successfully paired with the Tellur Smart app, you can remotely control it via 2G/3G/4G networks.
How can I share my device with my family?
Open Tellur Smart app, go to “Profile” -> “Device sharing” -> “Sharing sent”, tap “Add sharing” and share the device with the added family members. Notice – users have to install the Tellur Smart app on their devices in order to see shared devices.
How can I manage the devices shared by others?
Open the app, go to “Profile” > “Device sharing” > “Sharing received” where you can see the devices shared with others. Swipe left to delete shared devices.
Quick Guide of Using Google Home to Control Smart Devices
Before using Google Home to control your devices, make sure you meet the following conditions: You have a Google Home device or an Android device with Google Assistant. You have the newest version of the Google Home app. You have the newest version of the Google app (Android only). The device display language is set to English US. You have the Tellur Smart app and a related account. Add devices in Tellur Smart App (Refer to App Instruction) You can skip this part if you’ve already added some devices to your Tellur Smart account, and in the meantime, the devices’ names are easily recognized.
Link account in Home Control
- Go to Google Home’s homepage and tap “+”.

- Hit the “Add new” button, enter Tellur Smart in the search bar and select the app from the list. Next, select your Tellur Smart account’s region, enter your Tellur Smart account and password and tap “Link now”. After you assign rooms for devices, your devices will be listed in the Home Control page.

- Now you can control your smart devices through Google Home. Take bedroom light as the example, the supported voice commands are as below:
• Ok Google, turn on/off bedroom light.
• Ok Google, set bedroom light to 50 percent.
• Ok Google, brighten bedroom light.
• Ok Google, dim bedroom light.
• Ok Google, set bedroom light to red.
![]() Disposal and recycling information The crossed-out wheeled bin symbol on your product, battery, literature or packaging reminds you that all electronic products and batteries must be taken to separate waste collection points at the end of their working lives; they must not be disposed of in the normal waste stream with household garbage. It is the responsibility of the user to dispose of the equipment using a designated collection point or service for separate recycling of waste electrical and electronic equipment (WEEE) and batteries according to local laws. Proper collection and recycling of your equipment help ensure EEE waste is recycled in a manner that conserves valuable materials and protects human health and the environment, improper handling, accidental breakage, damage, and/or improper recycling at the end of its life may be harmful to health and environment.
Disposal and recycling information The crossed-out wheeled bin symbol on your product, battery, literature or packaging reminds you that all electronic products and batteries must be taken to separate waste collection points at the end of their working lives; they must not be disposed of in the normal waste stream with household garbage. It is the responsibility of the user to dispose of the equipment using a designated collection point or service for separate recycling of waste electrical and electronic equipment (WEEE) and batteries according to local laws. Proper collection and recycling of your equipment help ensure EEE waste is recycled in a manner that conserves valuable materials and protects human health and the environment, improper handling, accidental breakage, damage, and/or improper recycling at the end of its life may be harmful to health and environment.
![]()
Declaration of conformity
We, ABN SYSTEMS INTERNATIONAL S.R.L., Bucharest, Sector 1,
Marinarilor street, nr. 31, we declare on own responsibility that the
product below:
Product description:
Tellur WiFi Ceiling Light, 24W, Round, White
Tellur WiFi Ceiling Light, 24W, Square, White
Brand: Tellur
Product code: TLL331131/TLL331141
It does not endanger life, health, work safety, does not have a negative
impact on the environment and corresponds to the standards stated in
the manufacturer’s declaration of conformity.
The product is in compliance with the following standards and / or other
normative documents:
RED – 2014/53/EU
Applied standards:
ETSI EN 301 489-1 V2.2.0 (2017-03)
ETSI EN 301 489-3 V3.2.0 (2017-03)
ETSI EN 300 440 V2.1.1 (2017-03)
ETSI EN 300 440 V2.2.0 (2017-09)
EN 55015:2013+A1:2015
EN 61547:2009
EN 61000-3-2:2014
EN 61000-3-3:2013
EN 62479:2010
EN 60598-2-1:1989
EN 60598-1:2015+A1:2018
RoHS – 2011/65/EU (RoHS 2.0))
The product bears CE mark, applied in 2020
Name: George Barbu
Function: General manager
Place and date:
Bucharest, 07-01-2020
Signed: