Model: DMS05
Product Accessories
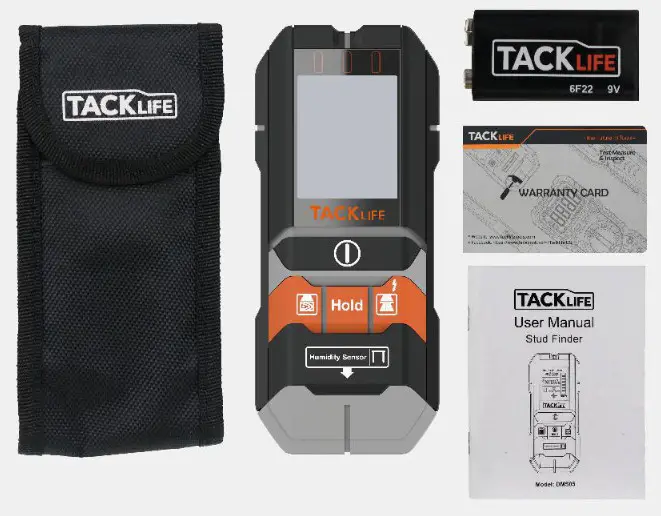
- 1 x TACKUFE DMS05 stud finder
- 1 x Packing Bag
- 1 x User Manual
- 1 x 9V Battery
- 1 x Warranty Card
*Reminder: Please check whether the accessories are complete when you receive the product. if you lack accessories, please contact our customer service [email protected].
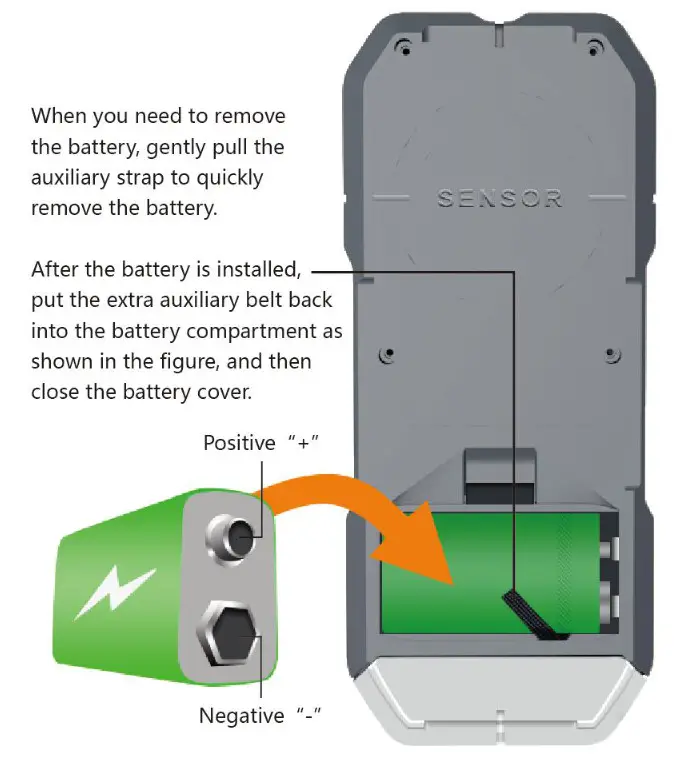
Battery Installation
Please refer to the picture to install the positive and negative poles of the battery
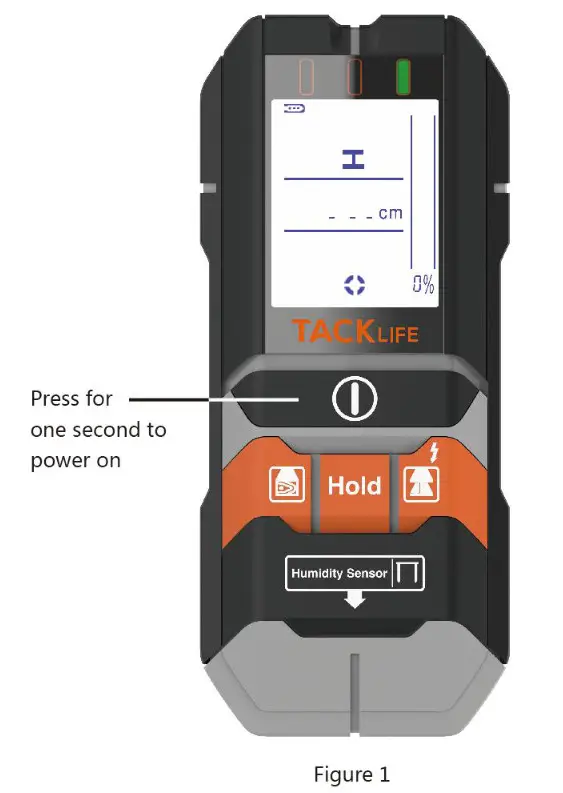
Boot page
Short press the button to turn on, and it will enter the metal detection mode.
Metal detection: Ferrous metal detection
The maximum detection depth of ferrous metals is 120mm.
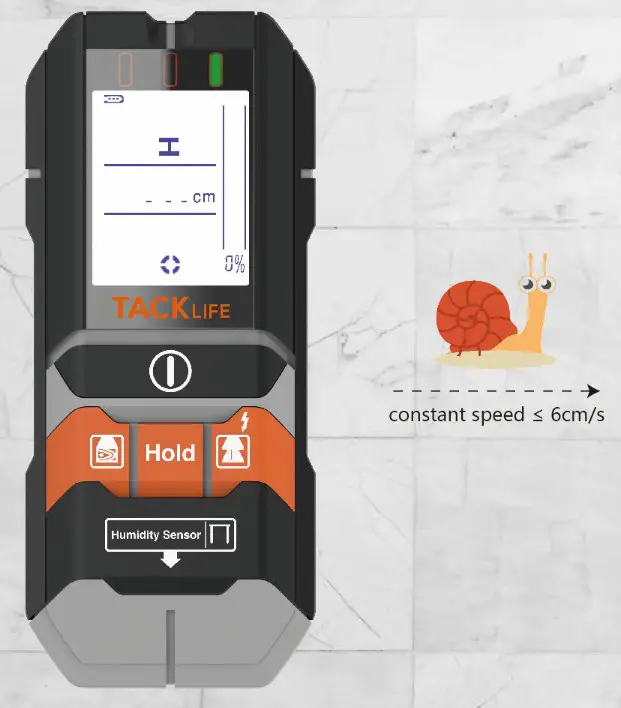
Power on is the metal detection mode.
When the measured object is a standard steel-reinforced copper pipe with a diameter of 18mm, the depth value accuracy is the best.
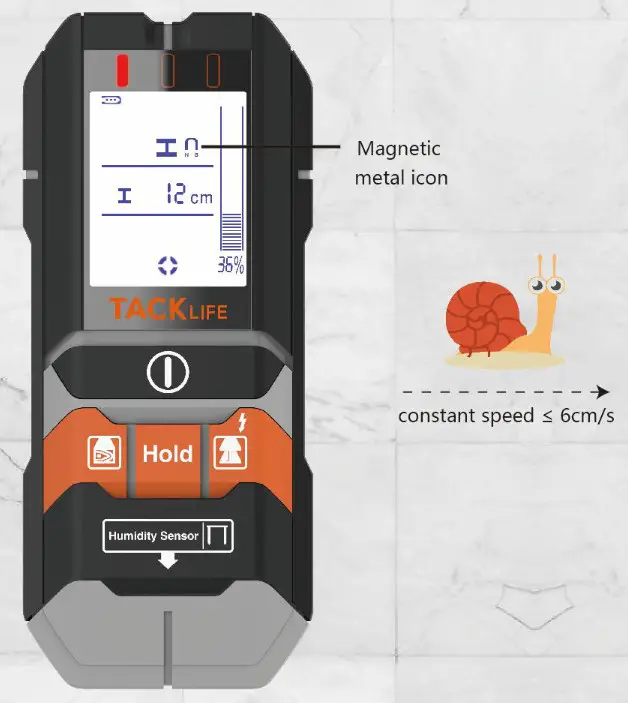
When an object is detected, the yellow or red indicator lights up.
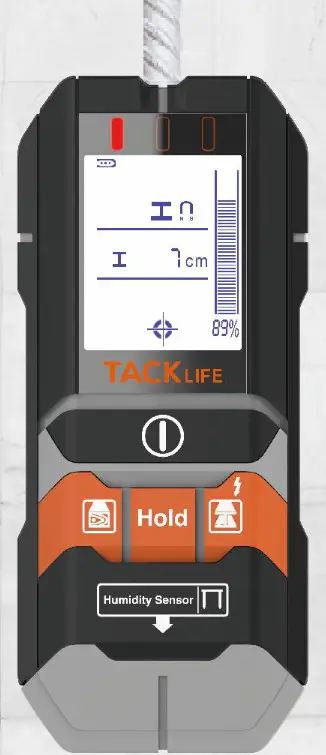 Detect center
When the detector display a magnetic metal symbol, it means that the current measured object is generally steel.
Metal detection: non-magnetic metal
The maximum detection depth of soldering iron metal is 80mm.
The detection method is the same as that of ferrous metals.
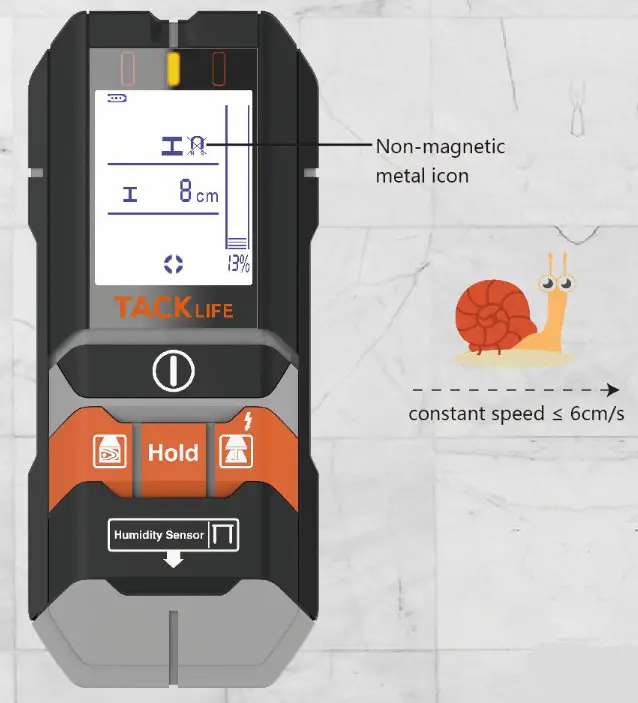
When the center is detected, the buzzer will sound.
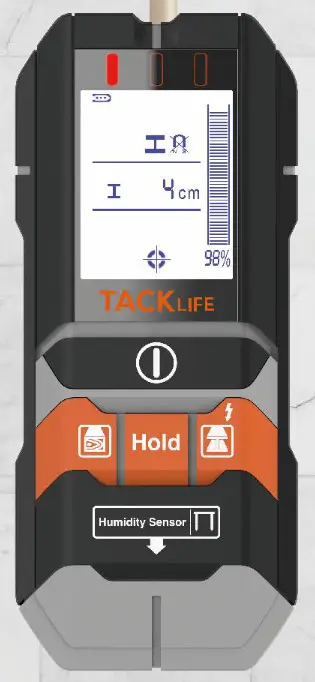
When the detector displays a non-magnetic metal symbol, it means that the current measured object is generally a wire or copper tube.
When the detector does not display a magnetic or non-magnetic metal symbol, it means that the current measured object is generally an alloy.
Wood Stud detection
Wood stud detection are suitable for detection on gypsum boards.
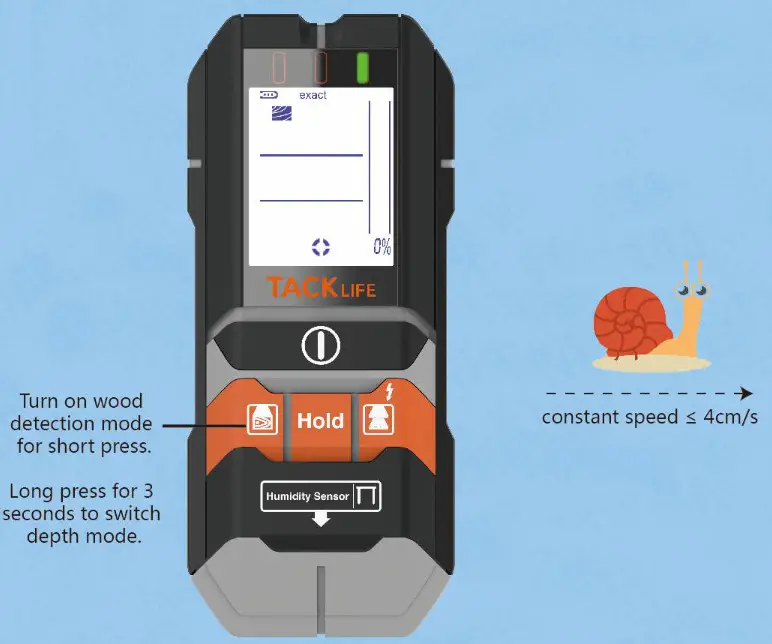
Detection needs to be lightly close to the wall and always in contact with the wall.
Long press for 3 seconds to switch depth mode, the green light flashes, and a beep sounds.
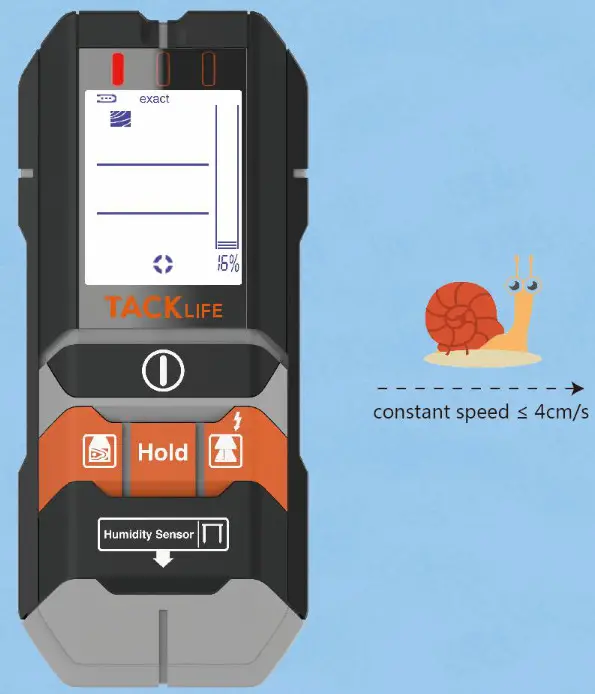
When an object is detected, the yellow or red indicator lights up.
The edge of the object is detected, the percentage will gradually increase.
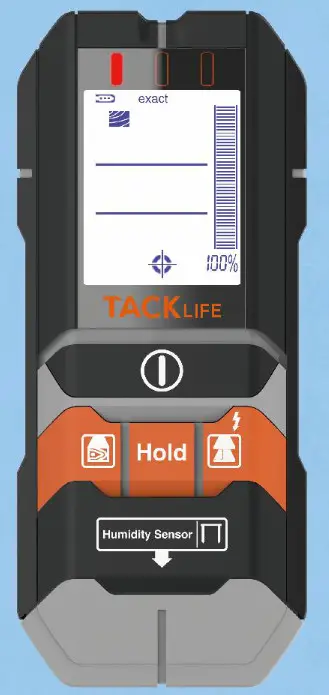
The center point of the object is detected.
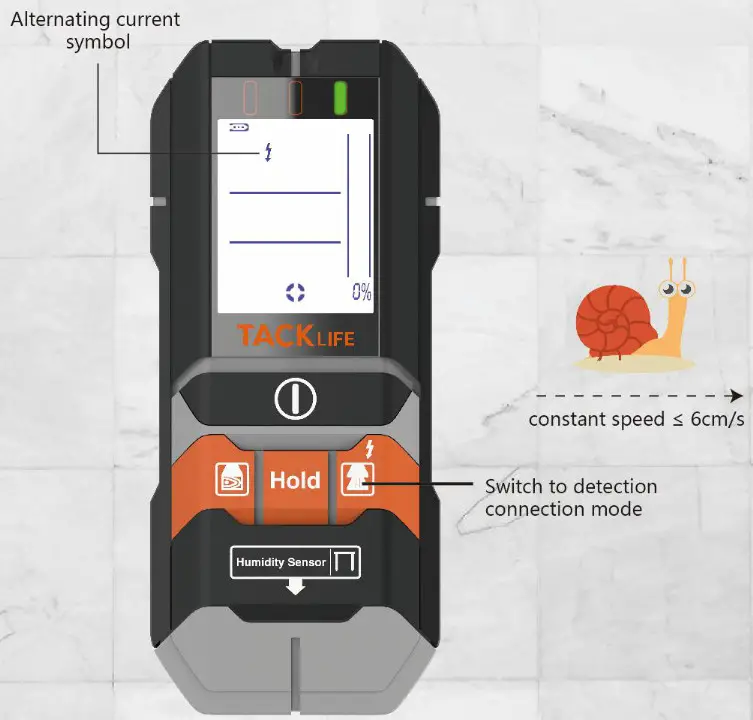
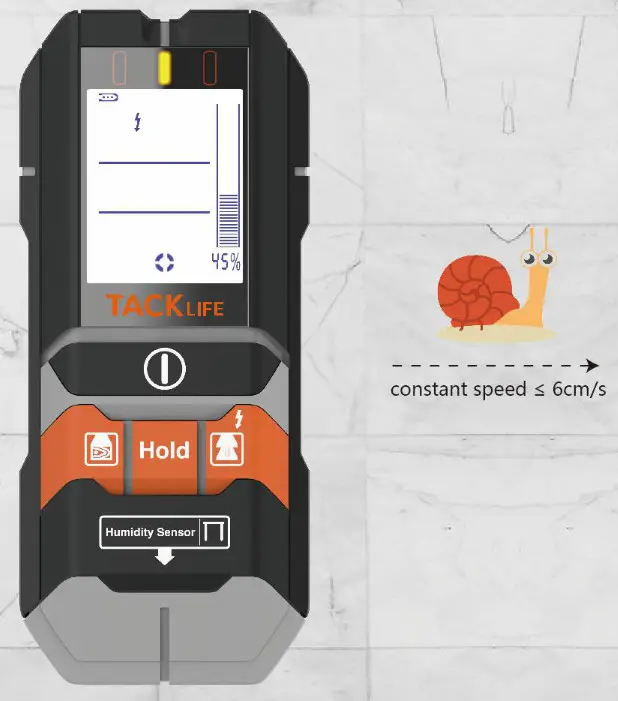
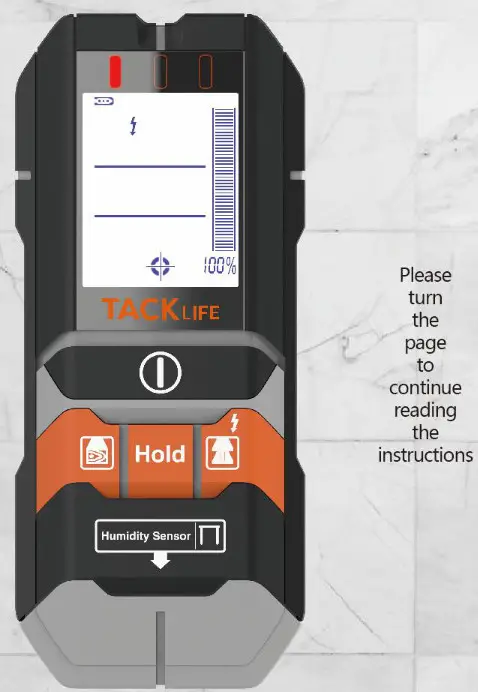
Alternating Current detection
Detect center
When the AC power symbol of the detector flashes, it means there is AC Power nearby.
When AC power is detected with other objects
When detecting metal or wood and AC power is detected at the same time, the AC power symbol will be displayed. The red light flashes to give an alarm and emits a rapid tone.
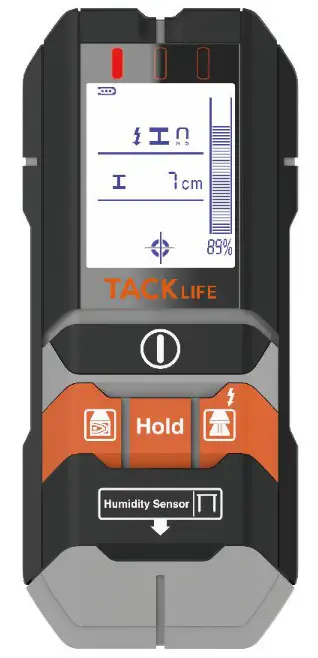
When AC power is detected with other objects Live cables can be detected in both metal mode and foreign object mode (≥4mm2).
Warning: If the wall contains wires, please pay attention to safety. Trun off power, gas, and water before drilling.
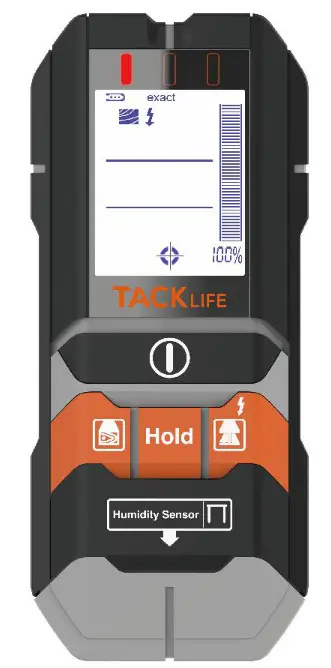
When AC power is detected with wood stud
Detect Wire mode
The maximum detection depth of a live cable is 50mm;
If the cable is not charged, the detection depth will be reduced. Conditions affecting measurement depth:
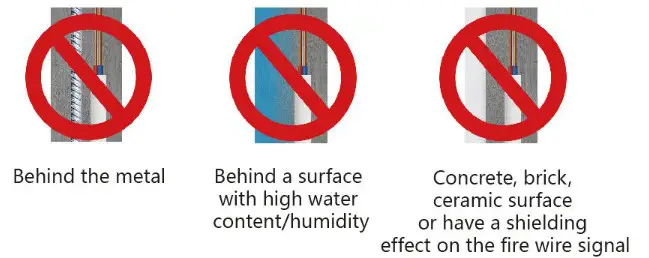
Terms and Conditions
This detector can detect metals (rebars, copper pipes) and cables hidden in walls, ceilings, and floors; wooden beams, metals, and cables under plaster. Ensure that there is no moisture in the detection area before starting up.
Working humidity range:
0-85%RH for ferrous metals,
0-60%RH for foreign object mode,
0-30%RH for alternating current mode.

Conditions that need calibration
In any case, the instrument has a signal display, you need to calibrate
Moisture measurement
Warning: If used incorrectly, the probe tip may cause injury. When the equipment is not in use, replace the protective cover and keep the tools away from children.
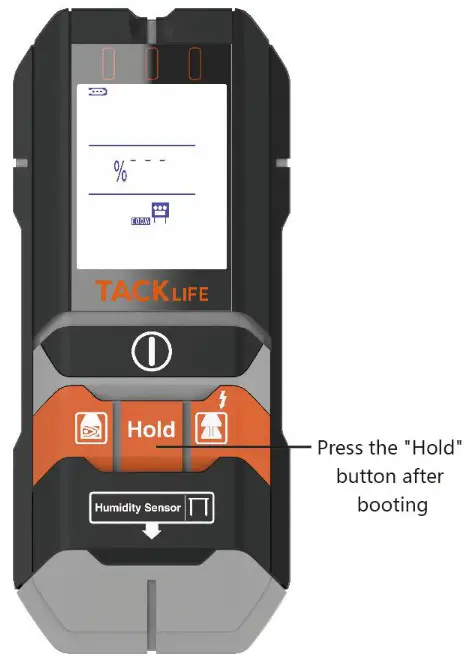
Enter wood moisture detection mode by default Wood moisture measurement range: 5%-SORH/±2%
Remove the probe cover and place the probe on the measurement surface without applying too much force.
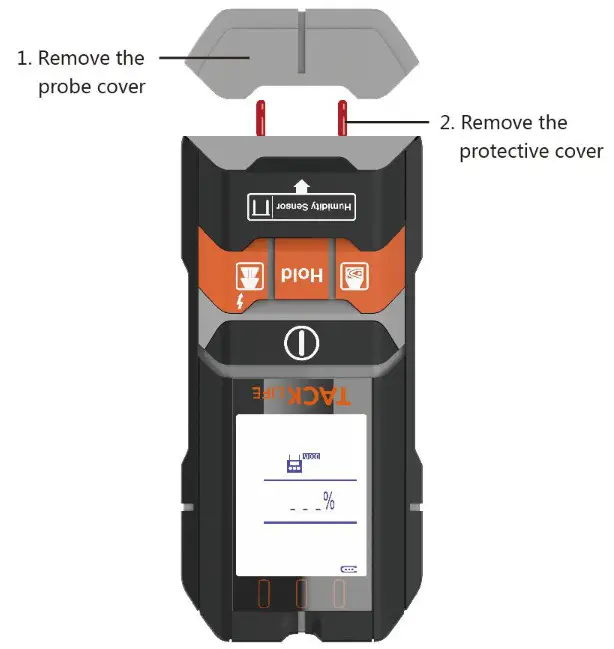
*In order to ensure the accuracy of the measurement data, the probe must be inserted into the measurement material during measurement and maintain good contact.
To locate the leaks in the water pipe on the wall, take measurements at different locations. The leak point is where the tool shows the highest reading
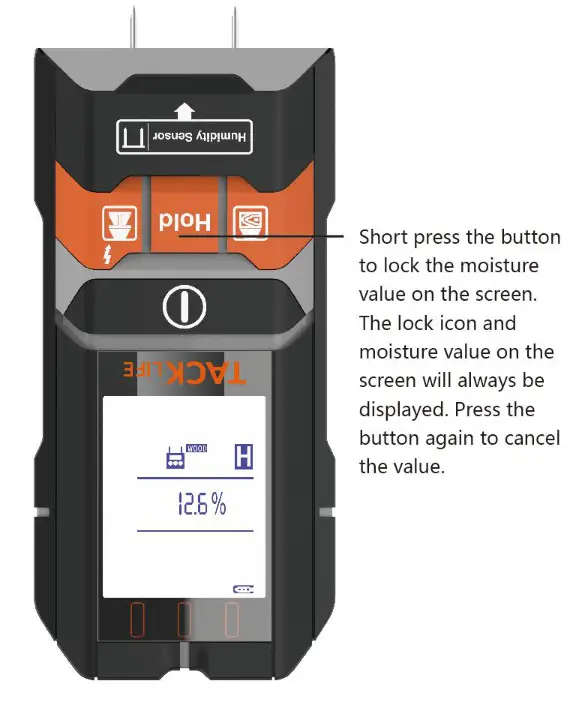
After a large change in the ambient temperature, wait at least 30 minutes for the measurement to ensure the accuracy of the measurement.
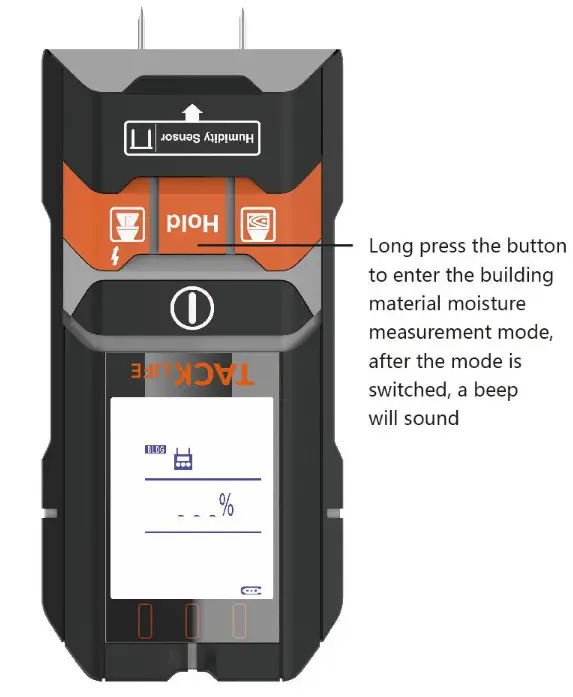
Building moisture measurement method is the same as wood measurement
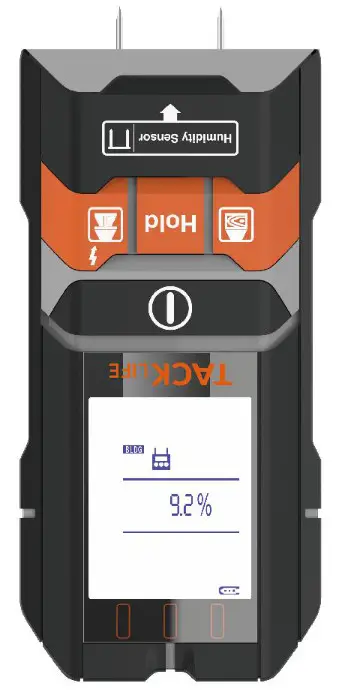
Moisture measurement range of building materials: 1.5%-33%RH/±2%
Calibration method
Metal mode calibration: At the current position (either on the wall or in the air), press and hold the metal button for 5 seconds, and the green light will turn on again to indicate a successful calibration.
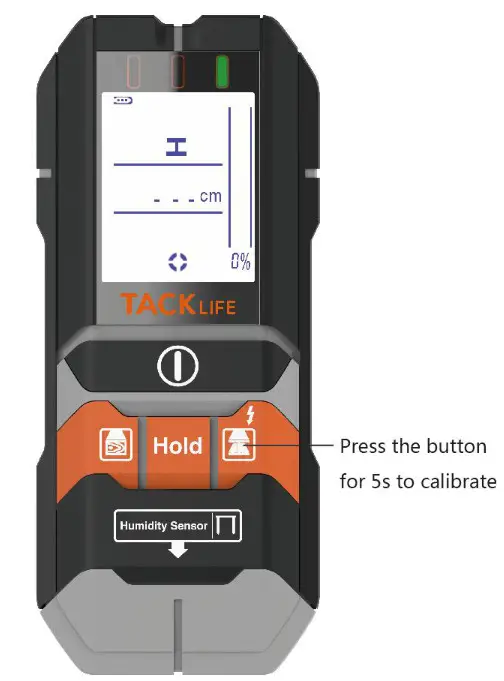
Cable mode calibration: If there is an alarm sound in every corner of the room, this is due to high humidity or strong static electricity on the wall. At the current position (either on the wall or in the air), long-press the button to calibrate, the green light will turn on again, and the signal strength percentage will display 0%. Release the button to continue detection.
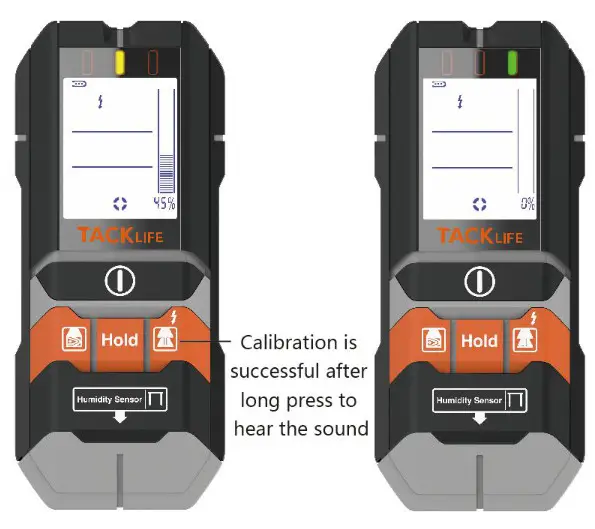
Wood mode calibration:
Attach it to the wall to ensure that there is no object in the wall for calibration (when there is no object, the display percentage shows 0% and there is no AC icon). Long press the wood mode button for 2s, the green light will light up again and a beep will sound, release the button to continue detection.
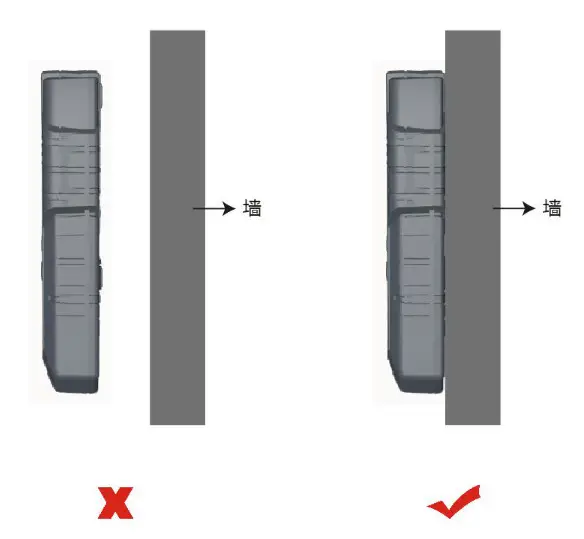
Component Description
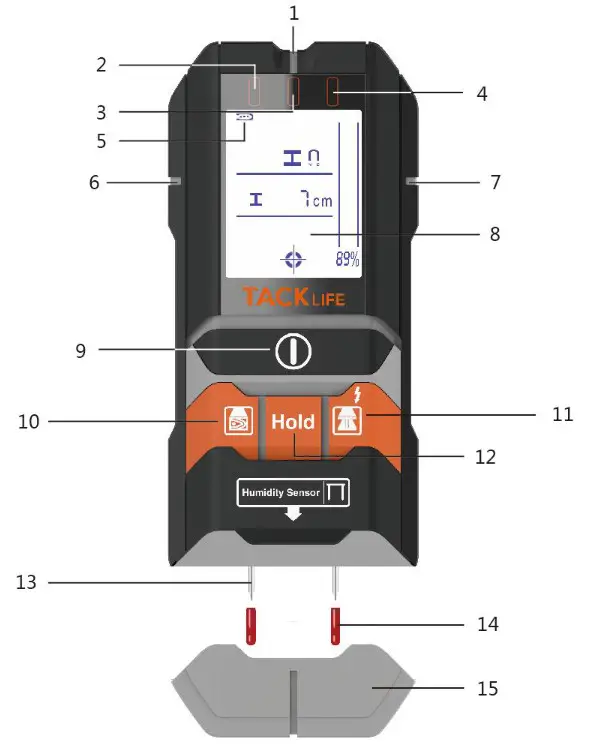
1 6 7.Central location
2.Red: The center of the sensor was located
3.Yellow: Getting closer to the target
4.Green: The detector has calibrated automatically and get read
5.Battery Indicator
8.LCD Screen
9.Power ON/OFF
10.Wood Studs Button(exact/deep Mode)
11.Detect Wire/Metal Button
12. Moisture measurement mode and lock” button
13.Test probe
14.Protective cover
15.Probe cover (the cover can be removed by gently pressing)
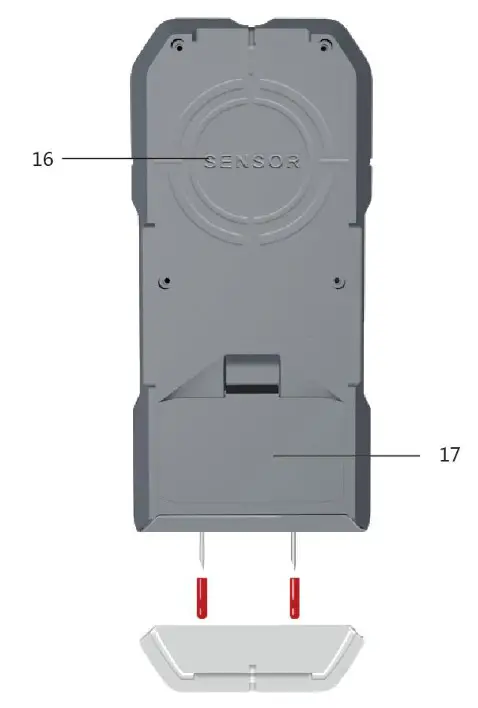
16.Detection area
17. Battery compartment
*Repeated detection many times to improve accuracy When the product is not in use, the battery must be removed from the instrument. If it is left for a long time, the battery will corrode or discharge automatically.
Maintenance, Service, Cleaning
Use a dry and soft cloth to wipe off the dirt on it. Do not use detergent or other solutions.
Do not stick labels or metal nameplates on the detection areas on the front and back sides of the instrument.
Use the enclosed packaging to store and carry the instrument.
Parameter
| Maximum detection depth | |
| Ferrous metals | 4-3/” /120mm |
| Non-ferrous metals (copper) | 3-1/8″ /80mm |
| Copper wire (a4mm2) (220V©50Hz/110V©60Hz) |
2″ /50mm |
| Foreign body mode (wood detection) |
Exact2Omm/Deep 38mm |
| Moisture detection depth | 0.3″ /8mm |
| Metal pattern | 0-85%RH |
| Foreign body mode | 0-60%RH |
| Moisture detection depth | |
| Wood | 5%-50%/±2% |
| Building materials | 1.4%-33%/±2% |
| General parameters | |
| Automatic shutdown time | 5Mins |
| range of working temperature | -10°C to 50°C/14°F to 122°F |
| Storage temperature range | -20°C to 70°C/-4°F to 158°F |
| Working humidity range | 35%-55%RH |
| Battery | 1*9V Battery |
Disposal of waste
The damaged detector, product accessories, and packaging must be recycled and used in a manner that meets environmental requirements The right to modify is reserved.
]]>
User Manual
Jump Starter
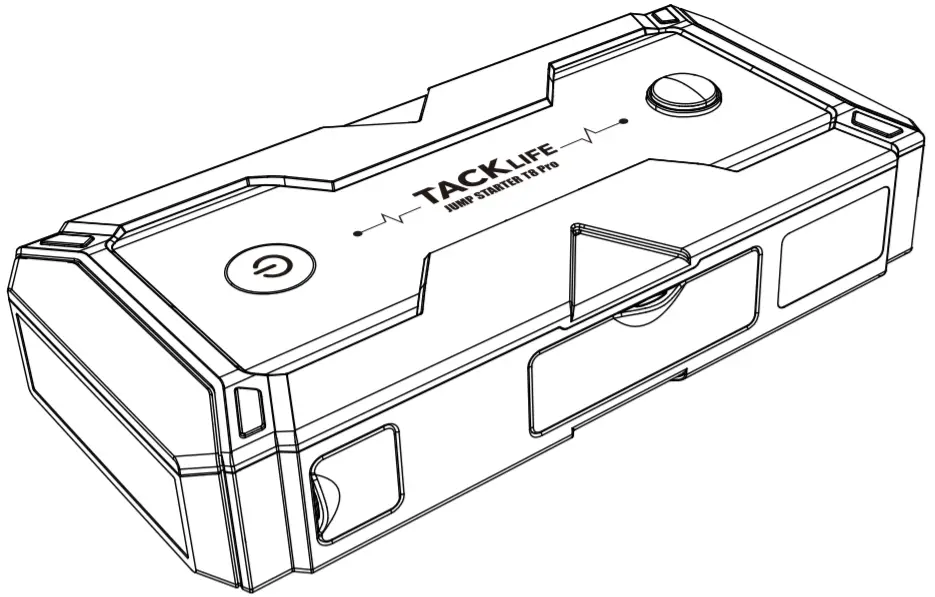
Model: T8 Pro
Thank you for choosing TACKLIFE T8 Pro smart car jump starter.
Please read the user manual carefully before using it and keep it for further reference.
PARTS AND FUNCTIONAL DESCRIPTION
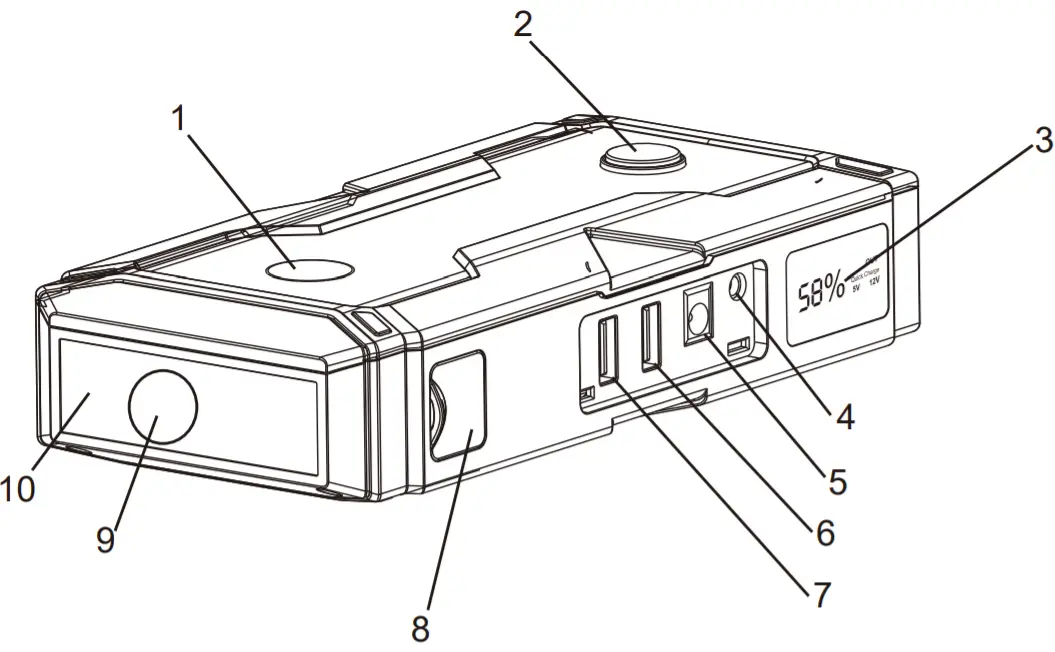
| 1. Power Button 2. Compass 3. LCD Screen 3.15V/1A Input 5. 12V/10A Output |
6. 5V/2.1A Output 7. Quick Charge Output 8. 12V Smart Jumper Socket 9. LED Flashlight (Stable/Strobe/SOS) 10. Emergency Light |
| 15V/1A Input | 12V Jump Clamps |
 |
 |
| USB 5V/2.1A Output | 12V/10A Output |
 |
 |
LCD SCREEN DISPLAY
Press the power button, the LCD screen will show the remaining power of the T8 Pro. When it is fully recharged, it will show 100%, while XX% indicates there is XX% power left. The product is being charged when the LCD screen shows “IN”. The LCD screen will show “OUT” when the
5V/9V quick charge or 12V output is being used.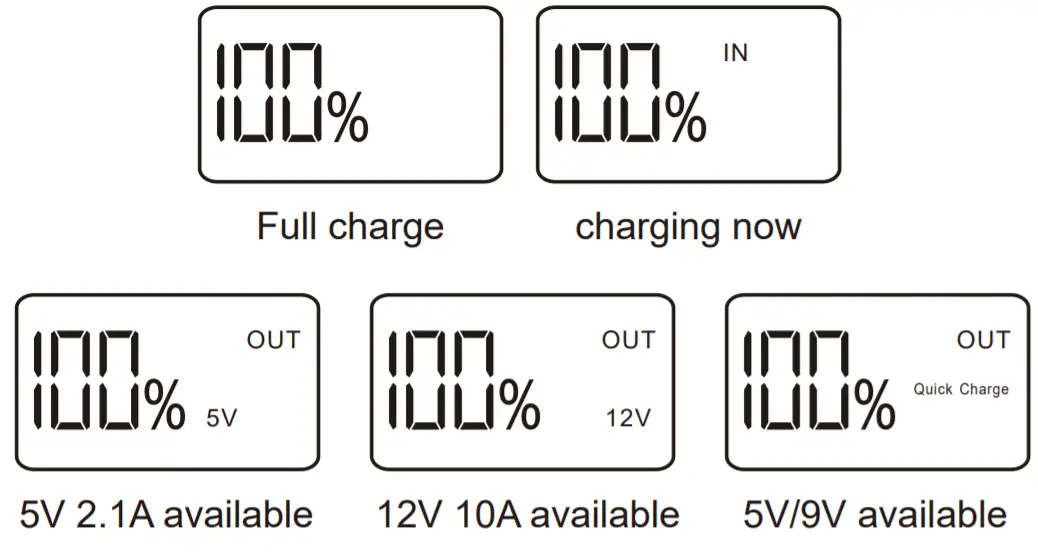
Steps To Charge The T8 Pro
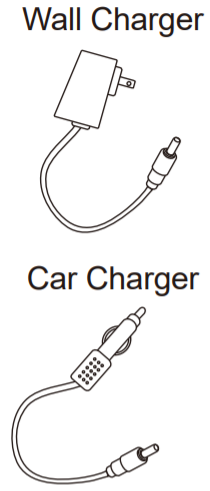
- Plug the wall charger into the universal socket.
- Plug the end of the wall charger into the 15V input port of T8 Pro.
OR
- Plug the car charger into the socket of a cigarette lighter.
- Plug the end of the car charger into the 15V input port of T8 Pro.

How To Jump Start 12V Vehicles
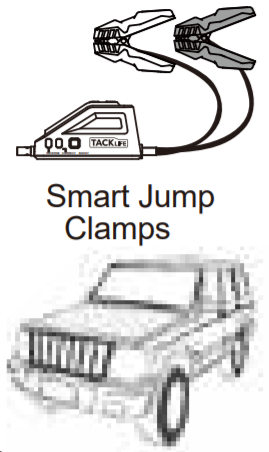
Firstly, plug the blue end of the jump clamps into the host of T8 Pro.
Secondly, connect the jump clamps with the car battery, red to positive (+) battery terminal, and black to negative (-).
Then operate with the following instruction: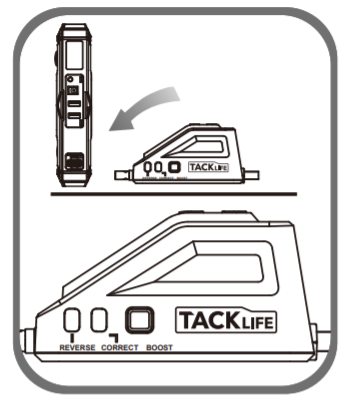
| Graphic | Green Light | Red Light | Reason/Solutions |
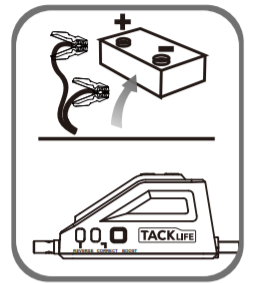 |
ON | OFF | The connection is correct, ready to start your car. |
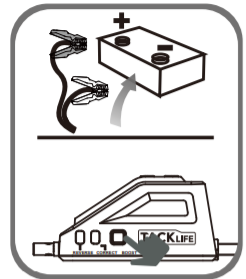 |
Blinking | OFF | The power of the car battery is too low or the car battery is totally dead. Press the “BOOST” button, the green light will turn on then start the engine in 30 seconds. |
| OFF | OFF | ||
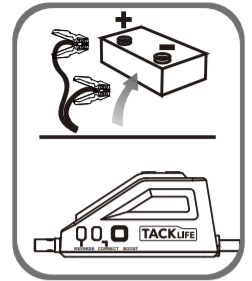 |
OFF | ON | The internal battery is too hot, allow the unit to cool / The T8 pro is at low power capacity / Please connect tightly the unit and clamps again. |
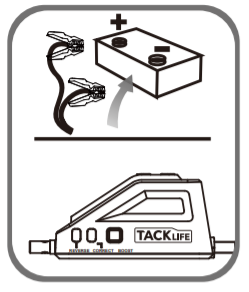 |
OFF | Blinking | Overcurrent protection, wait for at least 30 seconds. |
| Blinking | Blinking | Temperature protection initiates, wait 10 mins to resume automatically. | |
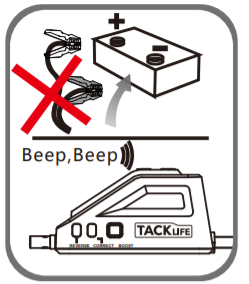 |
Red light on with Buzzing | Reverse the battery connections, please reconnect the poles correctly until the green light is on. |
|
- Make sure all of the connections are right and then start the engine.
- Once you have started your engine, disconnect the clamps, and remove the T8 pro.
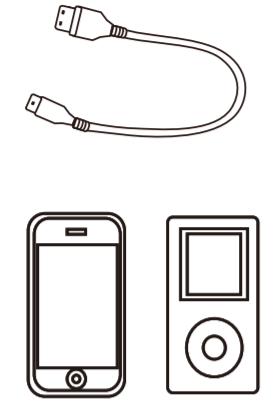
Use T8 Pro To Charge Your Cell Phone And Tablet.
- Plug the USB cable into the USB quick charge output of the device.
- Connect the Micro-USB end with your cell phone or tablet.
- Push the power button, the device will charge your cell phone or tablet.

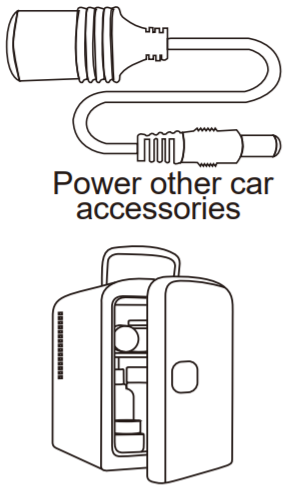
Use T8 Pro To Power The Other Car Equipment.
- Plug the cigarette adapter into the 12V/10A output of the device.
- Connect the power cable of the other 12V car equipment with the cigarette adapter.
- Press the power button to power the other 12V vehicle equipment.
LED Flash Light Instructions
- Hold the power button for a few minutes to turn on the flashlight.
Press one more time to change the modes from Stable, Strobe, SOS to OFF. - Press the power button twice quickly to turn on the red emergency light. Press one more time to turn it OFF.
PART LIST
| No. | Content name | Quantity | No. | Content name | Quantity |
| 8 | T8 Pro | 1 | @ | Type-C Cable | 1 |
| 0 | Smart Jumper Cable | 1 | 8 | Cigarette Lighter Adapter | 1 |
| 0 | Wall Charger | 1 | @ | EVA Storage Case | 1 |
| ® | Car Charger | 1 | @ | User Manual | 1 |
| 0 | USB Cable | 1 | C. | Warranty Card | 1 |
TECHNICAL SPECIFICATION
| Model: | T8 Pro |
| Size: | 185*87*40mm |
| Weight: | 550g |
| Battery Capacity: | 18000mAh (66.6Wh) |
| Output: | 5V/9V Quick Charge; 5V/2.1A; 12V/10A; 12V Jumper Socket |
| Input: | 15V/1A |
| Full Charging Time: | 4.5h |
| Starting Current: | 500A (3s), 300A (5s) |
| Peak Current: | 1200A |
| Waterproof Level: | IP65 |
| Working Temperature: | -20~ 60 |
FAQ:
Q: How to turn off the device?
A: This device is equipped with an intelligent detection system and will shut down automatically in 30 seconds once there is no load or it is fully charged.
Q: How long will it take before the device is fully charged?
A: It will take about 4.5 hours with the 15V/1A wall charger.
Q: How many times can T8 Pro charge the cell phone?
A: It depends on the capacity of your cell phone. Taking iPhone 6 as an example, T8 Pro can charge it about 7 times.
Q: How many times can this device jump-start a vehicle when it is fully charged.
A: It can jump-start the vehicle about 25 times.
Q: What is the lifetime of T8 Pro?
A: About 3-5 years in general condition.
Q: How long can T8 Pro hold a charge?
A: With scientific circuit design, can T8 Pro hold charge up to 12 months. But in order to extend the service life of the lithium battery, we suggest charging it every three months.
TROUBLESHOOTING
If the following operations can not solve your problems, please stop using the device and contact the manufacturer with an E-mail: [email protected].
| Problem | Reason | Solution |
| Nothing happens when pressing the power button. | The voltage of T8 Pro is really low and trigger the low power protection to shut down the device. |
Plug the wall charger into the T8 Pro to recharge it. |
COMPOSITIONS AND AMOUNT OF TOXIC AND
| TOXIC AND HARMFUL SUBSTANCES | |||||
| Pb | Hg | Cd | Cr (Vi) | PBB | PBDE |
| 0 | 0 | 0 | 0 | 0 | 0 |
| 0: Indicate all homogeneous materials hazardous substances content is below the MCV limit specified in the Standard 2002/95/EC(RoHS). | |||||
WARNING
- Read the instruction carefully before using the device.
- Leave the device far from children.
- Do not place the product in an environment where the temperature exceeds 60°C
- Do not shower dip the product in water.
- Do not place the product in an extremely hot environment or fire.
- Do not operate the product in an explosive environment, such as in the flammable liquids, gases or dust environment.
- Do not use the device as a toy.
- Do not use this device for charging a car.
- Do not drop the product. If the product is impacted or damaged, it must be repaired by a qualified technician.
- Do not use damaged or modified battery packs. Damage or modification of batteries may have unpredictable consequences, increasing the risk of fire, explosion, and injury.
- To reduce the risk, keep away from children when using the device.
- Make sure someone is nearby when you are using the device.
- Please remove metal accessories such as rings, bracelets, and necklaces before using the product to prevent the metal from falling into the hole and causing a short circuit.
- Please make sure that the power is above 75% when you use it to start your car.
- The product is only suitable for starting 12V gasoline and diesel vehicles. It may be dangerous if used for other purposes. Do not use it on equipment such as airplanes and ships.
- This device can not power all 12V automotive products. Currently, it can only power some small automotive electronics, such as portable tire air pumps.
- Please ensure that the blue end of the smart jump clamps is fully inserted into the product 12V car start port when you use it to start your car, otherwise, the blue end may melt.
- Please use the jump clamps which come with the device only.
When the battery clip or wire is damaged, please stop using it to avoid personal injuries such as fire and electric shock. - Do not use the clamps to power other equipment.
- Before starting, make sure there is no rust and foreign matter at the interface, and tightly connect the device with the jump clamps.
The non-tight connection will affect the starting performance of the device. - Do not use the device to start the car while it is being charged.
- Do not use the device to continuously start the car more than 3 times. It may cause the product to overheat and damage product. Each starting should be separated by two minutes.
- After successfully starting, please remove the product from the car battery within the 30s, otherwise it may cause damage.
- Do not charge the device immediately after using it to start the car successfully.
- Please charge it in the environment temperature between 0℃~45℃.
- Please use the comes with wall charger or the same specification charger to charge the device.
- In extreme cases, the battery may leak. Do not touch the liquid directly with your hands or skin. If you accidentally touch it, rinse it off immediately with soap and water. If you accidentally get into your eyes, rinse your eyes with cold water for at least 10 minutes and seek medical attention immediately.
- If the product battery leaks, please recycle it with the appropriate equipment immediately.
- Lithium battery-based products should be disposed of according to local regulations at the end of the product’s life.
WARRANTY
The Warranty of this product is covered by TACKLIFE. At TACKLIFE, we aim to manufacture the best products that inspire our consumers to live a more convenient, secure lifestyle.
We provide a 2-year warranty and lifetime technical support. If you need help, please contact us at any time, we will help you solve the problem within 24 hours.
Contact us: [email protected]
Website: www.tacklifetools.com
Facebook: www.facebook.com/AutoTacklife
