Sage BES500 the Bambino Plus Coffee Machine
- A downloadable version of this document is also available at sage appliances.com
- Before using for the first time, please ensure that your electricity supply is the same as shown on the rating label on the underside of the appliance. If you have any concerns please contact your local electricity company.
- The installation of a residual current safety switch is recommended to provide additional safety when using all electrical appliances. Safety switches with a rated operating current not more than 30mA are recommended. Consult an electrician for professional advice.
- Remove and discard any packaging materials safely, before first use.
- To eliminate a choking hazard for young children, discard the protective cover fitted to the power plug safely.
- Ensure the product is properly assembled before first use.
- This appliance is for household use only. Do not use the appliance for anything other than its intended purpose. Do not use in moving vehicles or boats. Do not use outdoors. Misuse may cause injury.
- Position the appliance on a stable, heat resistant, level, dry surface away from the counter edge, and do not operate on or near a heat source such as a hot plate, oven or gas hob.
- Fully unwind the power cord before operating.
- Do not let the power cord hang over the edge of a counter or table. Do not let the power cord touch hot surfaces or become knotted.
- Do not leave the appliance unattended when in use.
- if the appliance is to be:
- left unattended
- cleaned
- moved
- assembled; or
- stored always switch off the espresso machine by pressing the POWER button to OFF. Switch off and unplug from the power outlet.
- Regularly inspect the power cord, plug and actual appliance for any damage. If found to be damaged in any way, immediately cease use of the appliance and return the entire appliance to the nearest authorised Sage Service Centre for examination, replacement or repair.
- Keep the appliance and accessories clean. Follow the cleaning instructions provided in this book. Any procedure not listed in this instruction booklet should be performed at an authorised Sage Service Centre.
- The appliance can be used by children aged 8 or older and persons with reduced physical, sensory or mental capabilities or a lack of experience and knowledge, only if they have been given supervision or instruction concerning use of the appliance in a safe way and understand the hazards involved.
- Children should not play with the appliance.
- Cleaning of the appliance should not be carried out by children unless they are 8 years or older and under adult supervision.
- The appliance and its cord should be kept out of reach of children aged 8 years and younger.
- Do not use attachments other than those provided with the appliances.
- Do not attempt to operate the appliance by any method other than those described in this booklet.
- Do not move the appliance whilst in operation.
- Do not use any other liquid apart from cold mains/town water. We do not recommend the use of highly filtered, de-mineralised or distilled water as this may affect the taste of the coffee and how the espresso machine is designed to function.
- Never use the appliance without water in the water tank.
- Ensure the portafilter is firmly inserted and secured into the brewing head before using the machine.
- Never remove the portafilter during the brewing operation as the machine is under pressure.
- Do not place anything on top of the appliance.
- Use caution when operating machine as metal surfaces are liable to get hot during use.
- Do not touch hot surfaces. Allow the product to cool down before moving or cleaning any parts.
- Heating element surface is subject to residual heat after use.
- Always ensure the appliance is turned OFF, unplugged at the power outlet and has been allowed to cool before cleaning, attempting to move or storing.
- The appliance is not intended to be operated by means of an external timer or separate remote-control system.
- The use of attachmentsnot sold or recommended by Sage may cause fire, electric shock or injury.
- Always turn the appliance to the off position, switch off at the power outlet and unplug at the power outlet when the appliance is not in use.
- Any maintenance other than cleaning should be performed by an authorised Sage® service centre.
- Do not use the appliance on a sink drain board.
- Do not operate the appliance if it is in an enclosed space, or within a cupboard.
- Use caution when descaling as hot steam may be released. Before descaling, ensure drip tray is empty and inserted. Refer to ‘Care & Cleaning’ for further instructions.
- Use caution after milk texturing as the ‘Auto Purge’ function may purge hot steam when the steam wand is lowered.
NOTICE TO CUSTOMERS REGARDING MEMORY STORAGE
Please note that in order to better serve our customers, internal memory storage has been imbedded into your appliance. This memory storage consists of a small chip to collect certain information about your appliance including the frequency of use of the appliance and the manner in which your appliance is being used. In the event your appliance is returned for service, the information collected from the chip enables us to quickly and efficiently service your appliance.
The information collected also serves as a valuable resource in developing future appliances to better serve the needs of our consumers. The chip does not collect any information regarding the individuals who use the product or the household where the product is used. If you have any questions regarding the memory storage chip please contact us at [email protected]
SPECIFIC INSTRUCTIONS FOR WATER FILTER
- Filter cartridge should be kept out of reach of children.
- Store filter cartridges in a dry place in the original packaging.
- Protect cartridges from heat and direct sunlight.
- Do not use damaged filter cartridges.
- Do not open filter cartridges.
- If you are absent for a prolonged period of time, empty the water tank and replace the cartridge.
 The symbol shown indicates that this appliance should not be disposed of in the normal household waste.It should be taken to a local authority waste collection centre designated for this purpose or to a dealer providing this service. For more information, please contact your local council office.
 To protect against electricshock, do not immerse the power cord, power plug or appliance in water or any other liquid.
FOR HOUSEHOLD USE ONLY SAVE THESE INSTRUCTIONS
Components
- 1.9L removable water tank
- Control panel 1 CUP, 2 CUP and STEAM buttonsWith preset shot durations or programmable durations and volumes
- MILK TEMP settingsSelect from Warm, Ideal and Hot
- MILK FOAM settings Select from Low, Medium and High
- Group head
- 54mm stainless steel portafilter
- Steam wand grip
- Extra-tall cup clearance for tall mugs
- Steam wandWith automatic milk texturing
- Milk jug temperature sensor
- Removable drip tray grid
- Removable drip tray With full indicator
ACCESSORIES
- Stainless steel milk jug With MIN and MAX markings
- 54mm tamper
- Steam wand tip cleaning tool (Located under the water tank)
- The Razor™ precision trimming tool
- Dual wall filter baskets (1 cup & 2 cup)
- Single wall filter baskets (1 cup & 2 cup)
- Espresso cleaning tablets
- Cleaning disc
- Water filter holder with filter
- Descaling powder
Assembly
BEFORE FIRST USE Machine Preparation
Remove and discard all labels and packaging materials attached to your machine. Ensure you have removed all parts and accessories before discarding the packaging. Clean the drip tray, drip tray grid, portafilter, filter baskets and milk jugs using warm water and a gentle dish washing liquid. Rinse well and dry thoroughly before use.
INSTALLING THE WATER FILTER
- Remove the water filter and water filter holder from the packaging.
- Set the reminder for the next month of replacement. We recommend to replace the filter after 3 months.

- Soak the filter in cold water for 5 minutes.
- Wash the filter holder with cold water.
- Insert the filter into the two parts of the filter holder. Ensure they are connected.
- Remove the water tank from the machine. Align the base of the filter holder with the adapter inside the water tank. Push down to lock into place.
- Fill the water tank with cold potable water and reattached the machine, ensuring it is properly attached and sitting flush to the back of the machine.
Functions
FIRST USE
- 1. Remove the water tank and fill with potable water to the indicated MAX line. Replace the water tank onto the machine.
- Ensure that the drip tray is correctly positioned on the machine.
- Plug the power cord in the power outlet, and the 1 Cup button illuminates.
- 4. Press the 1 CUP button and the machine will commence its first use cycle.
- Once complete, the go into ready mode and all lights will be illuminated. The first use cycle is to rinse machine and prime the heating system.
TURNING OFF MACHINE
To turn the machine off, press the 1 CUP and STEAM button simultaneously.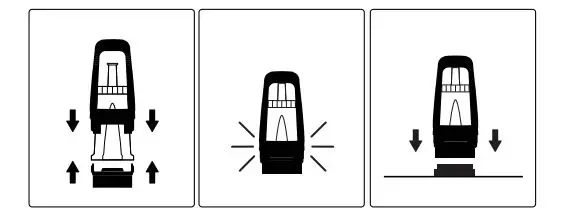
FILLING THE WATER TANK
Lift the water tank from the machine. Remove the water tank lid and add potable water to the water tank, filling to the MAX marking indicated.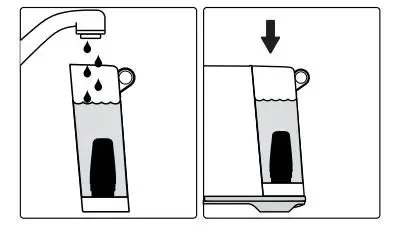
Replace the water tank onto the machine, ensuring it is properly attached and sitting flush against the back of the machine. If the 1 CUP, 2 CUP and STEAM buttons illuminate, the water tank has been correctly attached.
The machine will detect when the water level is low. The 1 CUP, 2 CUP and STEAM buttons will not be illuminated.
When this occurs, add water to the water tank. Once there is sufficient water, all buttons will be illuminated and the machine can be used.
FILTER BASKETS
This machine includes both single and dual wall 1 Cup and 2 Cup filter baskets. Use the 1 cup filter basket when brewing a single cup and the 2 cup filter baskets when brewing 2 cups or a stronger single cup or mug. Adjust the grind amount and size if switching from a single basket to a double basket, or vice versa. The provided filter baskets are designed for:
- 1 Cup filter basket = 8-11g
- 2 Cup filter basket = 16-19g
SINGLE WALL FILTER BASKETS
Single Wall filter baskets should be used when grinding fresh whole coffee beans. They allow you to experiment with grind, dose and tamp to create a more balanced espresso.
DUAL WALL FILTER BASKETS
Dual Wall filter baskets should be used when using pre-ground coffee and older beans that are past the 30 day roast date.These regulate the pressure and helps to optimise the extraction regardless of the grind, dose and tamp pressure or freshness.
NOTE
You may need to experiment with how much coffee is dosed into the filter baskets or how long the grinder needs to run to achieve the correct dose. For example; when using a finer espresso grind with the Single Wall filter baskets, you may need to increase the grind amount to ensure the filter basket is correctly dosed.
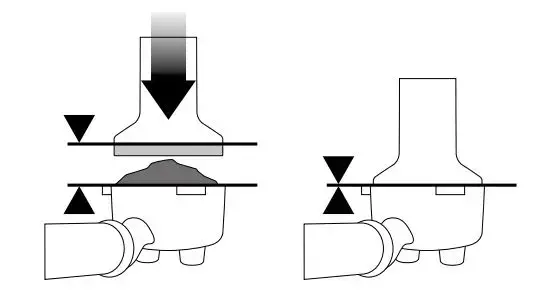
COFFEE DOSE AND TAMPING
- Insert the filter basket into the portafilter.
- Grind enough coffee to fill the filter basket.
- Tap the portafilter several times to collapse and distribute the coffee evenly in the filter basket.
- Using the tamper, tamp down firmly (approx. 15- 20kgs of pressure). The amount of pressure is not as important as the consistent pressure every time.

- As a guide, the top edge of the cap on the tamper should be level with the top of the filter basket AFTER the coffee has been tamped.
NOTE
Use Razor™ dose trimming tool to precisely control the dose of ground coffee AFTER you tamp.
TRIMMING THE DOSE
The Razor™ precision dose trimming tool allows you to trim the puck to the right level for a consistent extraction.
- Insert the Razor™ tool into the coffee basket until the shoulders of the tool rest on the rim of the basket.
- Rotate the Razor™ dosing tool back and forth while holding the portafilter on an angle over the knock box to trim off excess coffee grinds. Your coffee filter is now dosed with the correct amount of coffee.
- Wipe excess coffee from the rim of the filter basket to ensure a proper seal is achieved in the group head.
PURGING THE GROUP HEAD
Before placing the portafilter into the group head, run a short flow of water through the group head by pressing the 1 CUP button.This will stabilise the temperature prior to extraction.
INSERTING THE PORTAFILTER
Place the portafilter underneath the group head so that the handle is aligned with the INSERT position. Insert the portafilter into the group head and rotate the handle towards the centre until resistance is felt.
Place your cup/s under the portafilter on the drip tray.
PRE-PROGRAMED SHOT VOLUME – 1 CUP
Press the 1 CUP button once, the button will flash indicating that it has been selected. A preset single espresso volume of approximately 30mls will be extracted.The machine will automatically stop once the pre-set volume has been extracted. 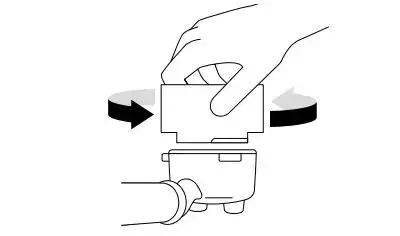 PRE-PROGRAMED SHOT VOLUME – 2 CUP
Press the 2 CUP button once, the button will flash indicating that is has been selected. A preset single espresso volume of approximately 60mls will be extracted. The machine will automatically stop once the pre-set volume has been extracted.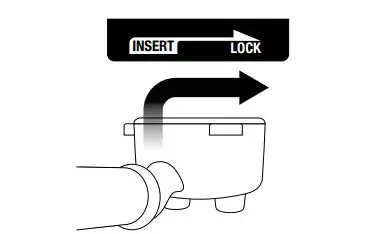 NOTE
NOTE
Pressing the 1 CUP or 2 CUP buttons during a programmed espresso will immediately stop the extraction.
MANUAL PRE-INFUSION AND SHOT VOLUME
Press and hold the 1 CUP or 2 CUP button for the desirbutton to stared prt the extre-infusion timeaction. Pr . Ress the flashing elease the button again to stop the extraction.
PROGRAMMING SHOT VOLUME
Press and hold the 1 CUP and 2 CUP buttons for 2 seconds, the buttons will illuminate and flash.
To set the 1 CUP volume:
- Press the 1 CUP button to start the extraction.
- Press the 1 CUP button again to stop the extraction. The modified volume will be saved.
To set the 2 CUP volume, follow the above steps but select the 2 CUP button to start and stop the extraction.
SETTING THE MILK TEMPERATURE
The machine has 3 milk temperature settings;
- 1 Warm
- 2 Ideal
- 3 Hot
When turning on the espresso machine, the milk temperature setting will default o the chosen last setting. Press the MILK TEMP utton until desired temperature is illuminated.
SETTING THE MILK FOAM
The machine has 3 milk foam settings;
- 1 Low
- 2 Medium
- 3 High
When turning on the machine, the milk foam setting will default to the last chosen setting. Press the MILK button until the desired foam setting is illuminated.
NOTE
Prior to texturing milk, it is recommended to momentarily purge the steam wand.To do this press the STEAM button to start purging and press it again to stop.
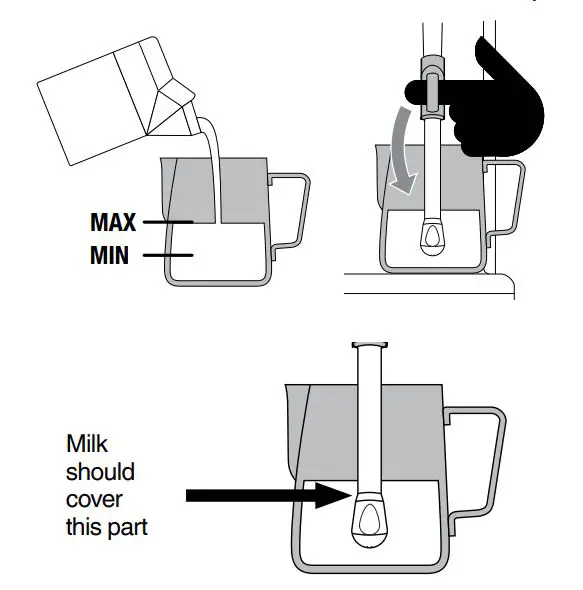
- Start with fresh cold milk.
- Fill the milk jug to between the min and max position.
- Lift the steam wand and insert into the milk jug.
- Lower the steam wand, ensuring it is fully down.
- The milk jug must rest on the milk temperature sensor located on the drip tray and the milk should cover the steam wand tip.

- Press the MILK TEMP and MILK FOAM buttons to select the desired settings.
- Press the STEAM button, the button will flash while texturing.
- The milk texturing will stop automatically when the selected milk temperature is reached.
- Lift the steam wand to remove the milk jug.
- Wipe the wand and tip with a clean damp cloth.
- Lower the steam wand to the down position and the steam wand will automatically purge.
NOTE
Pressurised steam can still be released, even after the machine has been switched off. Children must always be supervised.When the machine creates steam, a pumping noise can be heard.This is normal operation.Use only the supplied stainless steel milk jug to froth milk using this machine.The use of other containers may lead to dangerous conditions.
MANUAL MILK TEXTURING
- Auto milk texturing and auto shut-off are disabled during manual milk texturing.
- Fill the milk jug to between the MIN and MAX markings.
- Lift the steam wand and insert into the milk jug with the ste wand tip 1-2cm below surface of the , close to the right-hand side of the jug at a 3 o’clock position.
- Press the STEAM button to begin texturing.
- Keep the steam wand tip just under the surface of the milk until the milk is spinning clockwise, producing a vortex (whirlpool effect).
- With the milk spinning, slowly lower the jug. This will bring the steam wand tip to the surface of the milk and start to introduce air into the milk.
- Gently break the surface of the milk with the tip to get the milk spinning fast enough.
- Keep the steam wand tip at or slightly below the surface, continuing to maintain the vortex. Texture the milk until sufficient volume is obtained.
- Lift the jug to lower the tip beneath the surface but keep the vortex spinning. The milk is at the correct temperature (60-65°C) when the jug is hot to touch.
- When texturing is complete, press the STEAM button.
- Remove the steam wand from the milk jug.
- Wipe the wand and tip with a clean, damp cloth.
- Lower the steam wand to the down position and the steam wand will automatically purge.
STEAM WAND PURGING
After texturing milk, the steam wand must be returned to the lowered position and allowed to automatically purge. Not doing so, could result in the steam wand blocking. If the steam wand remains in the raised position, the machine will display a lower steam wand alert; illuminating the MILK TEMP and MILK FOAM ights in a downwards pattern, identitrying that the steam wand needs to be lowered. To manually commence the steam wand purge, with the steam wand lowered, press and hold the STEAM button for 5 seconds.
HOT WATER OPERATION
Hot water through the steam wand: When the machine is in ‘ready mode, follow these steps.
- Lift the steam wand and place a cup under the steam wand. CAUTION: Do not hold the steam wand while hot water is running.
- Press 1 CUP and MILK FOAM buttons together, and hot water will start to flow through the steam wand.
- Press the 1 CUP button to stop hot water flow.

WARNING
Cup temperature is at 90°C (194°F). Be careful in handling hot beverages.
EXTRACTION TIPS
A great espresso is about achieving the perfect balance between sweetness, acidity, and bitterness. The flavour of your coffee will depend on many factors, such as the type of coffee beans, degree of roast freshness, coarseness or fineness of the grind, dose of ground coffee and tamping pressure.
Experiment by adjusting these factors just one at a time to achieve the taste of your preference.
Care & Cleaning
REPLACING THE WATER FILTER
It is recommended to descale your unit every 90 days when the water hardness is at level 4; and when the water hardness is at level 6, descale your unit every 60 days.
CLEANING CYCLE
The machine will detect when 200 extractions have been carried out since the last cleaning cycle; this will be shown by the 1 CUP and2 CUP buttons alternately flashing.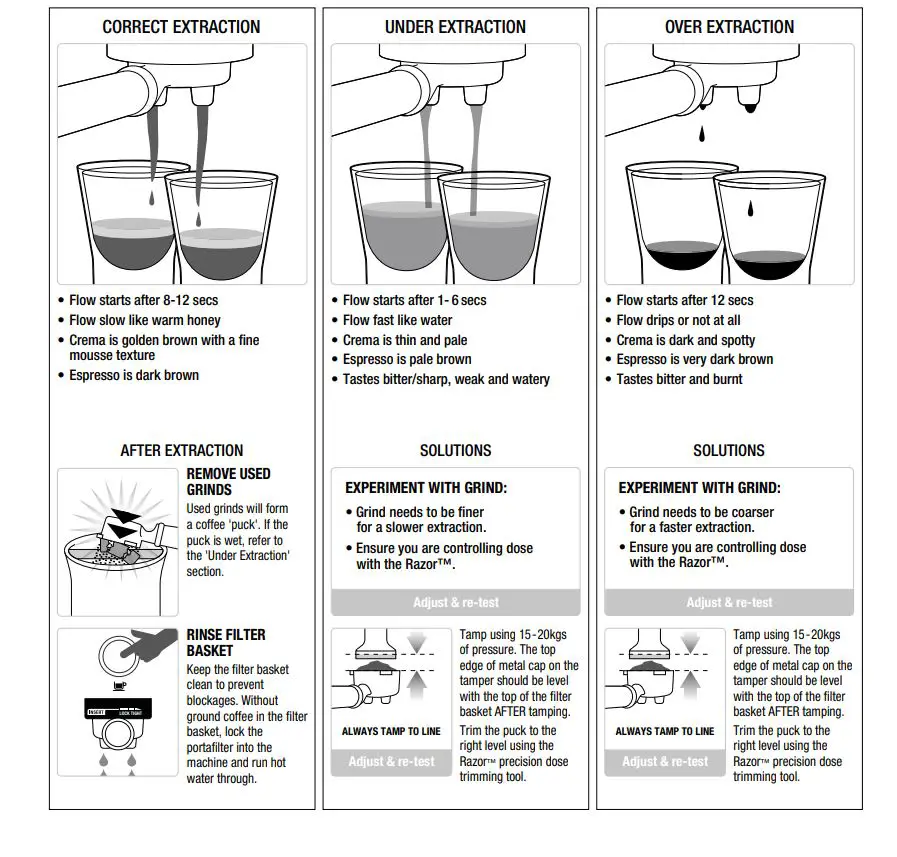
- Insert the provided cleaning disc into the filter basket in the portaflter
Place a cleaning tablet on top of the cleaning disc. - Lock the portafilter into the group head.
- Empty the drip tray and replace onto the machine.
- Place a 2L/ 68 fl.oz container under the portafilter and steam wand Sitting on the drip tray. O00 8 680Z
- Fill the water tank to the MAX line then reattached to the machine, ensuring it is correctly attached.
- Press and hold the 1 CUP and 2 CUP buttons for 5 seconds to enter the cleaning cycle mode. 5s
- The 1 CUP and 2CUP buttons will remain illuminated. Press either 1 CUP or 2 CUP to begin the cleaning cycle. When the cycle is in progress, the lights will alternatively flash.
- Once the cycle is complete the machine will go back to ready mode
- Remove and rinse the portafilter, cleaning disc, drip tray and container.
NOTE The user can also manually enter the cleaning cycle mode before the cleaning cycle alert is triggered. Press and hold 2 CUP and STEAM buttons simultaneously for five seconds when the unit is at off mode (all lights are off)
DESCALING
After regular use, hard water can cause mineral build up in and on many of the inner functioning components, reducing the brewing flow, brewing temperature, power of the machine, and the taste of the espresso.The machine will indicate that it requires descaling when the 1 CUP and STEAM button and the 2 CUP button flash alternately for 15 seconds. Pressing any of these buttons will cancel the alert and return the machine to ready mode.
WARNING
Do not immerse the power cord, power plug or appliance in water or any other liquid. The water tank should never be removed or completely emptied during descaling.
TO DESCALE
NOTE
Ensure that the water filter is removed from the water tank before adding the descaling powder when descaling the machine
- Empty the drip tray and re-insert into position on the machine.
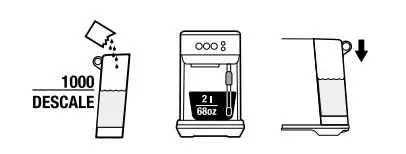
- Fill the water tank to the DESCALE line with hot tap water, and add and dissolve the descaling agent by stirring gently.
- Place a 2L 68 fl.oz container under grouphead and steam wand.
- Turn the machine off by simultaneously pressing the 1 CUP and STEAM buttons, and allow it to completely cool before descaling.

- With the machine off, press the 1 CUP and STEAM buttons simultaneously for 5 seconds to enter descale mode.
- The 1 CUP and STEAM buttons will iluminate, indicating that the machine Is ready to start descaling. 0.5s
- Press the 1 CUP or STEAM button to begin the descale cycle. These buttons will alternately flash throughout the cycle.
- Once the descale solution has been used up, the descale mode will pause. Refill the water tank to the MAX line and empty the waste water container, then replace both parts on to the machine.
- The 1 CUP and STEAM buttons will illuminate when the machine is ready. Press the 1 CUP or STEAM button to resume descaling.
- When descaling is complete, the 1CUP and STEAM button will alternately flash. The machine will then go into standby mode.
- Remove and empty the waste water container. Rinse the drip tray and water tank and dry thoroughly before replacing9 them back onto the machine.
STEAM WAND BLOCKED
During milk texturing, if the machine detects that the steam wand is blocked, it will immediately stop operating and the STEAM button light will be of. Both the milk temperature and milk foam lights will fully illuminate and flash. These lights will flash until a manual steam purge has been completed.
CLEANING THE STEAM WAND
- The steam wand should always be cleaned after texturing milk. Wipe the steam wand with a damp cloth.
- If any of the holes in the tip of the steam wand become blocked, it may reduce frothing performance. Manually purge the steam wand to try and clear the holes.
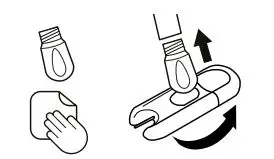
- If the steam wand remains blocked, unscrew the steam wand tip using the steam tip cleaning tool.Then use the cleaning tool to unblock the holes. Cleaning tool is located in the back of the machine, under the water tank.
- Rinse the steam tip and wipe with a clean, dry cloth. Reassemble the steam wand by screwing the steam tip back on to the steam wand. Purge the steam wand after cleaning.
CLEANING THE FILTER BASKETS AND PORTAFILTER
- The filter baskets and portafilter should be rinsed under hot water directly after use to remove all residual coffee oils.
- If the holes in the filter baskets become blocked, use the steam wand cleaning tool to unblock the holes.
CLEANING THE SHOWER SCREEN
- The group head interior and shower screen should be wiped with a damp cloth to remove any ground coffee particles.
- Periodically run hot water through the machine with the filter basket and portafilter in place, without any ground coffee, to rinse out any residual coffee.
CLEANING THE DRIP TRAY
- The drip tray should be removed, emptied and cleaned after each use or when the drip tray indicator rises through the drip tray grid.
- Remove the drip tray grid and wash both parts in warm soapy water.
- Cleaning the Outer Housing
- Wipe the outer housing with a soft, damp cloth and then polish with a soft, dry cloth.
NOTE
Do not use any abrasive cleaners, pads or cloths which can scratch the surfaces of the machine. Do not clean any of the parts or accessories in the dishwasher.
WARNING
Do not immerse the power cord, power plug or machine in water or any other liquid.
STORING YOUR MACHINE
Before storing, turn the machine off, switch off and remove the power plug from the power outlet. Empty the water tank and drip tray and ensure the machine is cool, clean and dry. Store in an upright position.
Do not place anything on top of machine.
RESET FACTORY ESPRESSO VOLUME SETTINGS
- Turn the machine off, by pressing the 1 CUP and STEAM buttons simultaneously for 5 seconds.
- Press and hold the 1 CUP and 2 CUP buttons for 5 seconds. Buttons will illuminate.
- Press the 1 CUP or 2 CUP buttons and the light will flash 3 times to indicate that all volumes have been reset.
- Machine will then return to ready mode.
NOTE
Press any other button to exit factory reset mode.
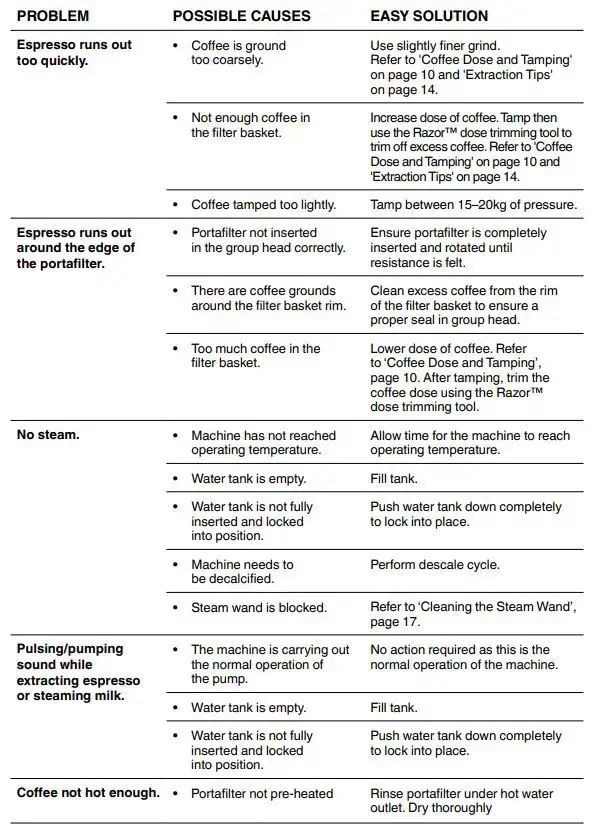
Troubleshooting
Guarantee
2 YEAR LIMITED GUARANTEE Sage Appliances guarantees this product for domestic use in specified territories for 2 years from the date of purchase against defects caused by faulty workmanship and materials. During this guarantee period Sage Appliances will repair, replace, or refund any defective product (at the sole discretion of Sage Appliances). All legal warranty rights under applicable national legislation will be respected and will not be impaired by our guarantee. For full terms and conditions on the guarantee, as well as instructions on how to make a claim, please visit www.sageappliances.com.
]]>the Q™
BBL820/SBL820

QUICK GUIDE
SAGE® RECOMMENDS SAFETY FIRST
At Sage® we are very safety conscious. We design and manufacture consumer products with the safety of you, our valued customer, foremost in mind. In addition we ask that you exercise a degree of care when using any electrical appliance and adhere to the following precautions.
IMPORTANT SAFEGUARDS
READ ALL INSTRUCTIONS BEFORE USE AND SAVE FOR FUTURE REFERENCE
- A downloadable version of this document is also available at sageappliances.com
- Before using for the first time ensure your electricity supply is the same as shown on the label on the underside of the appliance
- Remove and safely discard any packaging materials before first use.
- To eliminate a choking hazard for young children, safely discard the protective cover fitted to the power plug.
- This appliance is for household use only. Do not use the appliance for anything other than its intended use. Do not use in moving vehicles or boats. Do not use outdoors. Misuse may cause injury.
- Fully unwind the power cord before operating.
- Position the appliance on a stable, heat resistant, level, dry surface away from the edge and do not operate on or near a heat source such as a hot plate, oven or gas hob.
- Vibration during operation may cause the appliance to move.
- Do not let the power cord hang over the edge of a bench or table, touch hot surfaces or become knotted.
- Always ensure the appliance is turned OFF, unplugged at the power outlet and has been allowed to cool before cleaning, attempting to move or storing.
- Always turn the appliance to the OFF position, switch off at the power outlet and unplug at the power outlet when the appliance is not in use.
- Do not use the appliance if the power cord, plug, or appliance becomes damaged in any way. If damaged and maintenance other than cleaning is required please contact Sage Customer Service or visit sageappliances.com
- Any maintenance other than cleaning should be performed by an authorised Sage® service centre.
- Children should not play with the appliance.
- Cleaning of the appliance should not be carried out by children unless they are 8 years or older and supervised.
- The appliance and its cord should be kept out of reach of children aged 8 years and younger.
- The installation of a residual current safety switch is recommended to provide additional safety when using all electrical appliances. Safety switches with a rated operating current not more than 30mA are recommended. Consult an electrician for professional advice.
- Always ensure the appliance is properly assembled as per instruction before use. Using the appliance without being properly assembled may cause product malfunction, product damage or pose safety risk including personal injury.
- Do not use the appliance on a sink drain board.
- Keep hands, fingers, hair, clothing as well as spatulas and other utensils away from moving or rotating parts during operation.
- Do not use the appliance for anything other than food and/or beverage preparation.
- In order to avoid the possible hazard of the appliance starting by itself due to inadvertent resetting of the overload protection, do not attach an external switching device (such as a timer) or connect the appliance to a circuit that can regularly switch the appliance on and off.
- Carefully read all instructions before operation and save for future reference.
- The appliance can be used by persons with reduced physical or mental capabilities or a lack of experience and knowledge, only if they have been given supervision or instruction concerning use of the appliance in a safe way and understand the hazards involved.
- This appliance shall not be used by children.
- Do not leave the appliance unattended when in use.
- Allow the motor to rest for 1 minute between each use.
- Be careful when handling and cleaning blades, as they are very sharp. Mishandling of the blades may cause injury.
- Avoid putting the cup or jug on the motor base while the motor is still spinning.
- Do not operate without any ingredients in the cup or jug.
- Never attempt to operate with damaged blades, or with utensils, or any foreign objects inside the cup or jug.
- Do not put the cup or jug in extremes of heat or cold, for example placing a cold jug into hot water, or vice versa.
- Lid must be firmly secured to the jug before operation to ensure internal contents do not escape, spray or overflow.
- Do not remove the jug from the motor base while blender is in use.
- Do not use blender while OVERLOAD PROTECTION is flashing on the LCD. If this occurs, unplug the blender and wait for 30 minutes until the motor has cooled. Once cooled, you will be able to use the blender as usual again.
- Be careful when pouring hot liquids into the blender as splashing may occur due to the creation of steam.
- When blending hot liquids, ensure the inner measuring cap is in place. The cap will protect you from hot liquids splashing out during blending and includes vents designed to relieve pressure and avoid steam build-up.
- Be careful when removing the lid after blending hot liquids as steam may become trapped and be ejected out of the jug when the lid is removed.
- trictly observe the reduced capacity limit for blending hot ingredients. Failing to follow this instruction may cause personal injury with burns from hot liquid.
- Never blend hot ingredients or liquids using the vacuum blending feature (vacuum blending is an optional feature achieved through the use of the Sage vacuum pump, supplied separately).
- Never use attachments or accessories that are not supplied with this product, or that have been authorised by Sage for use on this product. Failing to follow this instruction may cause product malfunction, product damage or pose a safety risk.
- For optional accessories authorised by Sage to be used on this product, please read all instructions supplied with the accessory in conjunction with the instructions contained in this booklet.
NOTICE TO CUSTOMERS REGARDING MEMORY STORAGE
Please note that in order to better serve our customers, internal memory storage has been imbedded into your appliance. This memory storage consists of a small chip to collect certain information about your appliance including the frequency of use of the appliance and the manner in which your appliance is being used. In the event your appliance is returned for service, the information collected from the chip enables us to quickly and efficiently service your appliance. The information collected also serves as a valuable resource in developing future appliances to better serve the needs of our consumers. The chip does not collect any information regarding the individuals who use the product or the household where the product is used. If you have any questions regarding the memory storage chip please contact us at [email protected].
 The symbol shown indicates that this appliance should not be disposed of in normal household waste. It should be taken to a local authority waste collection centre designated for this purpose or to a dealer providing this service. For more information, please contact your local council office.
![]() To protect against electric shock, do not immerse the power plug, cord or appliance in water or any liquid.
To protect against electric shock, do not immerse the power plug, cord or appliance in water or any liquid.
SAVE THESE INSTRUCTIONS

| A. Inner measuring cup | E. Heavy duty metal coupling | I. 4 preset programs |
| B. High performance lid | F. Heavy duty 2400W motor | J. 5 speed settings |
| C. 2.0 Litre BPA-Free* jug | G. LCD indicator with timer | K. Overload protection Resettable thermal fuse for motor protection. |
| D. Extra-wide, heavy duty blade and bowl system | H. Durable base |
ACCESSORIES
L L. Tamper
COPOLYESTER MATERIAL
This blender jug is made with copolyester, which is a tough, BPA-free polymer used to make housewares products that can stand up to extreme use and repeated dishwasher cleaning. Products made from copolyester are impact resistant and shatter-resistant and stay clear and durable even after hundreds of cycles in the dishwasher.
* Sage makes its BPA Free claim for this product based on independent laboratory testing performed for all the food contact plastic materials of the product per EU Commission Regulation No 10/2011. BPA Free Material is used in all parts that come into contact with food.
![]() Rating Information
Rating Information
220240V~ 50/60Hz 2400W

GETTING STARTED
Ready mode
Press ON | OFF button to power the unit to READY mode.
Sleep
After 2 minutes of inactivity, LCD powers off, and the ON | OFF button flashes red. After 5 minutes of inactivity, the blender turns power OFF. Press the ON | OFF button to reactivate the blender.
CANCEL
The CANCEL function stops the pre-set program or selected speed setting and sets the time to 0.
Speed Control Selection
There are 5 electronic speed buttons from MIX through to MILL. MIX combines more delicate foods with a folding motion, and is good for combining wet and dry ingredients. MILL is the fastest setting and is ideal for breaking down ingredients to mill grain to flour, make nut milk and other finely blended mixtures. Select the required speed (1 to 5) by pressing the corresponding speed button.
![]() WARNING
WARNING
Never blend boiling hot liquids. Allow temperature of ingredients to cool down to room temperature before placing into blender jug.
PRESET PROGRAMS
PULSE | ICE CRUSH
A program of continuous pulsing designed to chop food into an even consistency or crush ice cubes.
SMOOTHIE
For dairy-based smoothies. A combination of speeds and pulses designed to combine and aerate ingredients into a smooth and creamy texture.
GREEN SMOOTHIE
For blending whole fruits/vegetables into a smooth beverage. A combination of high speed profiles breaks down tough fibres into very fine particles. Use the tamper if ingredients become wedged.
SOUP
This program is exclusively for creating a Cold to Hot Soupturning whole ingredients at ambient temperature into a smooth, hot soup. Primarily a high speed program, the program will finish with a slow stir to remove steam bubbles.
![]() NOTE
NOTE
Raw foods such as meats and seafood need to be cooked prior to using the SOUP program.
![]() WARNING
WARNING
Do not add hot ingredients when using the SOUP program.
If the blender is running and you press a different preset button, it will switch to that program without stopping. If a program is running and you press the same program button again, it will pause that program and timer. To resume press the same program button again.
CLEAN
Use to remove most of the ingredients off the blender walls and blades. Add 4 cups of warm soapy water to the blender jug and press the CLEAN button. For harder to clean, sticky or thick ingredients, add ½ teaspoon of liquid dish detergent for extra cleaning power. For best results, clean the blender jug this way immediately after use.
![]() Tips
Tips
- The inner measuring cap can be removed and oils/liquids or other ingredients added during blending. Extreme care must be taken as depending on the mixture and speeds of operation, splashes can eject from the Lid. It is not suggested to remove the inner measuring cap when blending hot liquids.
- Do not exceed the maximum mark when adding foods and liquids into the blender.
- Run the blender only for the appropriate amount of time required – do not over blend ingredients.
- Use the PULSE | ICE CRUSH button when food is too thick or coarse to circulate within the blender jug.
- The tamper accessory can be used during blending by removing the inner measuring cap. Always make sure the main lid stays firmly in place.
- Ingredients may stick to the sides of the blender jug. To push food back onto the blades with the main lid on (inner cap removed), use the tamper provided to scrape down the sides of the jug, and continue blending.
- If any moisture or liquid spills on top of the motor base during blending, turn the blender off and unplug from the outlet. Remove the blender jug, and wipe motor base immediately with a dry cloth or paper towel.
- The optimum amount of ice cubes that the blender can process in the jug is 250g (approximately 1 standard ice tray).
- Thicker mixtures puree more efficiently if the jug is ¼ to ½ full.
- Do not use metal utensils, as they may damage the blades or blender jug.
- To remove any food that cannot easily be scraped out from under the blades, replace lid and turn blender back on high speed for 45 seconds to spin foods out from under blades.
| FOOD | PREPARATION & USAGE | QUANTITY | FUNCTIONS | TIME |
| Grains & seeds | Mill into flour. Use in bread, pizza doughs, cakes, muffins and flour batters. | 250g–630g 1–3 cups | MILL speed | 30–60 seconds |
| Dried legumes & corn e.g. soy beans, chickpeas popping corn | Mill into flour. Use in combination with plain or selfraising flour for breads, cakes, muffins,pancakes. | 250g–630g 1–3 cups | MILL speed | 30–60 seconds |
| Spices | To make ground spices. Use whole spices except for cinnamon quills that need to be broken half. Store in airtight containers. | minimum ¼ cup 8–16 cinnamon sticks | MILL speed | 20–30 seconds |
| Raw nuts | To make nut meal. Use in cakes, biscuits and muffins. |
100g–500g ½–3cups | MILL speed | 8–15 seconds |
| Roasted nuts | To make nut butters and spreads. | 300g–500g 1½–3 cups | PUREE speed, use tamper | 1 minute |
| White sugar | Mill to make pure icing sugar or powdered sugar. | 100g–200g 1–2 cups | MILL speed | 15–30 seconds |
| Biscuits/cookies | Break biscuits/cookies in half. Blend to form crumbs. Use for cheesecake crusts. |
250g | PULSE |ICE CRUSH | 20–30 seconds |
| Mayonnaise | Mix the egg yolk, mustard and vinegar or lemon juice. Add oil slowly through the lid. Use for dressing. | Up to 4 egg yolks and 2 cups of oil. | MIX speed | 1 min 30 sec |
| Hard cheeses (like Parmesan and Pecorino) | Cut into 3cm cubes. Use in creamy sauces, pasta dishes. |
Maximum 250g | CHOP speed | 15–25 seconds |
| Cream | Whip cream to firm peaks. Add sugar or vanilla before blending, if desired. | 300–600mL | CHOP speed | 25–60 seconds |
| Raw vegetables | Peel and cut into 2cm cubes. Finely chopped. Use for stuffing, filling, bolognese, stews and casseroles. | 200g | CHOP speed | 4–6 seconds |
Dry milling
Please note that milling hard ingredients like spices, nuts, sugar, coffee, grains, etc will cause scratching and clouding to the inside surfaces of the jug. This is a cosmetic result from milling these kinds of ingredients, and does not affect the performance of the jug.
Avoid over-processing spices though. Essential oils found in spices when combined with heat can damage the jug surface.
This blending chart should be used as a guide only.
| Motor doesn’t start or blade doesn’t rotate | • Check the blender jug and lid are securely in place. • Check that the power plug is properly inserted into the power outlet. • Check the ON | OFF button and selected function button is illuminated. |
| Food is unevenly chopped | • Use the Tamper when blending to help move the ingredients around. • Reduce the speed so the blades have more chance of grabbing the food • This can happen when too much food is being blended at one time. Try a smaller amount, and work in batches if necessary. • The ingredients may be too large. Try cutting into smaller pieces. For best results, ingredients should be in pieces no larger than 2cm. |
| Food is chopped too fine or is watery | • Try blending for shorter period of time or slower speeds. • Use the ICE CRUSH | PULSE function for better control. |
| Food sticks to blade and jug | • The mixture may be too thick. Try adding more liquid and/or using a slower speed for blending. |
| Food stuck under blades | • To remove any food that cannot easily be scraped out from under the blades, replace lid and turn blender back on high speed for 4–5 seconds to spin foods out from under blades. |
| Blender overloaded | • This blender has a motor protection feature to protect against over heating and/or over current use. When activated OVERLOAD PROTECTION will flash on the LCD and the blender will be inoperable. • If activated, turn the blender off by pressing the ON | OFF button on the control panel, switch of at the wall, and unplug the blender. Wait a few minutes then re-plug and power ON the blender. • If OVERLOAD PROTECTION is still flashing, repeat and leave the blender to cool down for at least 20–30 minutes. Once OVERLOAD PROTECTION has disappeared from the screen the blender is ready to be used again. • We recommend blending in smaller batches or cutting ingredients into smaller pieces. |
Jug and Lid
To avoid food drying on blades, jug and lid, follow the below steps as soon as possible after use:
- Rinse most of the ingredients off the jug and lid.
- Add 1L of warm water and 12 drops of detergent and press the CLEAN button.
- Rinse the jug and lid again and/or wash separately in warm soapy water with a soft cloth or bottle brush.
![]() WARNING
WARNING
Oils in citrus rind can damage the material of your jug if being exposed to it for a longer period. Always clean your blender jug immediately after processing citrus rind.
Motor base
To clean the motor base, wipe with a soft, damp cloth then dry thoroughly. Wipe any excess food particles from the power cord.
Cleaning agents
Do not use abrasive scouring pads or cleaners on either the motor base or the jug, as they may scratch the surface. Use only warm soapy water with a soft cloth.
Dishwasher
The blender jug, tamper and lid can be washed in the dishwasher on a standard wash cycle. Jug can be placed on the bottom shelf, however the tamper should be on the top shelf only.
2 Litre jug
To remove, clean the jug and lid using the CLEAN instructions. Add 2 tablespoons bicarbonate of soda and ½ cup (125mL) vinegar into jug and let the mixture froth for 1 minute. Scrub the jug and lid with the mixture using a soft dishwashing brush. Add 2 cups warm water and allow to stand for 5 minutes.
Attach jug to blender base. Secure lid and then press the CLEAN button. Thoroughly rinse the jug, and allow to air dry. Store jug and lid with the lid off to allow air to circulate.
Stubborn food stains and odours
Strong smelling foods such as garlic and fish, and some vegetables such as carrots, may leave an odour or stain.
Dry milling
Milling hard ingredients like spices, nuts, sugar, coffee, grains, etc will cause scratching and clouding to the inside surfaces of the jug. Some spices and herbs release aromatic oils that may discolour the jug or leave an aroma. These are cosmetic results from milling these kinds of ingredients, and does not affect the performance of the jug.
Storage
Store your blender upright with the blender jug assembled on the motor base, or beside it. Do not place anything on top. To allow air to circulate, keep the lid off.
7 YEAR LIMITED GUARANTEE
Sage Appliances guarantees this product for domestic use in specified territories for 7 years from the date of purchase against defects caused by faulty workmanship and materials. During this guarantee period Sage Appliances will repair, replace, or refund any defective product (at the sole discretion of Sage Appliances).
All legal warranty rights under applicable national legislation will be respected and will not be impaired by our guarantee. For full terms and conditions on the guarantee, as well as instructions on how to make a claim, please visit www.sageappliances.com.
Switzerland
+41 (0)800 009 933
Registered in Germany No. HRB 81309 (AG Düsseldorf).
Registered in England & Wales No. 8223512.
• Due to continued product improvement, the products illustrated or photographed in this document may vary slightly from the actual product.
Copyright BRG Appliances 2019.
BBL820/SBL820 UG5 – B19
View Fullscreen
the OracleTM Touch
SES990
EN QUICK GUIDE
Contents
2 Sage® Recommends Safety First 5 Components 7 Functions 10 Care & Cleaning 14 Troubleshooting 18 Guarantee
SAGE® RECOMMENDS SAFETY FIRST
At Sage® we are very safety conscious. We design and manufacture appliances with your safety foremost in mind. We also ask that you exercise a degree of care when using any electrical appliance and adhere to the following precautions.
IMPORTANT SAFEGUARDS
READ ALL INSTRUCTIONS BEFORE USE AND SAVE FOR FUTURE REFERENCE
· A downloadable version of this document is also available at sageappliances.com
· Before using for the first time, please ensure thatyour electricity supply is the same as shown on the rating label on the underside of the appliance. If you have any concerns, please contact your local electricity company.
2
· The installation of a residual current safety switch is recommended to provide additional safety when using all electrical appliances. Safety switches with a rated operating current not more than 30mA are recommended. Consult an electrician for professional advice.
· Remove and discard any packaging materials safely, before first use.
· To eliminate a choking hazard for young children, discard the protective cover fitted to the power plug safely.
· Ensure the product is properly assembled before first use.
· This appliance is for household use only. Do not use the appliance for anything other than its intended purpose. Do not use in moving vehicles or boats. Do not use outdoors. Misuse may cause injury.
· Position the appliance on a stable, heat resistant, level, dry surface away from the counter edge, and do not operate on or near a heat source such as a hot plate, oven or gas hob.
· Fully unwind the power cord before operating.
· Do not let the power cord hang over the edge of a counter or table. Do not let the power cord touch hot surfaces or become knotted.
· Do not leave the appliance unattended when in use.
· If the appliance is to be: – left unattended – cleaned – moved – assembled; or – stored
Always switch off the espresso machine by pressing the POWER button to OFF. Switch off and unplug from the power outlet.
· Regularly inspect the power cord, plug and actual appliance for any damage. If found to be damaged in any way, immediately cease use of the appliance and return the entire appliance to the nearest authorised Sage Service Centre for examination, replacement or repair.
· Keep the appliance and accessories clean. Follow the cleaning instructions provided in this book. Any procedure not listed in this instruction booklet should be performed at an authorised Sage Service Centre.
· The appliance can be used by children aged 8 years or older and persons with reduced physical, sensory or mental capabilities or a lack of experience and knowledge, only if they have been given supervision or instruction concerning use of the appliance in a safe way and understand the hazards involved.
· Children should not play with the appliance.
EN
· Cleaning of the appliance should not be carried out by children unless they are 8 years or older and under adult supervision.
· The appliance and it’s cord should be kept out of reach of children aged 8 years and younger.
· Do not use attachments other than those provided with the appliance.
· Do not attempt to operate the appliance by any method other than those described in this booklet.
· Do not move the appliance whilst in operation
· Do not use any other liquid apart from cold mains/town water. We do not recommend the use of highly filtered, de-mineralised or distilled water as this may affect the taste of the coffee and how the espresso machine is designed to function.
· Never use the appliance without water in the water tank.
· Ensure the portafilter is firmly inserted and secured into the brewing head before using the machine.
· Never remove the portafilter during the brewing operation as the machine is under pressure.
· Do not place anything, other than cups for warming, on top of the appliance.
· Use caution when operating machine as metal surfaces are liable to get hot during use.
3
· Do not touch hot surfaces. Allow the product to cool down before moving or cleaning any parts.
· Heating element surface is subject to residual heat after use.
· Use caution after milk texturing as the `Auto Purge’ function may purge hot steam when the steam wand is lowered.
· Use caution when using the de-scale feature as hot steam may be released. Before de-scaling, ensure drip tray is empty and inserted. Refer to page 13 for further instructions.
· Do not operate the grinder without the hopper lid in position. Keep fingers, hands, hair, clothing and utensils away from the hopper during operation.
SPECIFIC INSTRUCTIONS FOR WATER FILTER
· Filter cartridge should be kept out of reach of children.
· Store filter cartridges in a dry place in the original packaging.
· Protect cartridges from heat and direct sunlight.
· Do not use damaged filter cartridges.
· Do not open filter cartridges.
· If you are absent for a prolonged period of time, empty the water tank and replace the cartridge.
The symbol shown indicates that this appliance should not be disposed of in normal household waste. It should be taken to a local authority waste collection centre designated for this purpose or to a dealer providing this service. For more information, please contact your local council office.
To protect against electric shock, do not immerse the power cord, power plug or appliance in water or any
other liquid.
FOR HOUSEHOLD USE ONLY SAVE THESE INSTRUCTIONS
4
Components
A B C D
E F G
H
EN
I
J K L M N
A. Integrated conical burr grinder B. Top-fill 2.5L removable water tank C. Grind size dial D. Touch screen control panel E. Grind outlet F. 58mm group head G. 58mm stainless steel portafilter H. Drop down swivel foot
I. Heated cup warming tray J. Cool touch steam wand K. Dedicated hot water outlet L. Descale access point M. Tool storage tray N. Removable drip tray
Rating Information 220240V~5060Hz 20002400W
5
A B
D C
F
G
H
J
E
I K M
L
ACCESSORIES
A. Stainless steel milk jug B. 2 cup filter basket C. 1 cup filter basket D. Water filter holder with filter E. Cleaning disc F. Mini grinds bin
G. Grinder burr brush H. Grind outlet brush & tamp
removal magnet I. Cleaning tool for steam wand tip J. Two allen keys K. Steam wand cleaning powder L. Water hardness test strip M. Espresso cleaning tablets
6
Functions
INSTALLING THE WATER FILTER
· Soak the filter in cold water for 5 minutes. · Wash the filter holder with cold water.
EN
· Fill the water tank with cold water, slide and lock back into position.
FIRST USE
1. Press POWER button to turn the machine on. 2. Follow the instructions on screen to guide
you through first use setup. 3. After completing setup, the machine will
tell that it is ready to use.
· Set the reminder for next month of replacement. We recommend to replace the filter after 3 months.
· Insert the filter into the two parts of the filter holder.
The machine is now in STANDBY mode.
NOTE
If your water hardness is either 4 or 5 when tested, we strongly recommend you change to an alternate water source.
GRINDING OPERATION
Insert bean hopper into position on-top of the machine. Turn dial to lock into place. Fill hopper with fresh beans.
· To install the assembled filter holder into the water tank, align the base of the filter holder with the adapter inside the water tank. Push down to lock into place.
7
DRINK SELECTION
To enter Drinks Menu screen, touch the Home icon . Swipe & select your drink. Touch the `Help &
Tip’ icon to see OracleTM Touch Guide.
SELECTING YOUR FILTER BASKET
2 Cup
1 Cup
Filter Basket Filter Basket
NOTE
Please keep the touch screen dry and clean to ensure that the machine functions properly.
DRINK SCREEN
AUTO GRIND DOSE & TAMP
Align portafilter handle with the INSERT position on the grind outlet. Lift to insert portafilter into the grind outlet and rotate to the centre position.
`Home’ icon
Drink chosen
`Setting’ icon
To start the auto grind, dose & tamp function, touch the `Grind’ button on the display. Grinding will commence.
Grind size
Adjust using the dial on the side of the machine
Brew setting: touch this button to scroll
Espresso single shot / double shot / custom extraction time
Long Black small / medium / large
Milk froth level
Milk temperature
SELECTING GRIND SIZE
There are 45 grind size settings (No.1 finest, No. 45 coarsest). We recommend you start at No. 30 and adjust finer if extraction is too fast, coarser if too slow. Expresso should start to flow within 812 seconds.
When the auto grind, dose & tamp function is complete, rotate the portafilter handle to the INSERT position and lower to remove.
8
EN
ESPRESSO EXTRACTION
Align portafilter handle with the INSERT position on the group head. Lift to insert portafilter into the group head and rotate towards the LOCK TIGHT position until resistance is felt.
Press `Brew’ button on the display to start extraction.You can change the shot volume.
MANUAL MILK TEXTURING
Auto milk texturing and auto shut-off are disabled during manual milk texturing mode. Lift the steam wand. Start frothing by touching the button. When frothing is done, touch the Milk button to stop.
Wipe the wand & tip with a clean damp cloth. Lower steam wand to the down position and the wand will automatically purge.
CAUTION: BURN HAZARD
MANUAL OVERRIDE
Press and hold the `Brew’ button (approx 2 secs) to enter manual extraction mode. Touch the `Brew’ button to start the extraction, touch the `Brew’ button to stop the extraction.
AUTO TEXTURING MILK
Start with fresh cold milk. Fill milk jug to below the spout position. Lift steam wand and insert into milk jug. Lower steam wand, ensuring it is fully down. The milk jug should rest on the drip tray and milk should cover the steam wand seal.
Pressurised steam can still be released, even after machine has been switched off.
Children must always be supervised.
AMERICANO
There are 3 preset Americano settings small, medium and large.
Grind dose & tamp your porta-filter & insert into the group head. Position your cup underneath the porta-filter spouts & the hot water spout. Espresso will be extracted first, the hot water is delivered automatically after the espresso.
MAX MIN
MILK MUST COVER THIS
SEAL
To start, touch the `Milk’ button. The screen will display the temperature of the milk as it heats. Milk texturing will stop automatically when the selected milk temperature is reached. Lift steam wand to remove milk jug. Wipe the wand & tip with a clean damp cloth. Lower steam wand to the down position and the wand will automatically purge.
PRESET CUP SIZE
AMOUNT BREWED
Small Medium Large
Approx. 6oz / 180ml Approx. 8oz / 240ml Approx. 12oz / 360ml
CAFÉ CREMA
There are 3 presets for the Café Crema setting, Small (120ml), Meduim (150ml), Large (180ml). Insert the single cup filter basket, adjust grinder to a coarse setting as prompted on screen.
9
HOT WATER
The HOT WATER function can be used to pre-heat cups or add hot water manually. To start & stop hot water, touch `Hot Water’ on the screen.
ADDING NEW DRINK
Touch `Create New’ in the menu screen to create a customised drink.You can adjust parameters based on a standard style and save your own.
Care & Cleaning
COLOUR TOUCH SCREEN DISPLAY
Please keep the touch screen dry and clean to ensure that the machine functions properly.
CLEANING CYCLE
· A message for cleaning will be displayed to indicate when a cleaning cycle is required (approx. 200 shots). Or you can start cleaning cycle by choosing `Clean Cycle’ in `Settings’. The cleaning cycle cleans the shower screen and back-flushes the group head.
· Follow the instruction on the touch screen.
Alternatively, after manually adjusting parameters touch the small icon to save the current setting.
SETTINGS
INSTALLING THE WATER FILTER
Refer to page 7.
To enter settings menu, touch the icon on the upper right on the screen.
TRANSPORTING AND STORING
We recommend draining both boilers completely before transporting the machine or storing for an extended period of time. Refer to the Descale section for the step by step instructions.
This procedure is also intended as an anti-freeze measure in the event the machine is exposed to extreme cold temperatures.
AUTO OFF MODE
The machine automatically switches to AUTO OFF mode after 30 minutes.
10
EN
CLEANING CONICAL BURRS
Regular cleaning helps the burrs achieve consistent grinding results which is especially important when grinding for espresso.
1
2
3
4
5
Unlock hopper
6
Remove beans
7
Replace & lock hopper
8
Run grinder until empty
9
10
Unlock & remove hopper
11
Remove upper burr
Clean upper burr with burr brush
12
13
Clean lower burr with burr brush
14
Remove tamping Clean grind fan with tamp outlet with grind removal magnet outlet brush
Replace tamping fan by hand
15
Push upper burr firmly into position
Lock upper burr Insert hopper
Lock hopper
Burr brush
Tamp removal magnet
Grind outlet brush
11
CLEANING THE STEAM WAND
IMPORTANT
After every use, thoroughly wipe the steam wand and tip with a damp cloth & purge immediately. Failure to clean the steam wand may affect the milk texturing performance. · If any of the holes in the tip of the steam wand
become blocked, ensure the machine stopped steaming and unblock using the steam tip cleaning tool. · If steam wand remains blocked, remove the tip and soak together with steam wand using the provided steam wand cleaning powder (instructions below). Screw tip back onto the steam wand after rinsing.
Steam Wand Tip
· The steam wand can be left immersed in the milk jug filled with water when not in use to reduce the risk of blockages.
Steam Wand Cleaning Powder 1. Add 1 packet into an empty milk jug. 2. Add 1 cup (8oz/240ml) hot water into
milk jug. 3. Remove steam tip and place with steam wand
into jug. 4. Leave to soak for 20 minutes.
5. Clean, rinse and replace steam tip. Place wand back into the jug and activate steam for 10 seconds.
6. Allow to soak for 5 minutes.
7. Activate steam several times to purge the steam wand, then rinse the wand thoroughly.
8. Wipe the steam wand dry with a clean cloth.
9. Discard solution & rinse jug thoroughly.
NOTE
Please ensure the steam wand tip is tightly fastened after cleaning to avoid temp sensing error.
CLEANING THE FILTER BASKET AND PORTAFILTER
· The filter basket and portafilter should be rinsed under hot water after each coffee making session to remove all residual coffee oils.
· If the holes in the filter basket become blocked, dissolve a cleaning tablet in hot water and soak filter basket and portafilter in solution for approx. 20 minutes. Rinse thoroughly.
CLEAR WATER BACKFLUSH
· After each coffee making session we recommend doing a clear water backflush before you turn off the machine. Empty drip tray. Insert the cleaning disc into the filter basket then insert the portafilter into the group head. Touch the `Brew’ button and allow pressure to build for 20 seconds, then touch to stop & release pressure. Repeat this 5 times to purge any fine coffee grounds and residual coffee oils from the brew water paths.
CLEANING THE SHOWER SCREEN
· The group head interior and shower screen should be wiped with a damp cloth to remove any ground coffee particles.
· Periodically, run hot water through the group head with the filter basket and portafilter in place, but without ground coffee. This will remove any residual ground coffee particles from the shower screen.
· If there seems to be stubborn build up on the shower screen, use the allen key to undo the screw in the middle of the shower screen, making note of which side faces into the group head.
12
CLEANING THE DRIP TRAY & STORAGE TRAY
· The drip tray should be removed, emptied and cleaned after each use.
· Remove grill from the drip tray. Wash the drip tray in warm soapy water.
· The storage tray can be removed and cleaned with a soft, damp cloth (do not use abrasive cleansers, pads or cloths which can scratch the surface).
CLEANING THE OUTER HOUSING & CUP WARMING TRAY
· The outer housing and cup warming tray can be cleaned with a soft, damp cloth. Polish with a soft, dry cloth. Do not use abrasive cleansers, pads or cloths which can scratch the surface.
NOTE
Do not clean any of the parts or accessories in the dishwasher.
DESCALE
· Use this function to access the descale procedure when promoted on screen.
· The machine will enter descale mode if you choose to descale from the pop-up message or if you choose `Settings’ > `Descale Cycle’. Follow the instruction on the touch screen.
· Please ensure you allow approximately 1.5 hours to complete the entire descale process and follow the step by step instructions. If you’ve just finished using your machine, please ensure to turn the machine off and allow to cool for at least 1 hour before starting your descale process.
NOTE
DO NOT attempt to descale your machine without using the Descale procedure in the Settings menu. Damage to your machine could occur.
EN
13
Troubleshooting
PROBLEM
POSSIBLE CAUSE
WHAT TO DO
Grinder Motor starts but no ground coffee coming from grind outlet
· No coffee beans in bean hopper.
· Grinder/bean hopper is blocked.
· Coffee bean may have become stuck in hopper.
· Fill bean hopper with fresh coffee beans.
· Remove bean hopper. Inspect bean hopper & grinding burrs for blockage. Replace parts and try again.
Grinder Motor starts but operates with a loud `clicking’ noise
· Grinder is blocked with foreign item or chute is blocked.
· Moisture clogging grinder.
· Remove bean hopper, inspect burrs and remove any foreign body.
· Clean the burrs and grind outlet, see page 11.
· Leave burrs to dry thoroughly before re-assembling. It is possible to use a hair dryer to blow air into the burr area to quicken the drying process.
Unable to lock bean hopper into position
· Coffee beans obstructing bean hopper locking device.
· Remove bean hopper. Clear coffee beans from top of burrs. Re-lock bean hopper into position.
Portafilter overfills
· Tamping fan was removed for cleaning and not replaced.
· Check that the tamping fan is in position and mounted correctly to the drive shaft, see Instruction Book on Sage website.
Grinder Emergency stop?
· Rotate the portafilter to the left to stop the auto grind, dose & tamp function.
· Unplug power cord from power outlet.
Grinder running continuously
· No beans in hopper.
· Fill hopper with beans.
· Rotate the portafilter to the left to stop the auto grind, dose & tamp function.
· Tamping fan has been removed.
· Check that the tamping fan is in position and mounted correctly to the drive shaft, see Instruction Book on Sage website.
14
EN
PROBLEM
POSSIBLE CAUSE
WHAT TO DO
Espresso runs out around the edge of the portafilter
and/or
· Portafilter not inserted in the group head correctly.
· There are coffee grounds around the filter basket rim.
· Ensure portafilter is rotated to the right until the handle is past the centre and is securely locked in place. Rotating past the centre will not damage the silicone seal.
· Clean excess coffee from the rim of the filter basket after grinding to ensure a proper seal in group head.
Portafilter comes out of the group head during an extraction
Issues with the Auto Start feature
Operation Error message on the touch screen
Pumps continue to operate / Steam is very wet / Hot water outlet leaks
Water does not flow from the group head
· Filter basket rim is wet or underside of portafilter lugs are wet. Wet surfaces reduce the friction required to hold the portafilter in place whilst under pressure during an extraction.
· Always ensure filter basket and portafilter are dried thoroughly before filling with coffee, tamping and inserting into the group head.
· Clock not set or clock is set with incorrect time.
· Check that the clock and Auto Start time have been programmed correctly.
· A major fault has occurred and machine cannot operate.
· Contact Sage Customer Service Centre.
· Using highly filtered, demineralised or distilled water which is affecting how the machine is designed to function.
· We recommend using cold, filtered water. We do not recommend using water with no/low mineral content such as highly filtered, demineralised or distilled water. If the problem persists, contact Sage Consumer Support.
· Machine has not reached operating temperature.
· Allow time for the machine to reach operating temperature.
· Water tank is empty.
· Fill tank. Prime the system by: 1) Touching the `Brew’ button to run water through the group head for 30 seconds.
· 2) Touching `Hot Water’ to run water through the hot water outlet for 30 seconds.
· Water tank not fully inserted & locked.
· Push water tank in fully and lock latch closed.
15
PROBLEM
Display says “Water tank empty” but water tank is full
No steam or hot water
POSSIBLE CAUSE · Water tank not fully inserted & locked.
· Machine is not turned on or up to operating temperature.
No hot water No steam
· Water tank is empty. · Steam wand is blocked.
The machine is `On’ but won’t operate
Steam pouring out of group head
Espresso only drips from the portafilter spouts, restricted flow
Espresso flows out too quickly
· Coffee is ground too finely.
· The coffee is ground too coarsely.
· Coffee beans are stale.
Coffee not hot enough
No crema
· Cups not pre-heated.
· Milk not hot enough (if making cappuccino or latté etc).
· Coffee beans are stale.
WHAT TO DO
· Push water tank in fully and lock latch closed.
· Ensure the machine is plugged in and ready for use.
· You may have a blockage in scale. Please run the descale process.
· Fill water tank.
· Refer to `Cleaning the Steam Wand’, page 12.
· You may have a blockage in scale. Please run the descale process.
· Turn machine off. Wait for 60 minutes and turn machine back on.
· If problem persists, call Sage Consumer Support.
· Turn machine off. Wait for 60 minutes and turn machine back on.
· If problem persists, call Sage Consumer Support.
· Adjust the grind size to a higher number to make the grind size slightly coarser.
· You may have a blockage in scale. Please run the descale process.
· Adjust the grind size to a lower number to make the grind size slightly finer.
· Use freshly roasted coffee beans with a `Roasted On’ date and consume between 520 days after that date.
· Rinse cups under hot water outlet and place on cup warming tray.
· Increase the milk temperature in settings menu.
· Use freshly roasted coffee beans with a `Roasted On’ date and consume between 520 days after that date.
16
EN
PROBLEM Not enough milk texture
Too much coffee extracted
Not enough coffee extracted
Amount of coffee extracted has changed, but all settings are the same.
POSSIBLE CAUSE
WHAT TO DO
· Steam wand is blocked.
· Refer to `Cleaning the Steam Wand’, page 12.
· You may have a blockage in scale. Please run the descale process.
· Different brands and types of milk and milk alternatives will texture differently.You may need to adjust the froth level accordingly.
· Coffee is ground too coarsely.
· Shot duration/volume needs to be adjusted.
· Adjust the grind size to a lower number to make the grind size slightly finer.
· Customise extraction time by touching the `Single’ / `Double’ button.
· Coffee is ground too finely. · Shot duration/volume
needs to be adjusted.
· Adjust the grind size to a higher number to make the grind size slightly coarser.
· Customise extraction time by touching the `Single’ / `Double’ button.
· As coffee beans age, the extraction rate changes and can affect the shot volume.
· Adjust the grind size to a lower number to make the grind size slightly finer.
· Customise extraction time by touching the `Single’ / `Double’ button.
· Use freshly roasted coffee beans with a `Roasted On’ date and consume between 520 days after that date.
17
Guarantee
2 YEAR LIMITED GUARANTEE
Sage Appliances guarantees this product for domestic use in specified territories for 2 years from the date of purchase against defects caused by faulty workmanship and materials. During this guarantee period Sage Appliances will repair, replace, or refund any defective product (at the sole discretion of Sage Appliances). All legal warranty rights under applicable national legislation will be respected and will not be impaired by our guarantee. For full terms and conditions on the guarantee, as well as instructions on how to make a claim, please visit www.sageappliances.com.
18
EN
Notes
19
GBR
IRE
BRG Appliances Limited Unit 3.2, Power Road Studios, 114 Power Road, London, W4 5PY
Freephone (UK Landline): +44 (0)808 178 1650 Mobile Calls (National Rate): 0333 0142 970
www.sageappliances.com
Registered in England & Wales No. 8223512. · Due to continued product improvement, the products illustrated or photographed in this document may vary slightly from the actual product.
Copyright BRG Appliances 2019. BES990 UG1 E19
SAGE® RECOMMENDS SAFETY FIRST
At Sage® we are very safety conscious. We design and manufacture consumer products with the safety of you, our valued customer, foremost in mind. In addition we ask that you exercise a degree of care when using any electrical appliance and adhere to the following precautions.
IMPORTANT SAFEGUARDS READ ALL INSTRUCTION
- A downloadable version of this document is also available at sageappliances.com
- Before using for the first time ensure your electricity supply is the same as shown on the label on the underside of the appliance.
- The appliance is for household use only. Do not use the appliance for anything other than its intended use. Do not use in moving vehicles or boats. Do not use outdoors. Misuse may cause injury.
- Fully unwind the power cord before operating.
- Position the appliance on a stable, heat resistant, level, dry surface away from the edge and do not operate on or near a heat source such as a hot plate, oven or gas hob.
- Do not let the power cord hang over the edge of a bench or table, touch hot surfaces or become knotted.
- Position the appliance at least 20cm from walls or heat/steam sensitive materials and provide adequate space above and on all sides for air circulation.
- Ensure the power cord does not become trapped between the upper and lower hot plates of the appliance during use or storage.
- Do not leave the appliance unattended when in use.
 The appliance is marked with a HOT surface symbol. The lid and other surfaces will be hot when the appliance is operating and for some time after use. To prevent burns always use insulated oven mitts or use handles or knobs where appropriate.
WE RECOMMEND SAFETY FIRST
- Always ensure the appliance is turned OFF, unplugged at the power outlet and has been allowed to cool before cleaning, moving or storing.
- Do not use the appliance if the power cord, plug, or appliance becomes damaged in any way. If damaged or maintenance other than cleaning is required, please contact Sage Customer Service or go to sageappliances.com
- Any maintenance other than cleaning should be performed by an authorised Sage® service centre.
- Children shall not play with the appliance.
- The appliance can be used by children aged 8 years or older and persons with reduced physical, sensory or mental capabilities or a lack of experience and knowledge, only if they have been given supervision or instruction concerning use of the appliance in a safe way and understand the hazards involved.
- Cleaning of the appliance should not be carried out by children unless they are 8 years or older and supervised.
- The appliance and its cord should be kept out of reach of children aged 8 years and younger.
- The appliance is not intended to be operated by means of external timer or separate remote control system.
- The installation of a residual current safety switch is recommended to provide additional safety when using all electrical appliances. Safety switches with a rated operating current not more than 30mA are recommended. Consult an electrician for professional advice.
![]() The symbol shown indicates that this appliance should not be disposed of in normal household waste. It should be taken to a local authority waste collection centre designated for this purpose or to a dealer providing this service. For more information please contact your local council office.
The symbol shown indicates that this appliance should not be disposed of in normal household waste. It should be taken to a local authority waste collection centre designated for this purpose or to a dealer providing this service. For more information please contact your local council office.
 To protect against electric shock, do not immerse the power cord, power plug or appliance in water or any other liquid.
SAVE THESE INSTRUCTIONS
GETTING TO KNOW YOUR NEW APPLIANCE
- A. POWER / DARKNESS Control dial
- B. Die-cast aluminum cooking plate
- C. PFOA-free non-stick
- D. Integrated moat
- E. Stainless steel housing
- F. Locking latch
- G. POWER light
- H. READY light

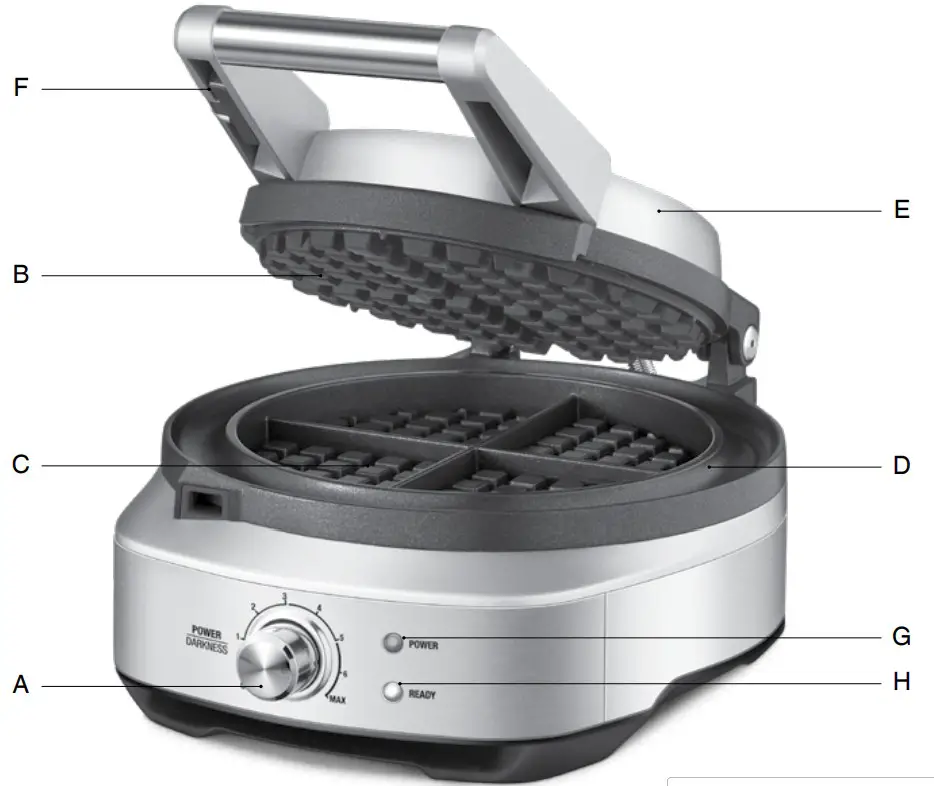 Rating Information 220–240V~ 50–60Hz 750–900W
OPERATING YOUR NEW APPLIANCE
Before first use, remove and safely discard any packing material, promotional labels and tape from the waffle maker.
- Wipe the waffle maker cooking plates with a damp sponge or cloth. Dry thoroughly and close the lid.
- Place the waffle maker on a flat, dry surface. Ensure there is a minimum distance of 20cm of space on all sides of the waffle maker.Do not place anything on top of the waffle maker.
- Unwind the power cord completely and insert the power plug into a grounded 220–240V power outlet.
- Turn the POWER / DARKNESS Control Dial clockwise to the desired setting to start pre-heating the waffle maker. The POWER light will be illuminated.
- Use the POWER / DARKNESS control dial to adjust the brownness of your waffle. There are 7 darkness settings ranging from 1 (lightest) to MAX (darkest). Rotate the dial clockwiseto increase the brownness or counterclockwiseto decrease it
- Once the waffle maker has completed preheating, three audible alerts will sound and the READY light will illuminate.
- Open the lid and pour approximately 125ml of batter evenly on the center of the waffle plate. The batter should cover the peaks of the waffle plate.
NOTE : When using the waffle maker for the first time you may notice a fine smoke haze. This is caused by the initial heating of some of the components and is not a cause for concern. - Close the lid but keep the locking latch open. As the cooking cycle progresses the READY light will switch off.
- At the end of the cooking cycle, three audible alerts will sound and the READY light will illuminate. Open the lid and carefully remove your waffles.
NOTE : There can be slight variations between cooking cycles. If your waffles are not at your desired darkness, close the lid and cook for an additional minute. - .For the most consistent results, add the next batch of batter immediately after removing the cooked waffle and repeat steps 7 through 8.
NOTE : If the next batch of batter is not added immediately after removing the cooked waffle, close the lid and allow the waffle maker to properly reheat (the READY light will switch off and then back on) before adding batter. - If you are not cooking any more waffles, turn the POWER / DARKNESS control dial to the OFF position.
CARE & CLEANING
CARE & CLEANING
- Before cleaning, ensure the POWER / DARKNESS control dial is set to the OFF position and then remove the power plug from the power outlet.
- Allow your waffle maker to cool slightly before cleaning. The waffle maker is easier to clean when slightly warm.
- Always clean your waffle maker after each use to prevent a build-up of baked-on foods. Wipe cooking plates and overflow moat with a soft cloth to remove food residue.
PFOA-FREE NON-STICK COATING
The cooking plates, hinges and overflow moat are coated with a PFOA-FREE non-stick finish. This minimises the need for oil, prevents food from sticking, and makes cleaning easier. Do not use metal or other abrasive cleaning tools on non-stick surfaces as they will damage the coating. Use only warm soapy water and remove stubborn residue with a non-abrasive plastic scouring pad or nylon brush.
NOTE : Do not use non-stick cooking sprays as they can impact the performance of the non-stick surface on the cooking plates.
STORAGE
To store your waffle maker:
- Ensure the POWER / DARKNESS control dial is set to the OFF position and then unplug power cord from the power outlet.
- Allow the waffle maker to cool completely.
- Set the locking latch to the locked position.
- Wrap the power cord in the cord wrap area below the waffle maker.
- Store the waffle maker on a flat, dry level surface.
GUARANTEE
2 YEAR LIMITED GUARANTEE
Sage Appliances guarantees this product for domestic use in specified territories for 2 years from the date of purchase against defects caused by faulty workmanship and materials. During this guarantee period Sage Appliances will repair, replace, or refund any defective product (at the sole discretion of Sage Appliances). All legal warranty rights under applicable national legislation will be respected and will not be impaired by our guarantee. For full terms and conditions on the guarantee, as well as instructions on how to make a claim, please visit www.sageappliances.com.
]]>BKE395/SKE395

SAGE®RECOMMENDSSAFETY FIRST
At Sage®we are very safety conscious. We design and manufacture appliances with your safety foremost in mind. We also ask that you exercise a degree of care when using any electrical appliance and adhere to the following precautions.
IMPORTANT SAFEGUARDS
READ ALL INSTRUCTIONS
BEFORE USE AND SAVE
FOR FUTURE REFERENCE
- A downloadable version of this document is also available at sageappliances.com
- Before using it for the first time please ensure that your electricity supply is the same as shown on the rating label on the underside of the appliance. If you have any concerns please contact your local electricity company.
- Remove and safely discard any packaging materials before first use.
- To eliminate a choking hazard for young children, safely discard the protective cover fitted to the power plug.
- This kettle has been designed specifically for the purpose of boiling drinking quality water only. Under no circumstances should this product be used to boil any other liquids or foodstuffs. ou
- Position the appliance on a stable, heat resistant, level, dry surface away from the edge and do not operate on or near a heat source such as a hot plate, oven or gas hob.
- Do not operate the kettle on a sink drainboard.
- Do not place the kettle on or near a hot gas burner, electric element or where it could touch a heated oven. our electricity dating label on the underside
- Position the appliance at least 20cm from walls or heat/steam sensitive materials and provide adequate space above and on all sides for air circulation.
- Always ensure the kettle is properly assembled before use. Follow the instructions provided in this book.
- The kettle must be used only with the power base supplied.
- This kettle is not intended to be operated by means of an external timer or separate remote control system.
- Do not touch hot surfaces. Use the handle for lifting and carrying the kettle.
- Do not place anything on top of the lid.
- Always ensure the appliance is turned OFF, unplugged at the power outlet, and has been allowed to cool before cleaning, attempting to move or storing.
- Use caution when pouring water from the kettle, as boiling water and steam will scald. Do not pour water too quickly.
- Do not remove the kettle from the power base during operation. Ensure the kettle is switched to an ‘off’ position after the water has boiled before removing the kettle from the power base.
- Do not move the kettle while it is switched on.
- Do not open the lid during operation.
- Do not overfill the kettle past the maximum water level mark. If the kettle is overfilled, boiling water may be ejected.
- Keep the kettle clean. Follow the cleaning instructions provided in this book.
IMPORTANT SAFEGUARDS FOR
ALL ELECTRICAL APPLIANCES
- Fully unwind the power cord before operating.
- Do not let the power cord hang over the edge of a bench or table, touch hot surfaces or become knotted.
- Children should not play with the appliance.
- The appliance can be used by children aged 8 or older and persons with reduced physical, sensory or mental capabilities or a lack of experience and knowledge, only if they have been given supervision or instruction concerning use of the appliance in a safe way and understand the hazards involved.
- Misuse may cause injury.
- Always turn the appliance to the OFF position, switch off at the power outlet and unplug at the power outlet when the appliance is not in use.
- It is recommended to regularly inspect the appliance. To avoid a hazard do not use the appliance if power cord, power plug or appliance becomes damaged in any way. Return the entire appliance to the nearest authorised Sage Service Centre for examination and/or repair.
- Any maintenance other than cleaning should be performed at an authorised Sage ®service centre.
- This appliance is for household use only. Do not use the appliance for anything other than its intended use. Do not use in moving vehicles or boats. Do not use outdoors. Misuse may cause injury.
- The installation of a residual current device (safety switch) is recommended to provide additional safety protection when using electrical appliances. It is advisable that a safety switch with a rated residual operating current not exceeding 30mA be installed in the electrical circuit supplying the appliance. See your electrician for professional advice.
- The appliance and its cord should be kept out of reach of children aged 8 years and younger.
- Cleaning of the appliance should not be carried out by children unless they are 8 years or older and upervised.
- For safety reasons it is recommended you plug your Sage ® appliance directly into its own electrical outlet on a dedicated circuit separate from other appliances. If the electrical circuit is overloaded with other appliances, your appliance may not function properly. Using in conjunction with a power strip or extension cord is not recommended.
 WARNING
Do not operate the kettle on an inclined surface. Do not move the kettle while it is switched on.
 The symbol shown indicates that this appliance should not be disposed of in the normal household waste. It should be taken to a local authority waste collection center designated for this purpose or to a dealer providing this service. For more information, please contact your local council office.
 To protect against electric shock, do not immerse the kettle base, power base, power cord or power plug in water or allow moisture to come in contact with these parts. Avoid spilling water onto the power base’s connector.
SAVE THESE INSTRUCTIONS
NOW YOUR SAGE®PRODUCT

A. Cushion Controlled Lid with BPA Free* Viewing Window
B. 1 Litre / 4 Cup Capacity
C. Premium Quality Brushed
Stainless Steel
D. Lid Release Button
E. Illuminated On / Off Switch
F. Multi-Directional Base
NOT SHOWN
- Concealed Element
- Auto Shut Off & Boil Dry Protection
- Hidden Cord Storage
* Laboratory tests show water not containing BPA that is boiled in this kettle will be BPA Free to a resolution of 1 part per million.
![]() Rating Information
Rating Information
220-240V ~50-60Hz 2000-2400W
OPERATING YOUR SAGE®PRODUCT
OPERATION OF YOUR KETTLE
Fill with the desired amount of water.
NOTE
Always fill the kettle between the minimum (250ml) and maximum (1000ml) marks on the water window.
Ensure the lid is locked firmly into place. Position the kettle securely onto the power base. Insert the power plug into a 220–240V power outlet and switch on.
Press the ‘On / Off’ switch to the ‘On’ position for water to boil.
NOTE
This kettle must only be used with the power base supplied. Use caution when pouring water from your kettle, as boiling water will scald. Do not pour the water too quickly.
The kettle will automatically switch ‘off’ once the water has boiled.
SAFETY BOIL DRY PROTECTION
If the kettle is operated with insufficient water it will stop heating. Switch ‘Off’ at the power outlet and allow the kettle to cool before refilling. Remove the kettle from the power base and add water. Return the kettle to the power base. The safety device will then automatically reset.
For additional safety, your kettle is fitted with an additional thermal cut-out. In the event of overheating, the kettle will automatically shut down to prevent further damage. Should this occur, take your kettle to an authorised Sage Service Centre.
WARNING
The appliance is designed for boiling of drinking quality water only. Never use to heat or boil any other liquids or foodstuffs. The lid should always be firmly in place and locked into a closed position before use.
WARNING
Do not press the lid release button to open the lid during and after an operation. This may result in boiling water splashing from the kettle. Pour out all the hot water from the kettle before opening the lid to refill. Always switch ‘off’ at the power outlet and unplug the appliance from the power outlet before cleaning.
NOTE
The concealed element in the base of the kettle is made from high-quality stainless steel. Any brown stains appearing are the results of mineral deposits and are not rust.
DESCALING
It is essential that regular descaling takes place. The frequency will depend on the usage of the kettle and the hardness of the water in your area. A build-up of scale may cause the inside of the kettle to discolour and ultimately may damage the element. This will affect the efficiency of the appliance and may invalidate the warranty agreement. We recommend the use of Sage ® “the Descaler” as it’s specially formulated for descaling kettles. To order visit www.sageappliances.com
WARNING
Causes skin irritation. Wash hands thoroughly after handling. Wear protective gloves/protective clothing/ eye protection/face protection.
CARE & CLEANING
1. Empty one sachet (25g) into 1 litre of warm water, stir to dissolve.
2. Pour into the kettle
3. Leave stand for 5 minutes.
4. After 5 minutes, discard the solution.
5. Rinse the kettle with fresh clean water.
WARNING
Never immerse the kettle base, switch area, power base, power cord or power plug in water, or allow moisture to come into contact with these parts.
TO CLEAN THE EXTERIOR
The outside of the kettle may be wiped over with a damp cloth and polished with a soft dry cloth.
CAUTION
To prevent damage to the kettle do not use chemicals, alkaline cleaning agents, steel wool or abrasive cleaners to clean the inside or outside of the kettle. Use a mild cleaning agent with a soft damp cloth.
STORAGE
Ensure the kettle is switched off, clean and dry before storing. Ensure the lid is closed and locked securely into place. Wrap the power cord around the cord storage under the power base. Stand the kettle upright on the power base. Do not store anything on top.
GUARANTEE
2 YEAR LIMITED GUARANTEE
Sage Appliances guarantees this product for domestic use in specified territories for 2 years from the date of purchase against defects caused by faulty workmanship and materials. During this guarantee period, Sage Appliances will repair, replace, or refund any defective product (at the sole discretion of Sage Appliances).
All legal warranty rights under applicable national legislation will be respected and will not be impaired by our guarantee. For full terms and conditions on the guarantee, as well as instructions on how to make a claim, please visit www.sageappliances.com.
BRG Appliances Limited
Unit 3.2, Power Road Studios, 114 Power
Road, London, W4 5PY
UK Landline: 0808 178 1650
Mobile (National Rate): 0333 0142 970
![]() www.sageappliances.com
www.sageappliances.com
Registered in England & Wales No. 8223512
Due to continued product improvement, the products illustrated or photographed in this document may vary slightly from the actual product.
Copyright BRG Appliances 2020
BKE395/SKE395 UG6 C20
BCI600/SCI600
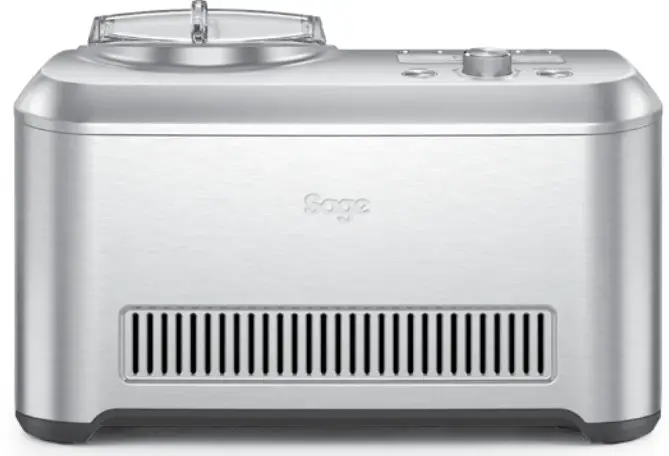 QUICK GUIDE
SAGE®RECOMMENDS SAFETY FIRST
At Sage, ®we are very safety conscious. We design and manufacture consumer products with the safety of you, our valued customer, foremost in mind. In addition, we ask that you exercise a degree of care when using any electrical appliance and adhere to the following precautions.
 WARNING
To prevent damage to the compressor and to ensure maximum performance, place the unit in an upright position for 12 hours after transit and before use.
NOTE
Always store the ice cream machine upright and level on its supporting feet. This will ensure reliable compressor performance.
IMPORTANT SAFEGUARDS
READ ALL INSTRUCTIONS BEFORE USE AND SAVE FOR FUTURE REFERENCE:
- A downloadable version of this document is also available at sageappliances.com
- Before using the first time ensure your electricity supply is the same as shown on the label on the underside of the appliance.This appliance is equipped with a power cord having a grounding wire with a grounding plug. The appliance must be grounded using a properly grounded outlet. In the event of an electrical fault, grounding reduces the risk of electrical shock.
- Remove and safely discard any packaging materials before first use.
- To eliminate a choking hazard for young children, safely discard the protective cover fitted to the power plug.
- This appliance is for household use only. Do not use the appliance for anything other than its intended use. Do not use in moving vehicles or boats. Do not use outdoors. Misuse may cause injury.
WE RECOMMEND SAFETY FIRST
- Fully unwind the power cord before operating.
- Position the appliance on a stable, heat resistant, level, dry surface away from the edge and do not operate on or near a heat source such as a hot plate, oven or gas hob.
- Vibration during operation may cause the appliance to move.
- Do not let the power cord hang over the edge of a bench or table, touch hot surfaces or become knotted.
- Always ensure the appliance is turned OFF, unplugged at the power outlet, and has been allowed to cool before cleaning, attempting to move or storing.
- Always turn the appliance to the OFF position, switch off at the power outlet and unplug at the power outlet when the appliance is not in use.
- Do not use the appliance if the power cord, plug, or appliance becomes damaged in any way. If damaged or maintenance other than cleaning is required, please contact Sage Customer Service or go to sageappliances.com in order to avoid a hazard.
- Any maintenance other than cleaning should be performed by an authorized Sage service centre.
- Children should not play with the appliance.
- Cleaning and user maintenance of the appliance should not be carried out by children unless they are 8 years or older and supervised.
- The appliance and its cord should be kept out of reach of children aged 8 years and younger.
- The installation of a residual current safety switch is recommended to provide additional safety when using all electrical appliances. Safety switches with a rated operating current of not more than 30mA are recommended. Consult an electrician for professional advice.
- Always ensure the appliance is properly assembled before use.
- Do not use the appliance on a sink drainboard.
- Keep hands, fingers, hair, clothing as well as spatulas and other utensils away from moving or rotating parts during operation.
- Do not use the appliance for anything other than food and/or beverage preparation.
- In order to avoid the possible hazard of the appliance starting by itself due to inadvertent resetting of the overload protection, do not attach an external switching device (such as a timer) or connect the appliance to a circuit that can regularly switch the appliance on and off.
- Carefully read all instructions before operation and save them for future reference.
- The appliance can be used by persons with reduced physical or mental capabilities or a lack of experience and knowledge, only if they have been given supervision or instruction concerning the use of the appliance in a safe way and understand the hazards involved.
- The appliance can be used by children aged 8 years or older if they have been given supervision or instruction concerning the use of the appliance in a safe way and if they understand the hazards involved.
- Position the appliance at a minimum distance of 15cm away from walls to ensure proper ventilation.
- Do not cover the air vents when the ice cream machine is in use.
- Do not place any ingredients directly into the ice cream chamber. Place ingredients into the ice cream bowl only.
- Do not store explosive substances such as aerosol cans with a flammable propellant in this appliance.
- Do not leave the lid off the ice cream machine for extended periods of time. Do not use any other accessories other than those provided with the product.
 The symbol shown indicates that this appliance should not be disposed of in the normal household waste. It should be taken to a local authority waste collection centre designated for this purpose or to a dealer providing this service. For more information, please contact your local council office.
 To protect against electric shock, do not immerse the power plug, cord or appliance in water or any liquid.
FOR HOUSEHOLD USE ONLY SAVE THESE INSTRUCTIONS
FEATURES OF YOUR NEW APPLIANCE
Automatic Mode
Automatic mode churns and freezes the ingredients to the selected/desired consistency. Select one of the four pre-set functions: Sorbet, frozen yogurt, gelato or ice cream. Smart Scoop will beep when ready.
Manual Mode
The time to make ice cream can be manually set for pre-timed recipes. Preset Functions The Sage ® Smart coop ™ has four pre-set functions to pick from. Select one of the following settings; sorbet, frozen yogurt, gelato, or ice cream.
Pre-Cool
It’s good practice to pre-cool the machine when preparing your dessert base. This optional function will cool the machine to approximately -10 to -30°C and usually takes about 5–10 minutes.
Keep Cool
Once the consistency of the dessert has been achieved, Keep Cool will prevent the mixture from melting for up to 3 hours. When the machine is in this mode, note that the compressor will operate intermittently to ensure consistency of the dessert.
Child Lock
The Sage®Smart Scoop™features a child lock. Press and hold  HOLD for 2 seconds to set the child lock mode. To exit this mode press and hold for 2 seconds again.
Add Mix-Ins
Mix-ins such as chocolate chips, fresh fruit and flavors can all be added easily through the flip back lid. The ice cream machine will beep and ADD MIX-INS will flash to let you know that it is time to add your favorite condiments!
Sound
The ice cream machine features an alert beeper when your ice cream is ready. This alert can be set between: loud, soft or mute.
COMPONENTS
| A. Anodised ice cream bowl Not dishwasher safe and should not be stored in the freezer. B. Paddle C. Lid D. Stainless steel housing E. POWER F. START / PAUSE G. Manual timer H. PRE-COOL function |
J. Auto timer/Hardness selection dial Will scroll between the following settings: sorbet, frozen yogurt, gelato, or ice cream. Rotate the dial left for softer textured desserts or right for harder textured desserts. K. TEMP / UNITS button Allows you to toggle between Celsius and Fahrenheit. L. Sound Select between loud, soft, or mute. M. Handles N. Bowl chamber |
![]() Rating Information
Rating Information
220–240V~ 50Hz 170–200W
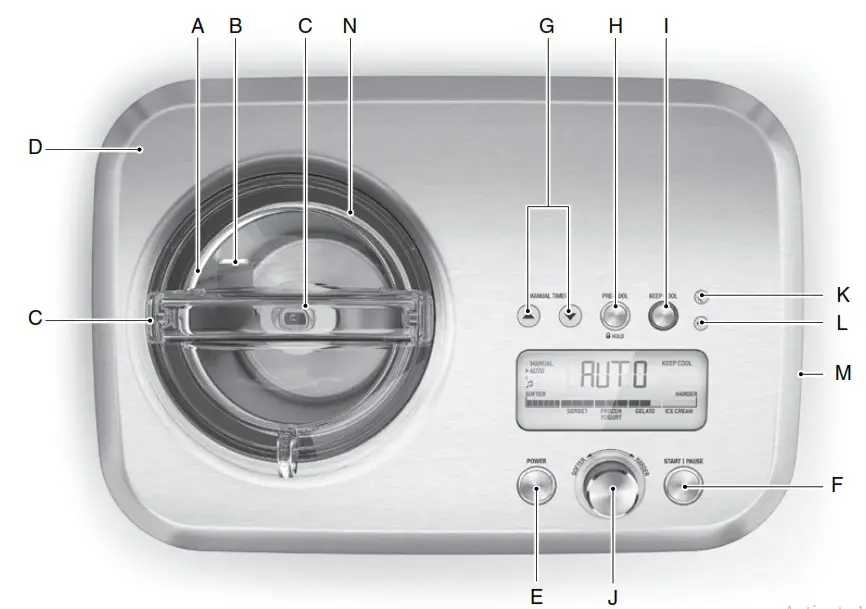
SMART SCOOP DISPLAY
O. LCD Control Display
P. Hardness selection bar
Q. Progress indicator bar
R. Keep Cool will keep the frozen dessert chilled and churned for up to 3 hours.
S. Add mix-ins will flash to let you know when it is time to add your favorite mix-ins.
T. Pre-Cooling
Pre-cool works by reducing the temperature of the cooling chamber to its optimal operating temperature before the base mix is introduced. As the appliance is already cold it will take less time to freeze. This reduces the churning required to achieve the dense & creamy consistency of great gelato.
U. Press Start flashes when in the PRE-COOL mode to advise that the machine is chilled and ready to start churning.
V. Remove blade indicates that the dessert is finished and the blade can be removed from the bowl.
ACCESSORIES
W. Anodised ice cream bowl
X. Spatula use to scrape the bowl
Y. Paddle
Z. Bottlebrush for easy cleaning of the paddle and bowl

OPERATION
BEFORE FIRST USE
Machine preparation
Remove and discard all labeling and packaging materials attached to your ice cream machine. Ensure you have removed all parts and accessories before discarding the packaging.
Remove the lid, ice cream bowl, and paddle from the machine. Clean these parts and accessories using warm soapy water and rinse thoroughly. Ensure all parts are completely dry.
FIRST USE
Initial start-up
- Place paddle inside the bowl.
- Place ingredients inside the bowl in order of the recipe.
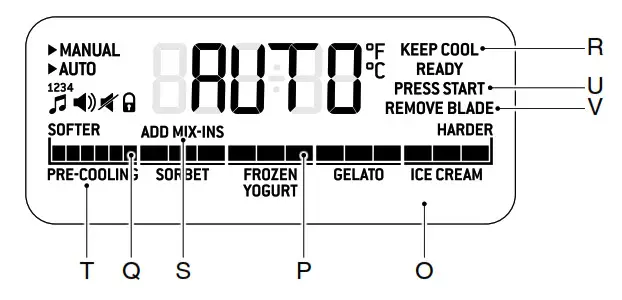 Place ice cream bowl into the ice cream chamber.
- There are 2 grooves in the bowl chamber. When positioning the bowl, align so that the bowl handle hinge is positioned within these grooves.
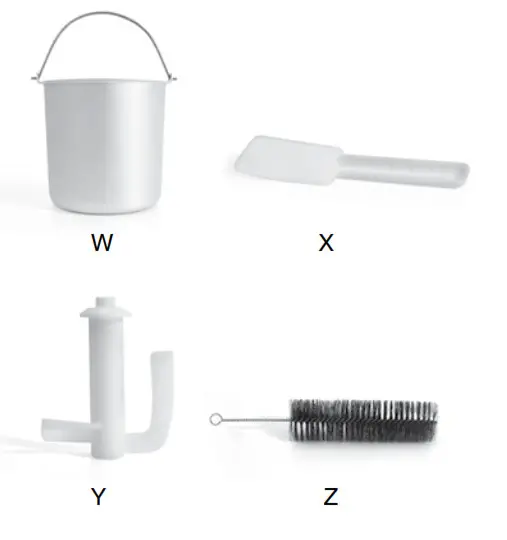
- Make sure the BOWL CHAMBER and thje exterior of the ice cream bowl is completely dry before inserting.

- To lock the lid into position, align the lid handle to the alignment graphic, rotating clockwise into the LOCK position.LOCK
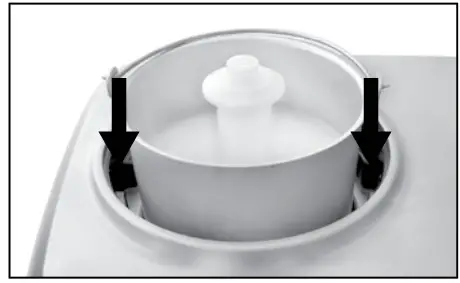
- Press the POWER button to turn the machine on.
- Rotate the hardness selection dial to your chosen dessert. Press the START / PAUSE button to begin
the churning process. The elapsed time will be displayed on the LCD. - The smart scoop will beep when your dessert has reached its desired consistency.
PRE-COOL
NOTE
PRE-COOL can only be operated in the standby mode, before pressing the START / PAUSE button.
a) PRE-COOL lowers the temperature of the ce cream machine to reduce the time it takes to prepare your dessert. It is optional and is ideal to use while you are preparing your ice cream base before churning.
b) To select the PRE-COOL function, press the PRE-COOL button. The light surrounding the button will turn from white to red to indicate that the machine is in PRE-COOL mode. This mode will ‘PRE-COOL’ the machine to approximately -10°C to -30°C, taking about 5-10 minutes. READY will illuminate and PRESS START will flash on the LCD screen when the ice cream maker has reached optimal temperature.
The paddle will start turning after 15 minutes has passed, but will not start making the frozen dessert unless the START / PAUSE button is pressed. In this function, the LCD screen will display the temperature, PRE- COOLING will illuminate and the progress indicator will scroll, to let you know that you are in this mode.
c) PRE-COOL will return to standby after 20 minutes or alternatively can be switched off either by pressing the PRE-COOL button again or pressing the START / PAUSE button which will override the pre-cooling mode.
NOTE
START / PAUSE button will have to be pressed to start the churning process after pre-cooling.
CARE & CLEANING
Ensure that the ice cream machine is turned off by pressing the POWER button. The ice cream machine is off when the START / PAUSE button’s LED light is no longer illuminating red. Remove the power plug from the power outlet. Allow the ice cream machine compressor to cool completely before disassembling and cleaning.
CLEANING THE STAINLESS STEEL HOUSING
- Wipe the exterior of the stainless steel housing and the LCD screen with a soft damp cloth. Do not use a dry paper towel or cloth to clean the LCD screen, or use an abrasive cleanser or metal scouring pad to clean any part of the ice cream machine as these will scratch the surface.
NOTE
Never immerse the stainless steel housing in water or place in the dishwasher. Take care not to allow water or cleaning fluids to seep under the buttons or LCD screen on the control panel.
NOTE
To clean the ice cream chamber ensure that the unit is at room temperature. Wipeout with soapy water and a soft damp cloth. - If an over-spill of cream, milk, chocolate, etc. occurs in the interior chamber, carefully remove using a soft, damp cloth.
- Let all surfaces dry thoroughly prior to inserting the power plug into a power outlet.
CLEANING THE LID
The lid can be cleaned in warm soapy water, using a soft sponge. Do not use an abrasive cleanser or metal scouring pad as these will scratch the surface. Let all surfaces dry thoroughly prior to placing them into the ice cream machine.
CLEANING THE ICE CREAM BOWL
Fill the ice cream bowl up halfway with warm soapy water. A non-abrasive liquid cleanser or mild spray solution may be used. Allow standing for 10-20 minutes.
NOTE
Ice Cream Bowl is NOT dishwasher safe.
CLEANING THE PADDLE
- Wash the paddle with warm soapy water. Using the bottle brush supplied insert this in the central part of the paddle to clean all the ice cream out.
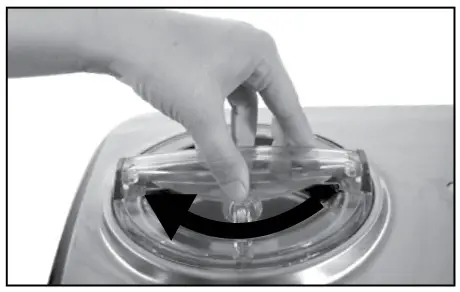 2. Let all surfaces dry thoroughly before reassembling the ice cream machine.
NOTE
The paddle and lid are dishwasher safe on the top rack ONLY.
STORAGE
Store the appliance in an upright position and level on it support legs. Do not store anything on top of the ice cream machine.
TROUBLESHOOTING
| PROBLEM | EASY SOLUTION |
| Ice cream won’t freeze |
|
| Paddle won’t move |
|
| Lid will not lock Into position |
|
| Frozen dessert not frozen in the allocated time |
|
| Can’t remove
bowl insert after churning |
|
| How do I make soft-serve ice cream? |
|
| I want my ice cream even harder! |
|
| Can I put my mix-ins Into the custard base? |
|
| PROBLEM | EASY SOLUTION |
| My Ice-cream maker seems to be vibrating briefly? | The internal compressor is mounted on special rubber mounts to reduce the noise and vibration during operation. When cooling is not required the compressor will automatically turn off and a small amount of vibration for 1-2 seconds is normal. |
| The controls don’t work? |
|
| The Ice cream maker does not remember my last setting? |
|
| The temperature reading In Fahrenheit |
|
| Ice Cream not churning but the compressor is on |
|
| My Ice cream Is Icy? Why? |
|
| I pulled the Ice cream out of the freezer and It Is very hard. Why? |
|
| Can I place the Ice cream bowl Into the freezer? |
|
 the button to change temperature units.
GUARANTEE
2 YEAR LIMITED GUARANTEE
Sage Appliances guarantees this product for domestic use in specified territories for 2 years from the date of purchase against defects caused by faulty workmanship and materials. During this guarantee period, Sage Appliances will repair, replace, or refund any defective product (at the sole discretion of Sage Appliances). All legal warranty rights under applicable national legislation will be respected and will not be impaired by our guarantee. For full terms and conditions on the guarantee, as well as instructions on how to make a claim, please visit www.sageappliances.com.
GBR
BRG Appliances Limited
Unit 3.2, Power Road Studios, 114 Power
Road, London, W4 5PY
UK Landline: 0808 178 1650
Mobile (National Rate): 0333 0142 970
![]()
www.sageappliances.com
Registered in England & Wales No. 8223512
Registered in Germany No. HRB 81309 (AG Düsseldorf)
Registered in France No. 879 449 866 RCS
Due to continued product improvement, the products illustrated or photographed in this document may vary slightly from the actual product.
Copyright BRG Appliances 2021
BCI600/SCI600 UG6 B20
BGR840/SGR840
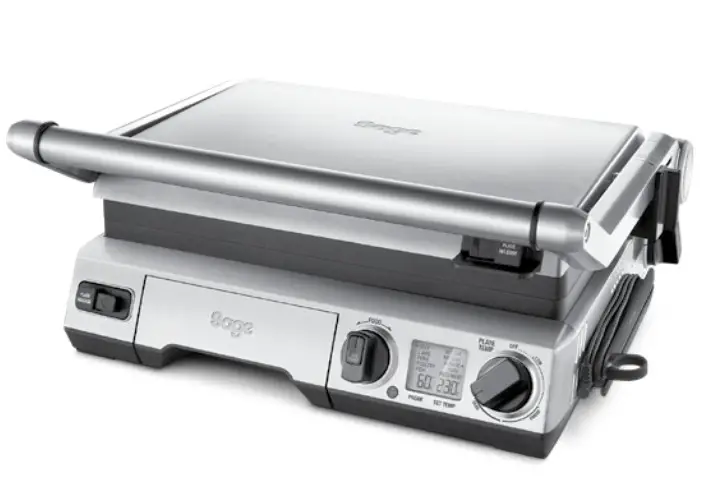
SAGE®RECOMMENDSSAFETY FIRST
At Sage®we are very safety conscious. We design and manufacture appliances with your safety foremost in mind. In addition, we ask that you exercise a degree of care when using any electrical appliance and adhere to the following precautions.
IMPORTANT SAFEGUARDS
READ ALL INSTRUCTIONS
BEFORE USE AND SAVE
FOR FUTURE REFERENCE
- A downloadable version of this document is also available at sageappliances.com
- Before using the first time ensure your electricity supply is the same as shown on the label on the underside of the appliance.
- Remove and safely discard any packaging materials before first use.
- The appliance is for household use only. Do not use the appliance for anything other than its intended use. Do not use in moving vehicles or boats. Do not use outdoors. Misuse may cause injury.
- Fully unwind the power cord before operating.
- Position the appliance on a stable, heat resistant, level, dry surface away from the edge and do not operate on or near a heat source such as a hot plate, oven or gas hob.
- Do not let the power cord hang over the edge of a bench or table, touch hot surfaces or become knotted.
- Position the appliance at least 20cm from walls or heat/steam sensitive materials and provide adequate space above and on all sides for air circulation.
- Ensure the power cord does not become trapped between the upper and lower hot plates of the appliance
during use or storage. - Do not leave the appliance unattended when in use.
- The appliance is not intended to be operated by the means of an external timer or separate remote control system
- Do not place anything on top of the grill when the lid is closed, when in use and when stored.
 The appliance is marked with a HOT surface symbol. The lid and other surfaces will be hot when the appliance is operating and for some time after use. To prevent burns always use insulated oven mitts or use handles or knobs where appropriate.
- Do not use the appliance if the power cord, plug, or appliance becomes damaged in any way. If damaged or maintenance other than cleaning is required, please contact Sage Customer Service or go to sageappliances.com
- Any maintenance other than cleaning should be performed by an authorized Sage ® service center.
- Children shall not play with the appliance.
- The appliance can be used by children aged 8 or older and persons with reduced physical, sensory or mental capabilities or a lack of experience and knowledge, only if they have been given supervision or instruction concerning useof the appliance in a safe way and understand the hazards involved.
- Cleaning of the appliance should not be carried out by children unless they are 8 years or older and supervised.
- The appliance and its cord should be kept out of reach of children aged 8 years and younger.
- The installation of a residual current safety switch is recommended to provide additional safety when using all electrical appliances. Safety switches with a rated operating current not more than 30mA are recommended. Consult an electrician for professional advice.
 The symbol shown indicates that this appliance should not be disposed of in the normal household waste. It should be taken to a local authority waste collection centre designated for this purpose or to a dealer providing this service. For more information, please contact your local council office.
 To protect against electric shock, do not immerse the power plug, cord, or appliance in water or any liquid.
SAVE THESE INSTRUCTIONS
GETTING TO KNOW YOUR NEW APPLIANCE

| A. Stainless Steel Housing with B. Cast Aluminium, Non-Stick Plates C. Removable, Interchangeable and Dishwasher Safe Plates D. Food type selection dial with Sound Alert E. Temperature Conversion Button F. Smart Settings with Rest Indicator G. Temperature Dial (160°C–230°C) H. Integrated Probe with Sage® Assist™ Loop & Probe Storage |
I. Adjustable Plate Tilt J. Height Control & Locking Storage Clip K. BBQ Lock Release L. 6 Adjustable Height Settings M. Levelling Support N. Top Plate Release O. Bottom Plate Release P. Integrated, Removable Drip Tray Q. Cord Storage |
1-Hour auto shut-off automatically stops heating the cooking plates after 1 hour of inactivity.
Element IQ ™
Sensors detect when the cooking plates drop in temperature and compensate by injecting heat for rapid recovery back to the selected cooking temperature. 2400 watt embedded heating elements ensure consistently high heat for faster cooking and reduced preheating time.
![]() Rating Information
Rating Information
220–240V ~ 50–60Hz 2000–2400W
ASSEMBLING YOUR NEW APPLIANCE
PREPARING THE GRILL FOR USE
- Remove and safely discard any packing material and promotional labels from the grill.
- Wipe the cooking plates and drip tray with a soft damp sponge. Dry thoroughly.
- Ensure the drip tray is correctly inserted into the grill.
- Ensure the cooking plates are correctly inserted and securely locked into position.
- Place the grill on a flat, dry surface. Ensure there is a minimum distance of 10cm of space on both sides of the appliance.
- Remove probe from packaging and insert the jack into the socket on the front face of the Probe Storage area located on the right-hand side of the grill. When not in use, wrap probe cord around Probe Storage.
- Unwind the power cord completely and insert the power plug into a grounded wall outlet.
- The grill alert will sound and the LCD screen will display OFF.
- The grill is now ready for the preheating cycle. The grill features 2 x PLATE RELEASE. These allow you to independently remove the top and bottom cooking plates for easy cleaning, or to interchange plate positions.
USING THE PLATE RELEASE
- To use the PLATE RELEASE:
− Always ensure the grill is completely cool.Use the handle to open the top plate to a 90-degree position.
− Use the ‘Plate Release’ on the front,right side of the top plate to remove the top cooking plate, and the ‘Plate Release’ on the left side of the control panel to remove the bottom cooking plate. Once released, gently slide the plates off the grill. - If the cooking plates are incorrectly inserted, the LCD screen will display Er1. Use the 2 x PLATE RELEASE to remove the plates then re-insert so they securely lock into position. Always ensure the grill is completely cool before releasing and removing the cooking plates.
- When the grill is turned on and heating for the first time, it may emit a fine smoke haze. This is due to the protective substances on the heating elements. It is safe and not detrimental to the performance of the grill.
OPERATING YOUR NEW APPLIANCE
PREHEATING THE GRILL
- Ensure the top plate of the grill is in the closed position, with the Height Control Clip in the OPEN position. This will ensure faster, more efficient preheating
- Turn the PLATE TEMP dial to adjust the temperature in 5°C increments. Rotate the dial to SEAR (210°C– 230 °C) for fast preheating, PANINI (sandwich) (180°C– 205°C), LOW (160°C –175°C) or select an alternative temperature.
- The grill will start to heat and the LCD screen will illuminate orange. The selected temperature that corresponds o PLATE TEMP will flash.
- Once the grill has preheated to the selected temperature, one alert will sound and the selected PLATE TEMP will stop flashing.
NOTE
Always allow the grill to completely preheat to the selected temperature before cooking. The temperature corresponding to PLATE TEMP on the LCD may flash during the cooking process. This is normal, indicating that the correct temperature is being maintained.
ADJUSTABLE HEIGHT CONTROL
This feature reduces the weight of the top plate on delicate foods like fish and accommodates varying thicknesses of food like artisan bread. Located on the right side of the top plate, the clip fixes the top plate to a range of positions above the bottom plate. To set the adjustable height control, use the handle to lift the top plate and simultaneously move the adjustable height control clip to the desired height. Then slowly lower the top plate until it rests on the adjustable height control clip.
ADJUSTABLE TILT CONTROL
The angle of the cooking plates can be adjusted by turning the PLATE TILT dial. The PLATE TILT dial is located on the lower back, right side of the grill. The unique indent between the two cooking plates channels juices from both plates into the same drip tray while cooking.
TEMPERATURE CONVERSION BUTTON
- The grill features a temperature conversion button on the left side of the LCD screen. The temperature reading on the grill is preset to Celsius. Pressing the temperature conversion button converts the Celsius temperature reading into Fahrenheit. The corresponding °C or °F symbol will be displayed on the LCD screen.
- If you have changed the default Celsius temperature reading to Fahrenheit, the setting will remain in the memory of the grill until the Temperature Conversion Button is pressed a second time or the grill is unplugged from the wall outlet. When the grill is plugged back into the wall outlet, the temperature reading will automatically return to the preset Celsius setting.
INTEGRATED PROBE WITH SMART SETTINGS
The integrated probe with smart settings is designed to help achieve consistent doneness results when cooking different meats.
5 meat settings have pre-programmed temperatures to suit your desired doneness. The set temperatures for each meat are displayed in the chart below.
| DONENESS SET TEMPERATURES | ||||
| Rare | Medium Rare | Medium | Well Done | |
| Beef | 55`C | 60`C | 65`C | 75`C |
| Lamb | 55`C | 60`C | 65`C | 75`C |
| Pork | 65`C | 75`C | ||
| Poultry | 65`C | 75`C | ||
| Fish | 45`C | 50`C | 55`C | 65`C |
REST INDICATOR
Resting meat for 3–5 minutes once it is taken off the grill is important as it allows the muscle fibres to relax and the juices to spread evenly throughout the meat, preventing juices and flavour from being lost as it is cut open.
When cooking to the desired doneness, it is important to remove the meat from the grill before it reaches the desired internal temperature as the residual heat will continue to cook the meat during the rest phase.
The Smart Grill Pro™has a REST MEAT indicator, which alerts you to remove your meat before the SET TEMP is reached to prevent over cooking.
NOTE
The probe and smart settings have been optimised for cooking in contact mode with the PLATE TEMP dial turned to SEAR (230ºC).
USE AS A CONTACT GRILL WITH SMART SETTINGS AND PROBE
- For best results, set the PLATE TEMP dial to SEAR (230°C).
- While the grill is preheating, adjust the angle of the cooking plates to the desired position by turning the PLATE TILT dial. The PLATE TILT dial is located on the lower back, right side of the grill.
- Ensure the probe is installed correctly.
- Insert probe gently into the side of the meat, ensuring that it is positioned in the thickest part and directly in the centre of the meat.

- To select meat type, rotate the FOOD dial to scroll through the food menu. An arrow indicator will show alongside selected meat.

- Once the meat type is selected, press the SET TEMP button to scroll through doneness settings. An arrow indicator will show alongside selected doneness.
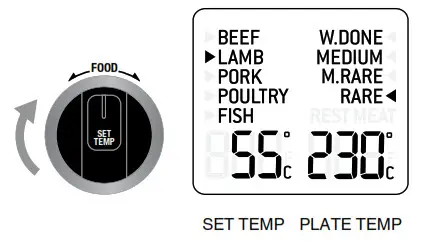
- To open the grill:
a) Ensure the grill has completely preheated and the LCD screen no longer flashes PLATE TEMP.
b) Use the handle to open the top plate to a 90-degree position.
c) Place meat with a probe inserted on the bottom cooking plate. For best results, ensure the PLATE TEMP dial is set on SEAR (230°C). - Use the handle to close the top cooking plate. When cooking with the probe it is recommended that the top plate of the grill is in the closed position, with the Height Control Clip in the OPEN position.
- During cooking 3 alerts will sound and REST MEAT and selected doneness will flash to indicate it is time to remove the meat from the grill to rest.
- When food is cooked, remove meat from grill using heatproof plastic or wooden utensils. Pull out probe and place the meat onto a plate or tray. Cover loosely with foil. Allow resting for a minimum of 5 minutes before serving.
- To turn off grill, turn the PLATE TEMP dial to the OFF position.
NOTE
The grill does not automatically stop cooking once the rest meat flashes. If meat is not removed you risk over cooking.
FOR BEST RESULTS
- For even results, select meat with even thickness.
- When cooking cuts of meat with irregular thicknesses such as chicken breast, edges can remain slightly pink. After cooking is complete, sear any undercooked edges on the hot cooking plates.
- Do not use spray-on, non-stick coatings as these will affect the performance of the non-stick cooking plates.
- Never use metal or sharp utensils as these can cause damage to the non-stick coating of the cooking plates.
USE IN OPEN FLAT BBQ MODE
The grill opens flat into a 1650 sq. cm grilling surface. The ribbed cooking plate is perfect for searing meats while the flat cooking plate is ideal for eggs, pancakes and vegetables.
- To open the grill into BBQ mode:
a) Ensure the grill has completely preheated and the LCD screen no longer flashes PLATE TEMP.
b) Ensure the top cooking plate is in the closed position, with the Height Control Clip in the OPEN position.
c) With your left hand, grip the handle.
With your right hand, pull the Height Control Clip on the right side of the grill towards you, into the BBQ mode position. Continue to pull the clip forward and simultaneously lift the handle to open, then gently lower the top plate into the horizontal BBQ mode position.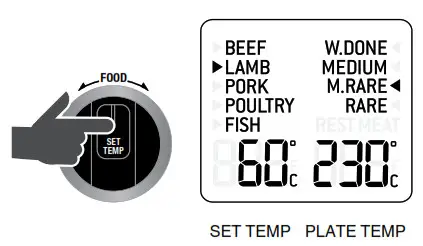
- Place food on either or both of the cooking plates.
- If using the probe, repeat steps 3–6 on how to insert the probe and select desired doneness setting before placing meat on the grill.
NOTE
The probe and smart settings have been optimized for cooking in contact mode. As a result, additional cooking time may be required when using the probe in BBQ mode for best results, it is recommended to flip meat regularly. - During cooking 3 alerts will sound and REST MEAT and selected doneness will flash to indicate it is time to remove the meat from the grill to rest.
- When food is cooked, remove meat from grill using heatproof plastic or wooden utensils. Pull out the probe and place the meat onto a plate or tray. Cover loosely with foil. Allow resting for a minimum of 5 minutes before serving.
- To turn off grill, turn the PLATE TEMP dial to the OFF position.
NOTE
Oils and/or fats captured by the drip tray during cooking, should not be consumed.
USE AS A SANDWICH OR PANINI PRESS
NOTE
If the probe is connected, food and doneness menus will be displayed. If the probe is disconnected, the LCD will only display temperature that responds to PLATE TEMP.
- To open the grill:
a) Ensure the grill has completely preheated and the LCD screen no longer flashes PLATE TEMP.
b) Ensure the top cooking plate is closed.
The Adjustable Height Control Clip, located on the right side of the top plate, should be in the OPEN position.
c) Use the handle to open the top plate to a 90-degree position. - Place food on the bottom cooking plate.
- Use the handle to close the top cooking plate. When cooking open melts it is recommended that the top plate of the grill is in the closed position, with the Height Control Clip in the HIGH position.
- When the food is cooked, remove it from the cooking plates using heatproof plastic or wooden utensils.
- To turn off grill, turn the PLATE TEMP dial to the OFF position.
FOR BEST RESULTS
When toasting sandwiches on the PANINI setting:
- Always place sandwiches in the center bottom plate.
- Toasting should take approximately 5–8 minutes. The exact roasting time will be a matter of preference and the type of bread and fillings used.
- Never use metal or sharp utensils as these can cause damage to the non-stick coating of the cooking plates.
CARE & CLEANING
Ensure the grill is turned OFF by turning the PLATE TEMP dial to the OFF position. The grill is OFF when the LCD screen displays OFF. Remove the power plug from the wall outlet. Allow the grill to cool completely before disassembling and cleaning. Always clean the probe, outer body, drip tray, and cooking plates after each use to prevent a build-up of ingredients.
CLEANING THE PROBE
Wipe the metal probe and cord with a soft, damp sponge. A non-abrasive liquid cleanser or mild spray solution may be used to avoid the build-up of stains. Apply the cleanser to the sponge, not the probe, before cleaning.
CLEANING THE OUTER BODY
Wipe the outer body with a soft, damp sponge. A non-abrasive liquid cleanser or mild spray solution may be used to avoid the build-up of stains. Apply the cleanser to the sponge, not the grill surface, before cleaning. Rinse. Let all surfaces dry thoroughly prior to inserting the power plug into a wall outlet.
CLEANING THE DRIP TRAY
After each use, slide out the drip tray and discard contents. Wash the tray in warm soapy water with a soft, damp sponge. A non-abrasive liquid cleaner may be used to avoid the build-up of stains. Apply the cleanser to the sponge, not the tray, before cleaning. Rinse and dry thoroughly. Always ensure to re-insert the drip tray into the rill after cleaning and prior to inserting the power plug into a wall outlet.
CLEANING THE COOKING PLATES
- Wipe the cooking plates with a soft cloth to remove food residue.
- Alternatively, release and remove the cooking plates:
• Always ensure the grill is completely cool.
• Use the handle to open the top plate to a 90-degree position.
• Use the PLATE RELEASE on the front, right side of the top plate to remove the top cooking
plate, and the PLATE RELEASE on the left side of the control panel to remove the bottom cooking plate.
• Once released, gently slide the plates off the grill. - Place the cooking plates in the dishwasher (top shelf only).
- Alternatively, wash the cooking plates in hot soapy water with a soft, damp sponge.
A non-abrasive liquid cleaner may be used to avoid the build-up of stains. Apply the cleanser to the sponge, not the plate, before cleaning. Remove stubborn residue with a non-abrasive plastic scouring pad or nylon washing brush. - Rinse and dry thoroughly. Always ensure the cooking plates are correctly re-inserted and securely locked back into position after cleaning and prior to inserting the power plug into a wall outlet.
STORAGE
- Ensure the grill is turned OFF by turning the PLATE TEMP dial to the OFF position. The grill is OFF hen the LCD screen displays OFF. Remove the power plug from the wall outlet.
- Allow the grill, cooking plates and drip tray to cool completely.
- Ensure the grill, cooking plates and drip tray are clean and dry.
- Ensure the drip tray is correctly re-inserted into the grill.
- Ensure the cooking plates are correctly re-inserted and securely locked into position.
- Ensure the cooking plates are locked together by sliding the adjustable height control away from you, into the LOCK position.
- Wrap the probe cord around the PROBE STORAGE on the right side of the grill, then locate the probe into the recess on the face of the PROBE STORAGE.
- Store on a flat, dry, level surface. Alternatively, the grill may be stored in an upright position.
TROUBLESHOOTING
ERROR MODES
Er1 – Cooking Plates are inserted incorrectly. 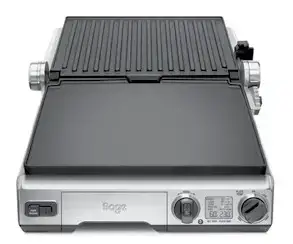 When the LCD screen displays ‘Er1’ error mode:
- Ensure the cooking plates are correctly and securely inserted into position.
- The LCD screen should no longer display the ‘Er1’ error Mode.
- If the problem continues, call Sage Customer Service or go to sageappliances.com
Er2 – Probe temperature has exceeded 180°C.
 When the LCD screen displays ‘Er2’ error mode:
- Unplug the grill from the wall outlet.
- Ensure the probe is not contacting the heating plates.
- Allow probe to cool.
- Re-insert the plug into the wall outlet.
- The LCD screen should no longer display ‘Er2’ error Mode.
- If the problem continues, call Sage Customer Service or go to sageappliances.com
Er3 – Overheat Protection.
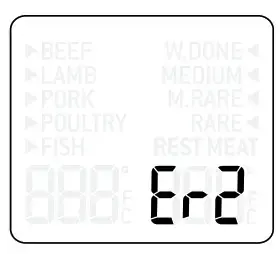 When the LCD screen displays ‘Er3’ error mode:
- Unplug the grill from the wall outlet
- Ensure the grill is completely cool.
- Re-insert the plug into the wall outlet.
- The LCD screen should no longer display the ‘Er3’ error Mode.
- If the problem continues, call Sage Customer
Service or go to sageappliances.com
GUARANTEE
2 YEAR LIMITED GUARANTEE
Sage Appliances guarantees this product for domestic use in specified territories for 2 years from the date of purchase against defects caused by faulty workmanship and materials. During this guarantee period, Sage Appliances will repair, replace, or refund any defective product (at the sole discretion of Sage Appliances).
All legal warranty rights under applicable national legislation will be respected and will not be impaired by our guarantee. For full terms and conditions on the guarantee, as well as instructions on how to make a claim, please visit www.sageappliances.com.
BRG Appliances Limited
Unit 3.2, Power Road Studios, 114 Power
Road, London, W4 5PY
UK Landline: 0808 178 1650
Mobile (National Rate): 0333 0142 970
![]()
www.sageappliances.com
Registered in England & Wales No. 8223512
•Due to continued product improvement, the products illustrated or photographed in this document may vary slightly from the actual product.
Copyright BRG Appliances 2021
BGR840/SGR840 UG6 – B20
 QUICK GUIDE
SAGE®RECOMMENDS SAFETY FIRST
Sage®we are very safety conscious. We design and manufacture consumer products with the safety of you, our valued customer, foremost in mind. In addition, we ask that you exercise a degree of care when using any electrical appliance and adhere to the following precautions.
IMPORTANT SAFEGUARDS
READ ALL INSTRUCTIONS BEFORE USE AND SAVE THEM FOR FUTURE REFERENCE
- A downloadable version of this document is also available at sageappliances.com
- Before using it for the first time please ensure that your electricity supply is the same as shown on the rating label on the underside of the appliance. If you have any concerns please contact your local electricity company.
- Remove and safely discard any packaging materials before first use.
- To eliminate a choking hazard for young children, safely discard the protective cover fitted to the power plug.
- This appliance has been designed specifically for the purpose of heating and boiling quality drinking water and tea only. Under no circumstances should this product be used to heat or boil any other liquids or foodstuffs.
- Position the appliance on a stable, heat resistant, level, dry surface away from the edge and do not operate on or near a heat source such as a hot plate, oven, or gas hob.
- Do not place the appliance on or near a hot gas burner, electric element or where it could touch a heated oven.
- Position the appliance at least 20cm from walls or heat/steam sensitive materials and provide adequate space above and on all sides for air circulation.
- Do not operate the kettle on the sink drainboard.
- Always ensure the appliance is properly assembled before connecting to a power outlet and operating. Follow the instructions provided in this book.
- The installation of a residual current safety switch is recommended to provide additional safety when using all electrical appliances. Safety switches with a rated operating current of not more than 30mA are recommended. Consult an electrician for professional advice.
- The glass jug must be used only with the power base supplied. Do not use on a range top.
- The appliance is not intended to be operated by means of an external timer or separate remote control system.
- Do not touch hot surfaces. Use the handle for lifting and carrying the glass jug.
- Attach the jug lid securely to the glass jug before operation.
- Do not place anything on top of the lid.
- Do not open the jug lid during operation as scalding v may occur.
- Extreme caution must be used when moving the glass jug containing hot liquid.
- Use caution when pouring water from the glass jug as boiling water and steam will scald. Do not pour the water too quickly.
- To avoid scalding, never fill the glass jug past the ‘WATER MAX’ (when heating water) or ‘TEA MAX’ (when brewing tea) line markings.
- Do not operate the appliance without water. Always fill the glass jug to at least the ‘MIN’ marking. Should it be operated without water, the boil-dry protection will shut the power off automatically. Allow the appliance to cool before refilling.
 WARNING
- Do not remove the glass jug from the power base during heating or when the basket is in operation. Ensure the appliance has completed the water heating or tea brewing cycle before removing the glass jug from the power base.
- The use of accessory attachments not recommended by Sage ®may result in fire, electric shock, or injury to persons.
- To turn OFF the appliance, press the TEA/Cancel button (when brewing tea) or the HOT WATER/Cancel button (when heating water) on the power base.
- Always ensure the appliance is turned OFF, unplugged at the power outlet, and has been allowed to cool before cleaning, attempting to move or storing.
- When the appliance is not in use or when left unattended, disconnect the power cord from the wall outlet.
- Allow the appliance to cool down in between brewing cycles.
- Keep the glass jug clean. Follow the cleaning instruction provided in this book.
- Do not use harsh abrasives or caustic cleaners when cleaning this appliance.
- Children should not play with the appliance.
- The glass jug has been specially treated to make it stronger, more durable, and safer than ordinary glass, however, it is not unbreakable. If dropped or struck extremely hard, it may break or weaken, and could at a later time shatter into many small pieces without apparent cause.
- Any maintenance other than cleaning should be performed by an authorized Sage ® service center.
- The appliance can be used by children aged 8 or older and persons with reduced physical, sensory or mental capabilities or a lack of experience and knowledge, only if they have been given supervision or instruction concerning use of the appliance in a safe way and understand the hazards involved.
- Children should not play with the appliance.
- Always turn the appliance to the OFF position, switch off at the power outlet and unplug at the power outlet when the appliance is not in use.
WARNING
Do not wash jug exterior under running water. 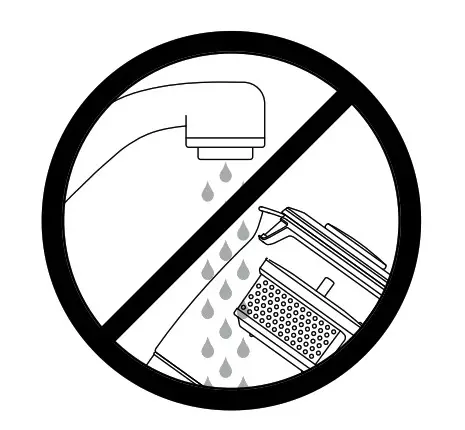 IMPORTANT SAFEGUARDS FOR ALL ELECTRICAL APPLIANCES
- Fully unwind the power cord before operating.
- This appliance is for household use only. Do not use the appliance for anything other than its intended use. Do not use in moving vehicles or boats. Do not use outdoors. Misuse may cause injury.
- Do not let the power cord hang over the edge of a bench or table, touch hot surfaces or become knotted.
- Close supervision is necessary when any appliance is used by or near children.
- Cleaning of the appliance should not be carried out by children unless they are 8 years or older and supervised.
- The appliance and its cord should be kept out of reach of children aged 8 years and younger.
- Do not use the appliance if the power cord, power plug, or appliance becomes damaged in any way. If damaged and maintenance other than cleaning is required please contact Sage Customer Service or go to sageappliances.com
WARNING
- Do not operate the appliance on an inclined surface.
- Do not move the appliance while it is switched on.
 The symbol shown indicates that this appliance should not be disposed of in the normal household waste. It should be taken to a local authority waste collection center designated for this purpose or to a dealer providing this service. For more information, please contact your local council office.
 To protect against electric shock, do not immerse the glass jug base, power base, power cord or power plug in water or allow moisture to come in contact with these parts. Avoid spilling water onto the power base’s connector. Do not immerse the glass jug or the power base for cleaning.
SAVE THESE INSTRUCTIONS


| A. Jug lid B. Stainless steel scale filter C. Tea basket lid D. Stainless steel tea basket E. Jug post |
F. Glass jug G. Immersed temperature sensor H. Tea scoop I. Powerbase J. Cord storage |
![]() Rating Information
Rating Information
220–240V ~50-60Hz 1680–2000W
| K. AUTO START button L. KEEP WARM button M. BASKET button N. TEA TYPE button O. Variable temperature control |
P. Backlit LCD Q. Variable time control R. TEA STRENGTH button S. HOT WATER / CANCEL button T. TEA / CANCEL button |
BEFORE FIRST USE
In order to remove any dust or protective residues from the manufacturing process, it is recommended to run an oiling cycle then discard the water.
- Unwind the power cord completely and insert the power plug into a grounded wall outlet.
- Press the left
 ARROW UP button until the LCD screen displays 100°C.
- Press the HOT WATER / Cancel button to start the cycle.
- Discard the water. The Tea Maker™is now ready to use.
USE THE TEA MAKER™ FOR BREWING TEA
- Fill with the desired amount of water. Ensure you do not fill past the tea maximum mark (1200mL TEA MAX).
- Place the basket on a flat, dry surface. Remove basket lid by lifting from the sides.

- Use the provided tea scoop to fill the basket with tea leaves. As a general guide, use 1 scoop of tea leaves per cup/250ml of water.

Selecting the tea type
Press the TEA TYPE button and toggle through until the desired tea.
Selecting the tea strength
The desired tea strength determines the brew time.
- Press the TEA STRENGTH button and toggle through until the desired tea strength.
- Press the TEA / Cancel button to start the tea brewing cycle.
- Once the selected brew temperature is reached the assembled basket will automatically lower into the heated water.
- Once the basket reaches the bottom of the glass jug, the LCD screen will indicate the brewing progress.
- At the end of the tea brewing cycle, the basket will automatically rise to the top of the glass jug.
WARNING
The tea basket is hot to touch after tea is brewed. Ensure the tea basket handle has cooled before handling.

Selecting the ‘Keep Warm’ Feature
This feature allows the brewed tea or heated water to remain warm for up to 60 minutes.
- Press the KEEP WARM button before, during, or after completion of the tea brewing or water heating cycle.
- If the glass jug is removed from the Power Base, the ‘Keep Warm’ feature will automatically switch off. You can re-select the ‘Keep Warm’ feature by pressing the KEEP WARM button.
Selecting the ‘Basket Cycle’ Feature
This features continuously auto lifts and lowers the basket during the tea brewing cycle.
To activate the ‘Basket Cycle’ feature, press the BASKET button once.
USE AS A VARIABLE TEMPERATURE KETTLE
- Fill the glass jug with the desired amount of water.
a) To boil water (100°C):
Press the left ARROW UP button to increase the temperature to 100°C.
b) To heat water to a customized temperature:
Press the left ARROW UP button to increase the temperature, or the left  ARROW DOWN button to decrease the temperature.
- Press the HOT WATER / Cancel button to start the cycle.
- Once the selected temperature is reached, the tea alert will sound three times. The LCD screen will automatically display the ‘Time Since Brew’ function. This function counts up to a maximum of 60 minutes, allowing you to monitor when the water heating cycle was complete. It does not activate the heating elements.
CUSTOMISING BREW TEMPERATURE
Press the left ![]() ARROW UP button to increase the temperature, or the left
ARROW UP button to increase the temperature, or the left ![]() ARROW DOWN button to decrease the temperature.
ARROW DOWN button to decrease the temperature.
 NOTE
NOTE
This product is not calibrated for commercial or scientific use. Temperatures may vary ± 3˚C, which is within range for optimal brewing for each tea variety.
CUSTOMISING BREW TIME
Brew time less than 10 minutes
Press the right ![]() ARROW UP button to increase the time, or the right
ARROW UP button to increase the time, or the right ![]() ARROW DOWN button to decrease the time.
ARROW DOWN button to decrease the time.
Manual mode-brew times over 10 minutes i) Press the right ![]() ARROW UP button to increase the time up to the maximum 10 minutes.
ARROW UP button to increase the time up to the maximum 10 minutes.
ii) Continue to press the right ![]() ARROW UP button. The LCD screen will display ‘MANUAL LIFT’ and ‘- -: – -‘ on the right side of the LCD.
ARROW UP button. The LCD screen will display ‘MANUAL LIFT’ and ‘- -: – -‘ on the right side of the LCD.
iii) Once the Tea Maker™is activated and the correct water temperature is reached, the basket will automatically lower.
iv) Once the desired brew time has elapsed, press and hold the BASKET button for 2 seconds. The basket will rise.
AUTOSTART FEATURE
- Press and hold the AUTO START button for 2 seconds.
- To set the CURRENT TIME, press the left ARROW UP button to increase the time, or the left ARROW DOWN button to decrease the time in 1-minute increments.
- To set the START TIME, press the right ARROW UP button to increase the time, or the right ARROW DOWN button to decrease the time.
- Once the current time and start time are programmed, press either the flashing HOT WATER / Cancel or TEA / Cancel button to select which feature you would like to start at the programmed time.
- Ensure that the Tea Maker™is prepared with:
a) Sufficient water in the glass jug and tea leaves in the basket for the tea brewing cycle or,
b) Sufficient water in the glass jug for the water heating cycle.
NOTE
Insufficient water may discolor your Tea Maker ™base!
NOTE
The ‘Auto Start’ feature can be canceled anytime by pressing the AUTO START button.

CLEANING THE GLASS JUG
- After each use, empty the glass jug. Do not allow brewed tea to stand overnight.
- Wipe the interior of the glass jug with a soft damp sponge or rinse with warm water. Tea deposits will enhance the flavor of the brewed tea, so if only using as a Tea Maker™do not wash with soapy water.
- Wipe the exterior of the glass jug with a soft damp cloth to clean.

- To remove the build-up of tannin, the astringent chemical constituent of tea, fill the glass jug with water up to the water maximum mark (1500mL WATER MAX) and bring water to boil, and allow water to cool for one minute. Add contents of tea cleaner packet and allow to stand for 5 minutes. Empty Tea Maker, ™ refill with fresh water and boil. Repeat this step again. Empty Tea Maker ™ and rinse thoroughly.
- Dry thoroughly with a soft lint-free cloth before using.
NOTE
Allow all parts of the Tea Maker™tocool completely before disassembling and cleaning.
NOTE
Only the jug lid, tea basket, tea basket lid, and tea scoop are dishwasher safe.
CLEANING THE JUG LID AND INTEGRATED SCALE FILTER
- Wash the jug lid in warm soapy water with a soft sponge, rinse and dry thoroughly. The integrated scale filter can be cleaned by placing it under running hot water and rubbing it with a cleaning cloth or brush.
- Alternatively, the jug lid is dishwasher safe. Position the jug lid vertically so the scale filter is facing upwards. This will allow water to drain properly.
- Let all surfaces dry thoroughly prior to use.
CLEANING THE TEA BASKET LID, TEA BASKET, AND TEA SCOOP
- Wash the tea basket lid, tea basket, and tea scoop in warm soapy water with a soft sponge, rinse and dry thoroughly. A non-abrasive liquid cleanser or mild spray solution may be used to avoid the build-up of stains. apply the cleanser to the sponge, not the accessory surfaces, before cleaning.
- Alternatively, these accessories are dishwasher safe.
- Let all surfaces dry thoroughly prior to using.
CLEANING THE POWER BASE - Wipe the power base with a soft damp sponge.
- Let all surfaces dry thoroughly prior to inserting the power plug into a wall outlet.
DESCALING
Use Sage®“The Descaler” to remove scale build-up. To order visit www.sageappliances.com
WARNING
Causes skin irritation. Wash hands thoroughly after handling. Wear protective gloves/protective clothing/eye protection/protection.
- Empty one sachet (25g) into 1 liter of warm water, stir to dissolve. Pour into the tea maker.

- Leave stand for 5 minutes.
- After 5 minutes, discard the solution.
- Rinse the tea maker twice with fresh clean water.
STORAGE
1. Ensure the Tea Maker™is switched off, cleaned, and dried before storing.
2. Ensure that the assembled tea basket is securely attached to the magnetic post within the glass jug.
3. Ensure that jug lid is securely in place.
4. Wrap the power cord around the power cord storage under the power base.
5. Stand the Tea Maker ™upright on the power base. Do not store anything on top.
 Troubleshooting
| PROBLEM | POSSIBLE CAUSE |
| Tea Maker™ will not switch ‘ON’ |
|
| The Tea Maker ™will not work |
|
| The LCD light has gone out? |
|
| I cannot select certain function |
|
| The LCD screen displays ‘RESET’ |
|
| The LCD screen displays ‘ERROR’ |
|
| PROBLEM | WHAT TO DO |
| I would like to have the Tea Maker ™ ’s default settings back |
|
| The ‘BASKET YCLE’ feature / ASKET button does not work |
|
| After boiling water, bubbles appear around the temperature sensor |
|
| My tea tastes too weak or too strong |
|
| The LCD screen displays ‘RESET’ |
|
| There is a rattling noise inside the glass jug |
|

2 YEAR LIMITED GUARANTEE
Sage Appliances guarantees this product for domestic use in specified territories for 2 years from the date of purchase against defects caused by faulty workmanship and materials. During this guarantee period, Sage Appliances will repair, replace, or refund any defective product (at the sole discretion of Sage Appliances). All legal warranty rights under applicable national legislation will be respected and will not be impaired by our guarantee. For full terms and conditions on the guarantee, as well as instructions on how to make a claim, please visit www.sageappliances.com.
Note:
RG Appliances Limited
Unit 3.2, Power Road Studios, 114 Power
Road, London, W4 5PY
UK Landline: 0808 178 1650
Mobile (National Rate): 0333 0142 970

www.sageappliances.com
Registered in England & Wales No. 8223512
Registered in Germany No. HRB 81309 (AG Düsseldorf)
Registered in France No. 879 449 866 RCS
Copyright BRG Appliances 2020
BTM800/STM800 UG6 B20
Copyright BRG Appliances 2021
SBL620
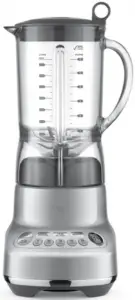
QUICK GUIDE
![]()
SAGE® RECOMMENDS SAFETY FIRST
At Sage® we are very safety conscious. We design and manufacture consumer products with the safety of you, our valued customer, foremost in mind. In addition we ask that you exercise a degree of care when using any electrical appliance and adhere to the following precautions.
IMPORTANT SAFEGUARDS
READ ALL INSTRUCTIONS BEFORE USE AND SAVE FOR FUTURE REFERENCE
- The full information book is available at sageappliances.com
- Before using the first time ensure your electricity supply is the same as shown on the label on the underside of the appliance.
- Remove and safely discard any packaging materials before first use.
- To eliminate a choking hazard for young children, safely discard the protective cover fitted to the power plug.
- This appliance is for household use only. Do not use the appliance for anything other than its intended use. Do not use in moving vehicles or boats. Do not use outdoors. Misuse may cause injury.
- Fully unwind the power cord before operating.
- Position the appliance on a stable, heat resistant, level, dry surface away from the edge and do not operate on or near a heat source such as a hot plate, oven or gas hob.
- Vibration during operation may cause the appliance to move.
- Do not let the power cord hang over the edge of a bench or table, touch hot surfaces or become knotted.
- Always ensure the appliance is turned OFF, unplugged at the power outlet and has been allowed to cool before cleaning, attempting to move or storing.
- Always turn the appliance to the off position, switch off at the power outlet and unplug at the power outlet when the appliance is not in use.
- Do not use the appliance if the power cord, plug, or appliance becomes damaged in any way. If damaged and maintenance other than cleaning is required please contact Sage Customer Service or visit sageappliances.com
- Any maintenance other than cleaning should be performed by an authorised Sage® service centre.
- Children should not play with the appliance.
- Cleaning of the appliance should not be carried out by children unless they are 8 year or older and supervised.
- The appliance and its cord should be kept out of reach of children aged 8 years and younger.
- The installation of a residual current safety switch is recommended to provide additional safety when using all electrical appliances. Safety switches with a rated operating current not more than 30mA are recommended. Consult an electrician for professional advice.
- Always ensure the appliance is properly assembled before use. The appliance will not operate unless properly assembled.
- Do not use the appliance on a sink drain board.
- Keep hands, fingers, hair, clothing as well as spatulas and other utensils away from moving or rotating parts during operation.
- Do not use the appliance for anything other than food and/or beverage preparation.
- In order to avoid the possible hazard of the appliance starting by itself due to inadvertent resetting of the overload protection, do not attach an external switching device (such as a timer) or connect the appliance to a circuit that can regularly switch the appliance on and off.
- Carefully read all instructions before operation and save for future reference.
- The appliance can be used by persons with reduced physical or mental capabilities or a lack of experience and knowledge, only if they have been given supervision or instruction concerning use of the appliance in a safe way and understand the hazards involved.
- This appliance shall not be used by children.
- Do not leave the appliance unattended when in use.
- Allow the motor to rest for 1 minute between each use.
3
- Be careful when handling and cleaning blades, as they are very sharp. Mishandling of the blades may cause injury.
- Avoid putting the cup or jug on the motor base while the motor is still spinning.
- Do not operate without any ingredients in the cup or jug.
- Never attempt to operate with damaged blades, or with utensils, or any foreign objects inside the cup or jug.
- Do not put the cup or jug in extremes of heat or cold, for example placing a cold jug into hot water, or vice versa.
- Lid must be firmly secured to the jug before operation to ensure internal contents do not escape, spray or overflow.
- Do not remove the jug from the motor base while blender is in use.
- Do not process hot or boiling liquids. Allow to cool before placing into the blender jug.
- Do not use blender while OVERLOAD PROTECTION is flashing on the LCD. If this occurs, unplug the blender and wait for 30 minutes until the motor has cooled. Once cooled, you will be able to use the blender as usual again.
- Under heavy load the blender should not be operated for more than 1 minute. Heavy load for this blender is defined as: 6 ice cubes (120g), 3 frozen banana halves (250g), 180g frozen raspberries, 500mL milk, 3 scoops ice cream (140g). Under loading equivalent to this or heavier the blender should not be operated for more than 1 minute.

The symbol shown indicates that this appliance should not be disposed of in normal household waste. It should be taken to a local authority waste collection centre designated for this purpose or to a dealer providing this service. For more information, please contact your local council office.
![]() To protect against electric shock, do not immerse the power plug, cord or appliance in water or any liquid.
To protect against electric shock, do not immerse the power plug, cord or appliance in water or any liquid.
SAVE THESE INSTRUCTIONS
4


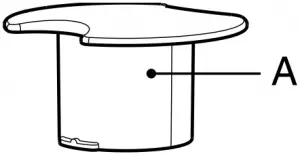
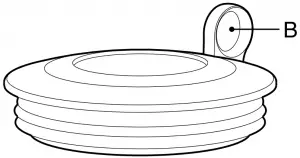
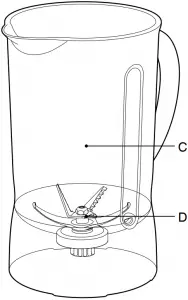
A. Inner measuring cup
B. Sage® Assist™ lid
C. 1.5 litre BPA-free Eastman Tritan™ jug
Impact resistant, shatter proof, and dishwasher safe.
D. Kinetix® blade and bowl system
E. Blender Base
F. SMOOTHIES and AUTO PULSE/ICE CRUSH programs
G. 5 electronic speeds
H. Auto Clean Function
![]()
Rating Information
220-240V~ 50/60Hz 1200-1300W
5

Functions
BEFORE FIRST USE
Before using your Sage® Blender for the first time, remove any packaging material and promotional labels.
Wash the lid, inner lid, blender jug (refer to “Care & Cleaning”) in warm, soapy water with a soft cloth. Rinse and dry thoroughly. Do not place parts in the dishwasher (with the exception of the blender jug).
Please refer to the “Care & Cleaning” Section for further details. The motor base can be wiped with a damp cloth. Dry thoroughly.
ASSEMBLING AND ATTACHING THE BLENDER
Step 1
Place the motor base on a flat, dry surface such as a counter-top. Ensure that the motor base is turned off at the ON / OFF button and the power cord is unplugged.
Step 2
With the blender jug in the upright position place it on the motor base. The handle of the blender can be positioned to the left or right hand side of the appliance.

Step 3
Add food or liquid into the blender jug ensuring not to exceed the ‘MAX’ mark.
Place the blender lid firmly into position on the top of the blender jug. Insert the clear inner measuring lid into the blender lid and turn clockwise to lock into position.

Your Sage® Blender features a Sage® Assist™ Lid. This allows the lid to fit tightly onto the blender jug, avoiding displacement during operation. The ring pull design allows the user to easily remove the lid with a simple leverage action.
Step 4
Plug power cord into a 220-240V power outlet and turn on.
Step 5
Press the ON / OFF button on the far left of the control panel to turn the blender on.
The ON / OFF button will illuminate and flash. The LCD timer screen will illuminate with ’00’ displayed.
- Flashing light indicates ready to operate.
Avoid any contact with moveable parts while in operation. - Do not fill the blender jug above the ‘MAX’ line. When the blender jug is filled at or near the ‘MAX’ line place one hand on the blender lid to avoid displacement of the lid during operation.

WARNING
Oils in citrus rind can damage the material of your blender jug if being exposed to it for a longer period. Always clean your blender jug immediately after processing citrus rind.
6

MANUAL SPEED SELECTION ON / OFF
The ON / OFF button powers the unit into READY mode.
ELECTRONIC SPEED CONTROL
There are 5 electronic speed buttons from MIX through to LIQUIFY.
MIX combines more delicate foods with a folding motion, and is good for combining wet and dry ingredients.
LIQUIFY is the fastest setting, and is ideal for breaking down ingredients to make cocktails and other finely blended mixtures.
Select the required speed (1 to 5) by pressing the corresponding speed button. The blender will start to operate and the selected speed button will illuminate. The ON / OFF button will illuminate and cease to flash.
The LCD timer screen will start counting up in one second increments until 120 seconds is reached.

Operate the blender only for the appropriate amount of time required do not over blend. When 120 seconds is reached, the blender will automatically stop blending and the selected speed button illumination will go out.
The ON / OFF button will illuminate and flash. After a few seconds the LCD timer screen will revert to ’00’.
- The Sage® Blender will automatically stop blending after 120 seconds. This is a safety feature and restricts wear on the motor.
- The speed can be changed at any time during the blending process. Each time a new speed is selected its button will illuminate and the previous speed button illumination will go out. The number of seconds on the LCD timer screen will continue to count upwards to 120 seconds unless interrupted.
Count-up timer
The blender timer counts up in seconds as it blends on one of the 5 electronic speeds from MIX to LIQUIFY. When using the timer this way, the blender will stop after 2 minutes.
PRESET PROGRAMS
Your Sage® Blender features three additional functions, ‘AUTO PULSE/ICE CRUSH’, ‘GREEN SMOOTHIE’ and ‘SMOOTHIE’. These three pre-programmed cycles automatically adjust the blending time and speeds to optimise blending results. The maximum amount of ice cubes the blender can blend at any one time is 1 standard ice tray or 250g. Select the required function by pressing the corresponding function button. The blender will start to operate and the selected function button will illuminate. The ON / OFF button will illuminate and stop flashing. The LCD timer screen will start counting down in one second increments until ’00’ is displayed.
AUTO CLEAN
Use to remove most of the ingredients off the blender walls and blades. Add 2 cups warm soapy water, and press the clean button.
For harder to clean, sticky or thick ingredients, add ½ teaspoon of dish liquid detergent for extra cleaning power. For best results, clean the blender jug this way immediately after use.
NOTE
If the blender is running and a different button is pressed, the speed will automatically switch to that program without stopping.
Never place anything other than food and liquids in the blender while the motor is running.
NOTE
Use the PULSE button when the food that is being processed is too thick or coarse to circulate within the blender jug.
At the end of use, always ensure the blender is turned off by pressing the ON / OFF button on the control panel. Then unplug the cord. Ensure the motor and blades have completely stopped before attempting to move the appliance, or when the Sage® Blender is not in use and before disassembling, cleaning and storing.
7

| PROBLEM | EASY SOLUTION |
| Motor doesn’t start or blade doesn’t rotate | • Check the blender jug and lid are securely in place. • Check the ON / OFF button and selected function button is illuminated. • Check that the power plug is properly inserted into the power outlet. |
| Food is unevenly chopped | • This can happen when too much food is being blended at one time. Try a smaller amount, and work in batches if necessary. • The ingredients may be too large. Try cutting into smaller pieces. For best results, ingredients should be in pieces no larger than 2cm. |
| Food is chopped too fine or is watery | • Try blending for shorter period of time. Use the PULSE function for better control. |
| Food sticks to blade and jug | • The mixture may be too thick. Try adding more liquid and/or using a slower speed for blending. |
| Blender overloaded (all lights flashing) | • This blender has overload protection to prevent damage to the motor. OVERLOAD PROTECTION will flash on the LCD. Unplug and allow the blender to cool down for 30 minutes. Once cooled, you will be able to use the blender as usual again. • We recommend blending in smaller batches, or cutting ingredients into smaller batches. |
Care & Cleaning
Jug and lid
In order to keep your Jug clean and avoid food drying on the blades and jug, follow the below steps as soon as possible after use
- Rinse most of the ingredients off the jug and lid.
- Fill the jug with 500ml of warm water and press the AUTO CLEAN button. If thick or sticky ingredients require extra cleaning power add a few drops of dish liquid detergent.
- Rinse the jug and lid again and/or wash separately in warm soapy water with a soft cloth or bottle brush.
- It is most effective to clean the jug immediately after use.
Motor base
To clean the motor base, wipe with a soft, damp cloth then dry thoroughly. Wipe any excess food particles from the power cord.
Cleaning agents
Do not use abrasive scouring pads or cleaners on either the motor base or the jug, as they may scratch the surface. Use only warm soapy water with a soft cloth.
Dishwasher
The blender jug and lid can be washed in the dishwasher on a standard wash cycle. The jug can be placed on the bottom shelf, however the lid and inner measuring cap should be washed on the top shelf only. Be aware that washing parts on a regular base in the dishwasher can shorten the life of them due to prolonged exposure to harsh detergents, hot water and pressure.
Stubborn food stains and odours
Strong smelling foods such as garlic, fish and some vegetables such as carrots may leave an odour or stain on the blender jug and lid. To remove, soak blender jug and lid for 5 minutes in warm soapy water. Then wash with a mild detergent and warm water, rinse well and dry thoroughly. Store jug with the lid off.
Storage
Store your blender upright with the blender jug assembled on the motor base, or beside it. Do not place anything on top. To allow air to circulate, keep the lid off.
8

Notes
9
BRG Appliances Limited
Unit 3.2, Power Road Studios, 114 Power Road, London, W4 5PY
Freephone (UK Landline): 0808 178 1650
Mobile Calls (National Rate): 0333 0142 970
![]()
Registered in Germany No. HRB 81309 (AG Düsseldorf).
Registered in England & Wales No. 8223512.
Due to continued product improvement, the products illustrated or photographed in this document may vary slightly from the actual product.
Copyright BRG Appliances 2017.
SBL620 A18
]]>BJE520
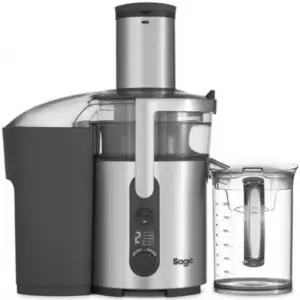
QUICK GUIDE
![]()
SAGE® RECOMMENDS SAFETY FIRST
At Sage® we are very safety conscious. We design and manufacture consumer products with the safety of you, our valued customer, foremost in mind. In addition we ask that you exercise a degree of care when using any electrical appliance and adhere to the following precautions.
IMPORTANT SAFEGUARDS
READ ALL INSTRUCTIONS BEFORE USE AND SAVE FOR FUTURE REFERENCE
- A downloadable version of this document is also available at sageappliances.com
- Before using for the first time ensure your electricity supply is the same as shown on the label on the underside of the appliance.
- Remove and safely discard any packaging materials before first use.
- To eliminate a choking hazard for young children, safely discard the protective cover fitted to the power plug.
- This appliance is for household use only. Do not use the appliance for anything other than its intended use. Do not use in moving vehicles or boats. Do not use outdoors. Misuse may cause injury.
- Fully unwind the power cord before operating.
- Position the appliance on a stable, heat resistant, level, dry surface away from the edge and do not operate on or near a heat source such as a hot plate, oven or gas hob.
- Vibration during operation may cause the appliance to move.
- Do not let the power cord hang over the edge of a bench or table, touch hot surfaces or become knotted.
- Always ensure the appliance is turned OFF, unplugged at the power outlet and has been allowed to cool before cleaning, attempting to move or storing.
2
- Always turn the appliance to the OFF position, switch off at the power outlet and unplug at the power outlet when the appliance is not in use.
- Do not use the appliance if the power cord, plug, or appliance becomes damaged in any way. If damaged or maintenance other than cleaning is required, please contact Sage Customer Service or go to sageappliances.com
- Any maintenance other than cleaning should be performed by an authorised Sage® service centre.
- Children should not play with the appliance.
- Cleaning of the appliance should not be carried out by children unless they are 8 years or older and supervised.
- The appliance and its cord should be kept out of reach of children aged 8 years and younger.
- The installation of a residual current safety switch is recommended to provide additional safety when using all electrical appliances. Safety switches with a rated operating current not more than 30mA are recommended. Consult an electrician for professional advice.
- Always ensure the appliance is properly assembled before use. The appliance will not operate unless properly assembled.
- Do not use the appliance on a sink drain board.
- Keep hands, fingers, hair, clothing as well as spatulas and other utensils away from moving or rotating parts during operation.
- Do not use the appliance for anything other than food and/or beverage preparation.
- In order to avoid the possible hazard of the appliance starting by itself due to inadvertent resetting of the overload protection, do not attach an external switching device (such as a timer) or connect the appliance to a circuit that can regularly switch the appliance on and off.
- Carefully read all instructions before operation and save for future reference.
- The appliance can be used by persons with reduced physical or mental capabilities or a lack of experience and knowledge, only if they have been given supervision or instruction concerning use of the appliance in a safe way and understand the hazards involved.
3
- This appliance shall not be used by children.
- Do not leave the appliance unattended when in use.
- Do not push food into the feed chute with your fingers or other utensils. Always use the food pusher provided. Do not place hand or fingers into the food chute when it is attached to the appliance.
- Do not juice stone fruit unless seeds and/or stones have been removed.
- Make sure the stainless steel filter basket has stopped rotating and the motor has completely stopped before releasing the safety locking arm and/or attempting to move the appliance, when the juicer is not in use, and before disassembling, cleaning and storing.
- Any significant spillage onto the surface under or around the appliance, or onto the appliance itself, should be cleaned and dried before continuing to use the appliance.
- Be careful when handling the stainless steel filter basket as the small cutting blades at the base of the filter basket are very sharp. Mishandling may cause injury.
- Remove rind from all citrus fruit before juicing.
- Do not use the appliance if the rotating sieve (filter basket) or lid is damaged.
- Always make sure juicer cover is clamped securely in place before motor is turned on.
Do not unfasten interlock arm while juicer is in operation.
 The symbol shown indicates that this appliance should not be disposed of in normal household waste. It should be taken to a local authority waste collection centre designated for this purpose or to a dealer providing this service. For more information, please contact your local council office.
 To protect against electric shock, do not immerse the power plug, cord or appliance in water or any liquid.
SAVE THESE INSTRUCTIONS
4

Components

A. Unique Direct Central Feed System
B. 84mm extra wide feed chute
C. Juicer cover (Top shelf dishwasher safe).
D. 3 litre pulp container (Top shelf dishwasher safe).
E. Stylish stainless steel design
F. ON / OFF switch
G. LCD speed indicator
H. Electronic variable speed control dial
I. Food pusher
J. Die-cast metal interlocking safety arm
K. Filter basket (top shelf dishwasher safe).
L. Motor drive coupling
M. Filter bowl surround (Top shelf dishwasher safe).
N. 1.2 litre juice jug and lid (top shelf dishwasher safe).
O. Heavy duty motor
![]()
Rating Information
220-240V~50/60Hz 1100-1300W
5

Q. 
R. 
S. 
T. 
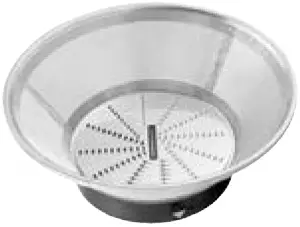
P. Custom designed juice nozzle (top shelf dishwasher safe).
Q. Cleaning Brush (top shelf dishwasher safe).
R. Froojie® Insert
S. Froojie® Disc
T. Nutri Disc™
U. Built in froth separator
V. Juice jug lid
6
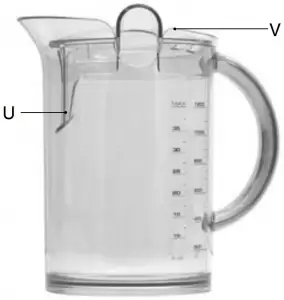
Assembly
BEFORE FIRST USE
Before using your juicer for the first time, remove any packaging material and promotional stickers and labels. Ensure the appliance is switched off at the power outlet and the power cord is unplugged.
Wash the filter bowl surround, Nutri Disc™, juicer cover, Froojie® Disc, Froojie® Insert, food pusher, pulp container and juice jug and lid in warm, soapy water with a soft cloth. Rinse and dry thoroughly. The motor base can be wiped with a damp cloth. Dry thoroughly.
FOR USE WITH JUICE EXTRACTOR
1. Place the motor base on a flat, dry surface such as a bench top. Ensure that the motor base is switched OFF at the control panel, then switch the appliance off at the power outlet and unplug the cord.
2. Place the filter bowl surround on top of the motor base.

3. Align the arrows at the base of the Nutri Disc™ with the arrows on the motor drive coupling and push down until it clicks into place. Ensure the Nutri Disc™ is fitted securely inside the filter bowl surround and onto the motor base.
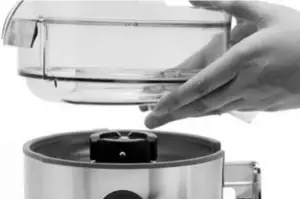
4. Place the juicer cover over the filter bowl surround, positioning the feed chute over the juice disc and lower into position.
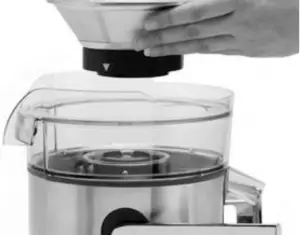
5. Raise the safety locking arm up and locate it into the two grooves on either side of the juicer cover. The safety locking arm should now be in a vertical position and locked into place on top of the juicer cover.
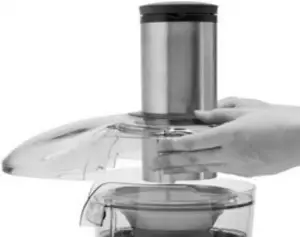
6. Slide the food pusher down the feed chute by aligning the groove of the food pusher, with the small protrusion on the inside top of the feed chute. Continue to slide the food pusher down into the feed chute.

7
7. Place the pulp container into position by tilting the base of the pulp container away from the motor base and slide the top of the pulp container over the bottom of the juice cover. Tilt the base of the pulp container back into the motor base ensuring it is supported by the container support extending from under the motor base.

To minimise cleaning, line the pulp container with a plastic freezer bag to collect the pulp. Pulp can then be used in other dishes, or as compost for the garden or discarded.
8. Place the juice jug provided under the spout on the right-hand side of the juicer. The juice jug lid can be used to avoid any splatter. Alternatively you can fit the custom-designed juice nozzle over the juice spout and place a glass underneath. The juice nozzle will prevent splatter, ensuring mess free juicing.
FOR USE WITH FROOJIE® EXTRACTOR
1. Place the filter bowl surround on the top of the motor base.
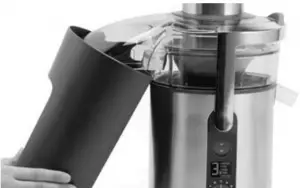
2. Place the Froojie® Disc into the filter bowl surround and onto the motor drive coupling. Push down until it clicks into place. Ensure the Froojie® Disc is fitted securely inside the filter bowl surround and onto the motor base.
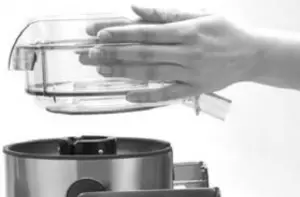
Never use Froojie® Disc without Froojie® Insert. They must always be used together.
3. Place the Froojie® Insert into the filter bowl surround, making sure the warning label on the handle is facing upwards.

To assemble remaining parts follow steps 4-7 listed on previous page.
NOTE
There is no need to use pulp container when using Froojie® extractor.
8
PREPARATION OF FRUIT AND VEGETABLES FOR FROOJIE® EXTRACTOR
Only soft fruits should be used with the Froojie® extractor.
When using fruits with hard inedible skins, such as mangoes, pineapple or kiwi fruit, always peel before juicing.
When using fruits with a hard core such as pineapple, always remove this before juicing.
All fruits with pits, hard seeds or stones such as nectarines, peaches, mangoes and apricots must be pitted or deseeded before juicing.
Passionfruit pulp, peeled kiwi fruit and berries can be processed without removing seeds.
When using the Froojie® extractor, use low speed (speed 1). Always ensure motor is running before adding fruit and/or vegetables to feed tube.
| FROOJIE® EXTRACTOR | SPEED |
| Apricots (stone removed) | 1 |
| Bananas (peeled) | 1 |
| Kiwi fruit (peeled) | 1 |
| Mangoes (peeled, stone removed) | 1 |
| Melons (peeled) | 1 |
| Pears soft (stalk and core removed) | 1 |
| Pineapple (peeled and cored | 1 |
| Raspberries | 1 |
| Strawberries (stalks removed) | 1 |
| Watermelon (peeled, seeds removed) | 1 |
| Use speed 2 to push out any remaining fruit pulp in juice collector | 2 |

WARNING
Do not put hard fruit and vegetables (i.e. Carrots, apples, fresh beetroot, etc.) or ice through juicer when using Froojie® extractor. This could damage parts of the unit.
PREPARATION OF FRUIT AND VEGETABLES FOR JUICE EXTRACTOR SPEED SELECTOR TABLE
| FRUIT / VEGETABLES | SUGGESTED SPEED |
| Apples | 5 |
| Apricots (stone removed) | 2 |
| Beetroot (cleaned, trimmed) | 5 |
| Blueberries | 1 |
| Broccoli | 4 |
| Brussel Sprouts (trimmed) | 5 |
| Cabbage | 4 |
| Carrots (cleaned) | 5 |
| Cauliflower | 4 |
| Celery | 5 |
| Cucumber (peeled) | 2 |
| Cucumber – soft skinned | 4 |
| Fennel | 5 |
| Grapes (seedless) | 1 |
| Kiwi fruit (peeled) | 2 |
| Mangoes (peeled, stone removed) | 2 |
| Melons (peeled) | 1 |
| Nectarines (stone removed) | 2 |
| Oranges (peeled) | 3 |
| Peaches (stone removed | 2 |
| Pears – hard (stalks removed) | 5 |
| Pears – soft (stalks removed) | 2 |
| Pineapple (peeled) | 5 |
| Plums (stone removed) | 2 |
| Raspberries | 1 |
| Tomatoes | 1 |
| Watermelon | 1 |
9

Care & Cleaning
Ensure the juicer is turned off by pressing the ON / OFF button on the control panel to OFF. Then switch the appliance off at the power outlet and unplug the cord. Ensure the juicer is correctly disassembled.
FOR EASIER CLEANING
- Clean as you go and avoid dried on juice or pulp residue.
- Immediately after each use, rinse removable parts in hot water to remove wet pulp. Allow parts to air dry.
- To minimise cleaning, line the pulp container with a plastic freezer bag to collect the pulp. Pulp can then be used in other dishes or as compost for the garden or discarded.
CLEANING THE MOTOR BASE
- Wipe the motor base with a soft, damp cloth then dry thoroughly.
- Wipe any excess food particles from the power cord.
Do not use abrasive scouring pads or cleaners when cleaning the parts or motor base as they may scratch the surface.
CLEANING THE FILTER BOWL SURROUND, JUICER COVER, FROOJIE® INSERT, FOOD PUSHER, PULP CONTAINER
- Wash all parts in warm soapy water with a soft cloth. Rinse and dry thoroughly.
The filter bowl surround, juicer cover and pulp container are dishwasher safe (top shelf only).
The Froojie® Insert is not dishwasher safe. Please wash in warm water.
CLEANING THE JUICE JUG
- Rinse the juice jug and lid with froth attachment under running water.
- Wash both parts in warm soapy water with a soft cloth. Rinse and dry thoroughly.
- The juice jug and lid are dishwasher safe (top shelf only).
- Discolouration of the plastic may occur with strongly coloured fruit and vegetables. To help prevent this, wash parts immediately after use. If discolouration does occur, the plastic parts can be soaked in water with 10% lemon juice or they can be cleaned with a non abrasive cleaner.
WARNING
Do not immerse the motor base in water or any other liquid. The centre of the juice disc and feed chute contains small sharp blades to process fruit and vegetables during the juicing function. Do not touch blades when handling the juice disc or feed chute.
CLEANING THE JUICE DISC
For consistent juicing results always ensure that the juice disc is thoroughly cleaned using the supplied cleaning brush.
- Soak the juice disc in hot soapy water for approximately 10 minutes immediately after juicing is completed. If pulp is left to dry on the filter it may clog the fine pores of the filter mesh thereby lessening the effectiveness of the juicer.
- Using the cleaning brush, hold the juice disc under running water and brush from the inside of the basket to the outer rim. Avoid touching the small sharp blades in the centre of the juice disc. After cleaning the juice disc, hold it up towards a light to ensure the fine mesh holes are not blocked. If the holes are blocked, soak the juice disc in hot water with 10% lemon juice to loosen the blocked holes. Alternatively, wash the juice disc in the dishwasher.

- The juice disc is dishwasher safe (top shelf only).
- Do not soak the juice disc in bleach or other abrasive cleansers.
- Always treat the juice disc with care as it can be easily damaged.
10

Troubleshooting
| POSSIBLE PROBLEM | EASY SOLUTION |
| Machine will not work when switched ON | • The safety locking arm may not be correctly engaged in the vertical operating position with the locking arm located into the two grooves on either side of the juicer cover. |
| Motor appears to stall when juicing | • Wet pulp can build up under the juicer cover if the juicing action is too vigorous. Try slower juicing action by pushing the food pusher down more slowly. Follow cleaning instructions and clean the filter bowl surround, the juice disc and the juicer cover.
• The juicer will automatically stop operating if the motor is stalled for more than 10 seconds. Either too much food is being processed at one time or the pieces are not small enough. Try trimming the food or cutting into smaller pieces of even size and processing a smaller amount per batch. To continue juicing, reset the juicer by pressing the ON / OFF switch on the control panel to OFF then turn the appliance back on by pressing ON / OFF switch to ON. • Hard fruits and vegetables will put excess strain onto the motor if a low speed is selected. Please refer to the juicing guide to determine the correct speed for the fruits and vegetables selected for juicing. |
| Excess pulp building up the Stainless Steel Filter Disc | • Stop the juicing process, remove the juicer cover, scrape off pulp, reassemble and begin juicing again. Try alternating (soft and hard) vegetable and fruit varieties. |
| Pulp too wet and reduced extracted juice | • Try a slower juicing action.
• Remove juice disc and thoroughly clean mesh walls with a cleaning brush. Rinse the juice disc under hot water. If the fine mesh holes are blocked, soak the basket in a solution of hot water with 10% lemon juice to unblock the holes or wash in the dishwasher. This will remove excess fibre build up (from fruit or vegetables) which could be inhibiting the juice flow. |
| Juice leaks between the rim of the juicer cover | • Try a slower juicing speed and push the food pusher down the feed chute more slowly. |
| Juice sprays out from spout | • Use juice jug and lid provided, or if juicing into a glass use the custom designed juice nozzle.
• Try using fruits with more water content to help flush through the contents. Additionally, try a slower juicing action by feeding one piece in at a time and by pushing the food pusher down more slowly. |
| When using the Froojie® extractor, the filter bowl surround becomes full and clogs its spout | • Try using fruits with more water content to help flush through the contents. Additionally, try a slower juicing action by feeding one piece in at a time and by pushing the food pusher down more slowly. |
| Overheating with excessive loads. | • The juicer is fitted with a safety device which safeguards against overheating with excessive loads. If overheating occurs, the juicer will automatically activate the overload protection device and the unit will switch itself off. When the overload protection is activated, unplug the juicer from the power outlet for at least 15 minutes to allow the unit to cool. Then plug the juicer into the power outlet and use as normal. |
11

Guarantee
2 YEAR LIMITED GUARANTEE AND 5 YEAR LIMITED MOTOR GUARANTEE
Sage Appliances guarantees this product for domestic use in specified territories for 2 years for all parts of the product and 5 years for the product’s motor from the date of purchase against defects caused by faulty workmanship and materials.
During this guarantee period Sage Appliances will repair, replace, or refund any defective product (at the sole discretion of Sage Appliances).
All legal warranty rights under applicable national legislation will be respected and will not be impaired by our guarantee. For full terms and conditions on the guarantee, as well as instructions on how to make a claim, please visit www.sageappliances.com.
12
13
14
15
GBR IRE
BRG Appliances Limited
Unit 3.2, Power Road Studios, 114 Power Road, London, W4 5PY
Freephone (UK Landline): +44 (0)808 178 1650
Mobile Calls (National Rate): 0333 0142 970
![]()
Registered in England & Wales No. 8223512.
• Due to continued product improvement, the products illustrated or photographed in this document may vary slightly from the actual product.
Copyright BRG Appliances 2019.
SJE520 UG1 C19
]]>