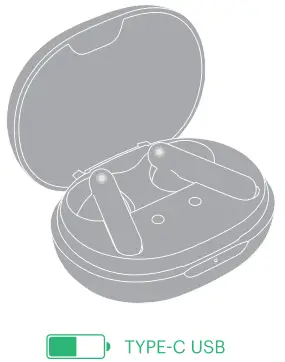
FRONT
SPECIFICATIONS
|
PACKAGE CONTAINS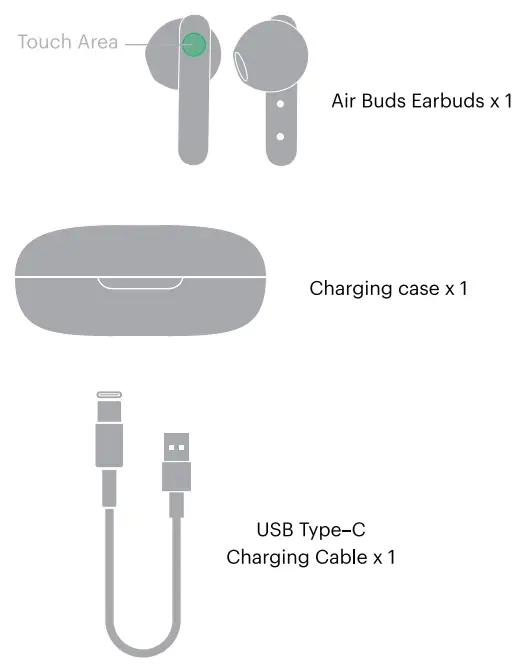 |
CHARGING CASE SPECIFICATION
- Charging Case Weight: 38 grams
- Charging Port: USB Type-C
- Number of Earbud Charges from Case: Up to 4 times
- Case Charging Time: Up to 2 hours
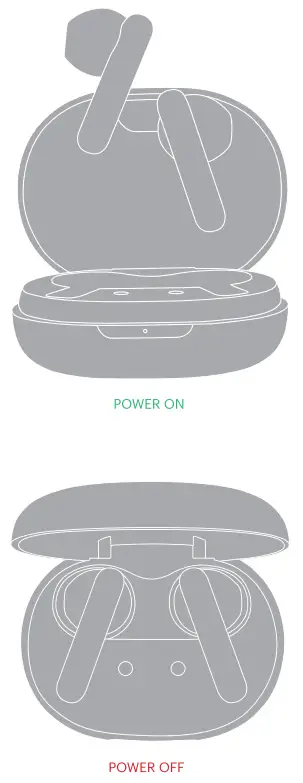
POWER ON
The earbuds will automatically turn on once removed from the charging case.
POWER OFF
The earbuds will automatically turn off once placed inside the charging case.
PAIRING
Take out the earbuds from the charging case and turn on the Bluetooth on your device.
- Select ‘Add Device’ and from the list of devices, select Air Buds.
- Your Air Buds are now paired with your device and ready to use!
Note: Your Air Buds will automatically connect to the last paired device as soon as you remove them from the charging case again.
RESET
- Before resetting, make sure that Air Buds are fully charged and are disconnected from other Bluetooth devices.
- On your paired device, remove or delete Air Buds from the list of paired devices in the Bluetooth Menu.
- Place both the earbuds inside the charging case.
- Long press both the earbuds for 6 seconds while they are inside.
Your Noise Air Buds have now been reset and are ready to pair again.
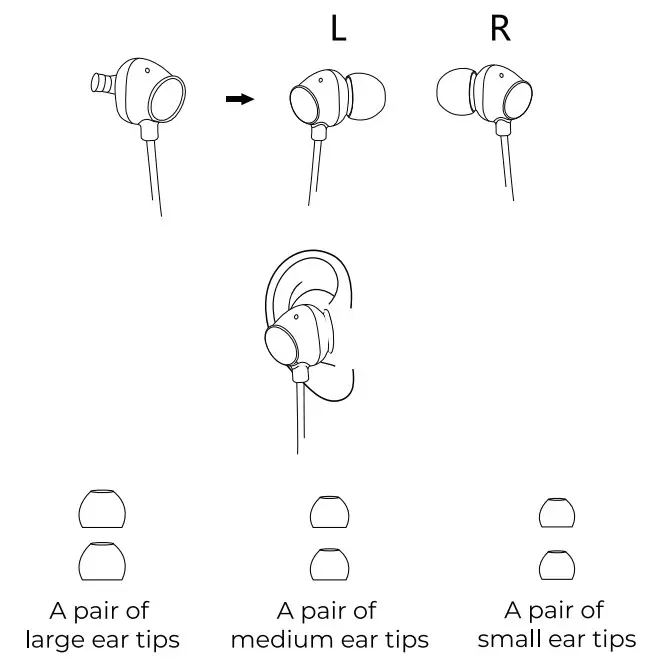
Follow the images and chart to learn how to wear the earbuds in the right manner.
CONTROLS
|
Tap twice on either earphone Tap the left earphone thrice Tap the right earphone thrice Tap the right earphone once |
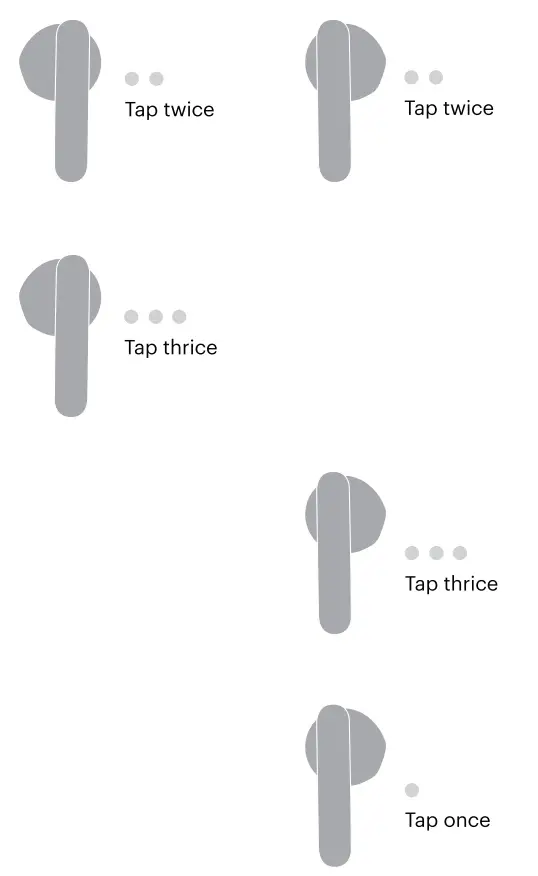 |
BACK
CONTROLS
![]() Volume Down
Volume Down
Tap the left earphone once
![]() Answer/End a Call
Answer/End a Call
Tap once on either earphone to answer Tap twice on either earphone to end
![]() Reject Call
Reject Call
Touch and hold either earphone for 2 seconds
![]() Voice Assistant
Voice Assistant
Touch and hold either earphone for 2 seconds
CHARGING
EARBUDS
Place both earbuds in the case to charge them. The earbuds LED will light up white for 5s and then turn off.
![]() White
White![]()
CASE
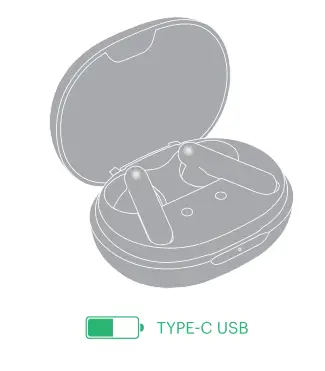 Charge the case via the supplied USB Type-C from any PC, laptop, or USB charger. White LED flashes slowly while charging constant white LED when fully charged.
![]() White LED Flashes
White LED Flashes![]()
![]() White
White![]()
WARRANTY
The warranty covers your Noise product, including accessories against manufacturing defects (if any) for 1 year from the date of purchase.
Things that are not covered in the warranty
- Unauthorized tampering, modifications, or repairs of the product.
- Physical damage of the product on the account of abuse, handling, storage, installation, or testing including any use that is not in accordance with the product manual or documentation, or any other instruction provided along with the Noise product.
For further information on product replacement/refund-related queries, please refer to the terms and conditions mentioned in our online return policy section on www.gonoise.com.
WARRANTY REGISTRATION
www.gonoise.com/pages/
warranty-registration
![]() SUPPORT AND SERVICE
SUPPORT AND SERVICE
![]() 1 YEAR LIMITED WARRANTY MLA
1 YEAR LIMITED WARRANTY MLA
https://www.gonoise.com/pages/warranty-registration
SCAN ME
CUSTOMER QUERY
For any assistance, please reach out to us at support.gonoise.in
SAFETY FOR YOU AND YOUR NOISE AIR BUDS
Follow these tips and you & your Air Buds will be happy together for a very long time.
![]() Do not expose Air Buds to liquids, moisture, or humidity. It has electronics and a battery in it. Neither of them likes getting wet.
Do not expose Air Buds to liquids, moisture, or humidity. It has electronics and a battery in it. Neither of them likes getting wet.
![]() Don’t use abrasive cleaning solvents to clean your Air Buds. Wipe them down with a slightly damp cloth if and when necessary.
Don’t use abrasive cleaning solvents to clean your Air Buds. Wipe them down with a slightly damp cloth if and when necessary.
![]() Do not expose Air Buds to extremely high or low temperatures as this may damage the battery or even deform the plastic parts.
Do not expose Air Buds to extremely high or low temperatures as this may damage the battery or even deform the plastic parts.
![]() Don’t throw your Air Buds in a fire to dispose of them. The internal battery may explode.
Don’t throw your Air Buds in a fire to dispose of them. The internal battery may explode.
![]() Don’t try to disassemble your Air Buds. There are no user-serviceable parts inside it.
Don’t try to disassemble your Air Buds. There are no user-serviceable parts inside it.
![]() Try not to drop your Air Buds and keep them away from sharp objects such as keys in your pockets.
Try not to drop your Air Buds and keep them away from sharp objects such as keys in your pockets.
![]() Only charge your Noise Air Buds from 5V USB ports such as phone chargers and laptops or PCs.
Only charge your Noise Air Buds from 5V USB ports such as phone chargers and laptops or PCs.
![]() Never listen to music at high volumes or you may permanently damage your hearing.
Never listen to music at high volumes or you may permanently damage your hearing.
![]() Pay attention to your surroundings and never wear ANY headphones while riding, driving, or walking in traffic. You do not come with any warranty.
Pay attention to your surroundings and never wear ANY headphones while riding, driving, or walking in traffic. You do not come with any warranty.
Air Buds
Please refer to this manual before using the product

Colorful Pro 3
Please refer to this manual before using the product
What’s In the box
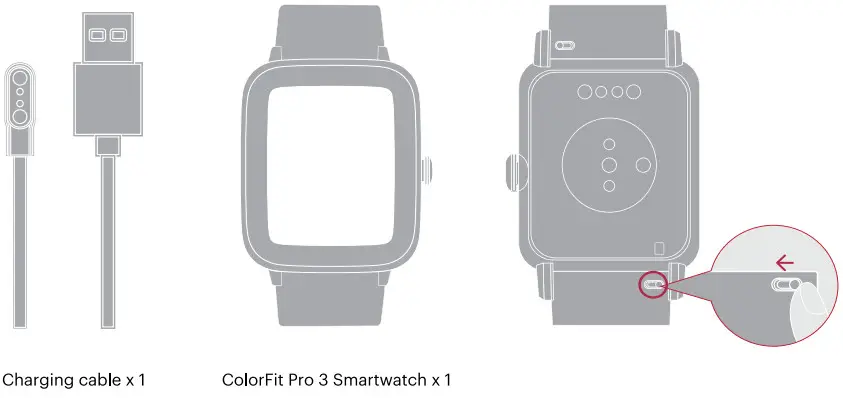
| Watch Features | |
|
|
Charging the ColorFit Pro 3 Smart Watch
Before using your ColorFit Pro 3 for the first time, charge the battery to its full capacity. Use the charging cable provided with the watch to charge. On a full charge, ColorFit Pro 3 can last up to 10 days.
Note: The battery life and time to fully charge your device may vary as per usage and other factors.
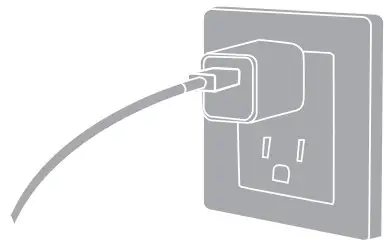
To charge ColorFit Pro 3
- Plug the USB cable into a power adaptor. Plug the power adaptor into an electrical socket. (Power adaptor not included)
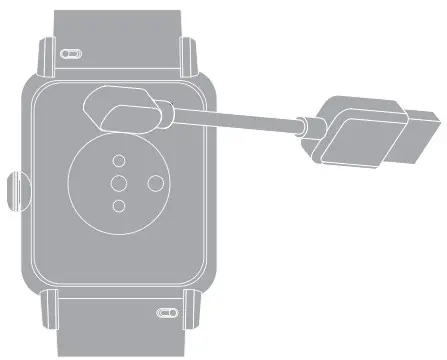
- Place your watch on the charging dock as shown below
- While your watch is charging, the screen will show the time, day, date, battery percentage, and charging progress (indicated by the edge of the watch face)
- Once the battery is fully charged, remove it from the charging dock
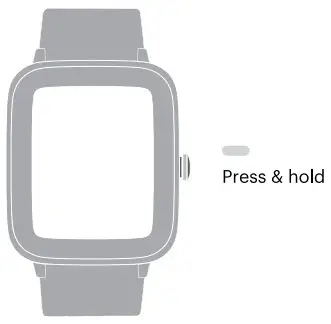
Power On
Press and hold the side button for a few seconds to power on and off the watch.
Power Off
Go to setting. Select power off and choose to power off.
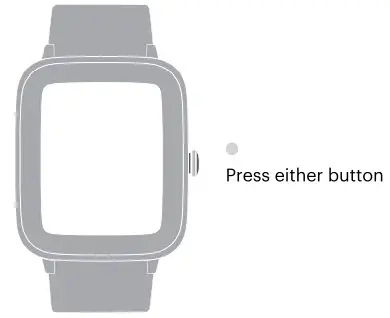
 Waking Up the Watch
To preserve the battery, the watch screen turns off when not in use. To turn the screen back on, you can wake up the watch by:
- Pressing the side button
- Turning on the wrist sense
Watch Navigation
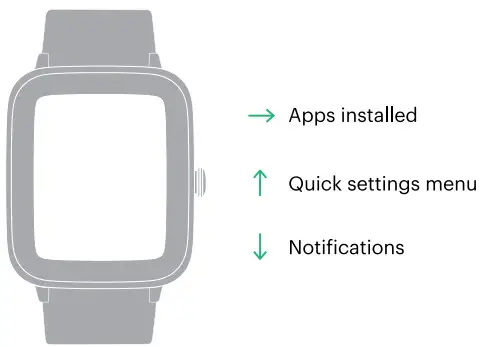
The colorful Pro 3 Smart Watch has a TFT Colour touch screen. Navigate the watch by tapping on the screen, swiping side to side, up and down, pressing the side button.
Home Screen Navigation
The home screen is the watch face. From the home screen:
- Swipe left or right to access shortcuts.
- Swipe up to go to the quick settings menu.
- Swipe down to check your message notification.
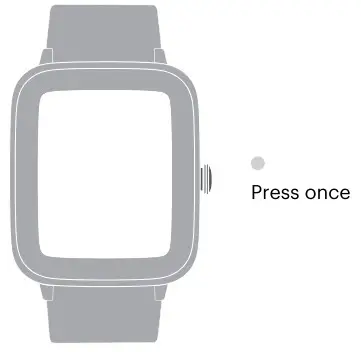
Button Navigation
- Press the side button to turn on the watch display.
- Press the side button again to go to the main menu.
Setup
Before pairing, make sure that your smartphone and smartwatch are next to each other.
The app will ask for personal information such as height, weight, and sex to calculate your stride length, distance covered, calorie burn rate, and metabolic rate. When you set up your account, your name and profile picture will be visible to other users.
- Turn on Bluetooth and the location on your mobile
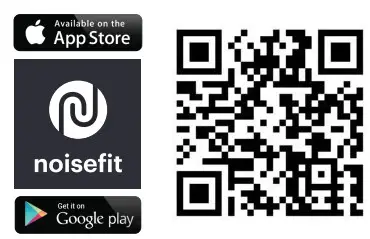
- On your smartphone, download the NoiseFit app from the Play Store or the App Store and install it.
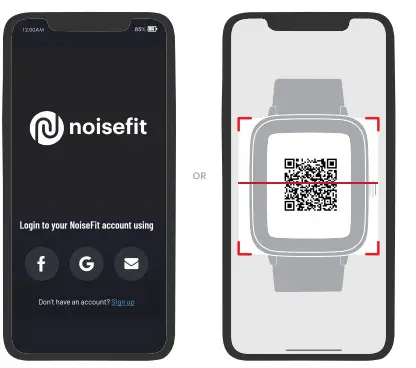
- Create an account or login using an existing account.
Note: Ensure that your smartphone is running on Android 4.4+ or iOS 9 + and is connected to mobile data or a Wi-Fi network.
http://www.youduoyun.com/q/1000006.html
Pair the Watch
- Open the NoiseFit app and allow the Bluetooth and GPS positioning to be turned on.
- Feed-in your personal information and health goals in the app.
- Go to the ‘Add Device’ page in the app, select the device type and link the watch.

Watch Features
Watch Face
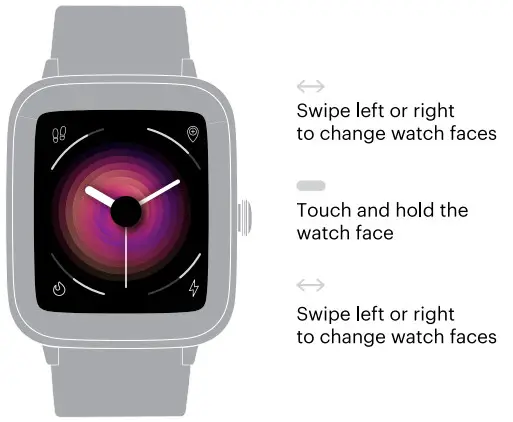
You can switch between different watch faces in the watch, choose and download cloud-based or you can create your own watch faces in the NoiseFit app.

Changing the Watch Face
Give your screen a personalized style by changing or customizing the watch face from the NoiseFit app or the watch.
On the Watch
Touch and hold the home screen. Swipe and choose from the watch faces.
In the App
Go to watch faces, select the watch face of your choice and tap save to change the watch face.
Daily Activity
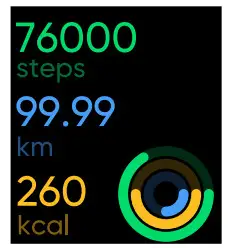
You can check your daily activity progress in terms of the steps taken, distance covered, calories burned, and time duration.
 Heart Rate
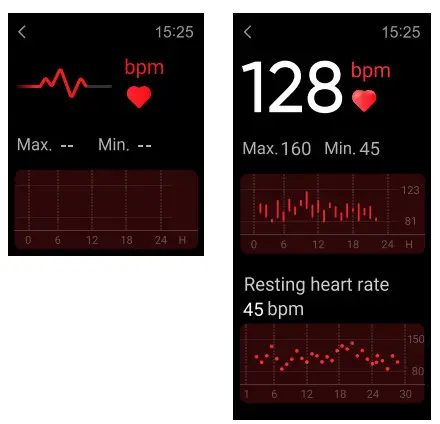
Colorful Pro 3 supports 24/7 heart rate tracking. You can select the measurement frequency in the app settings. To measure your heart rate in real-time, go to the Heart Rate monitor and tap on the heart (icon). You can view the all-day data on the watch and app. Note: Make sure your arms and wrists are still and there is no space between your watch and the wrist.
Stress Levels
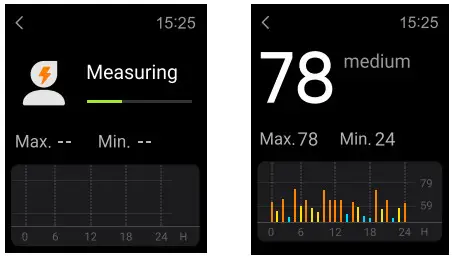
colorful Pro 3 supports 24-hour stress level measurement and viewing of all-day measurement data.
To measure the stress levels in real-time, go to the Stress Level feature and wait for it to measure. Note: Make sure your arms and wrists are still and there is no space between your watch and the wrist.
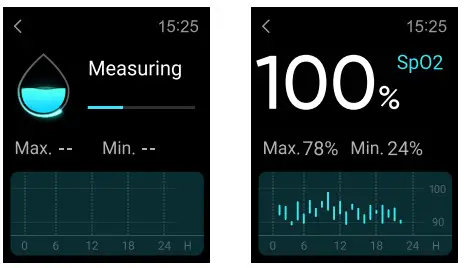
Blood Oxygen
colorful Pro 3 supports viewing of the highest and lowest values of Blood Oxygen level of the day and the measurement data throughout the day.
To measure your blood oxygen level in real-time, go to the Blood Oxygen monitor and let it measure.
Note: Make sure your arms and wrists are still and there is no space between your watch and the wrist.
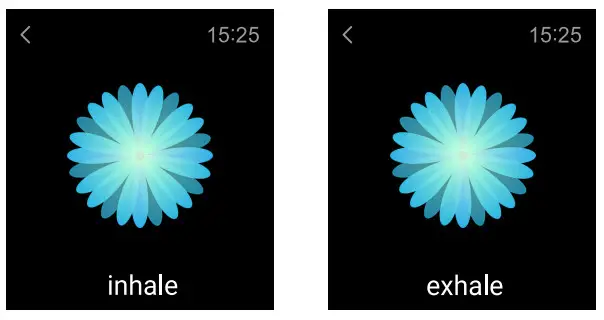
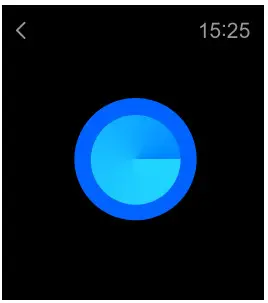
Breathe
The Breathe feature helps you adjust your breathing rhythm at your convenience. You can choose from 3 levels (rapid, normal and slow) to adjust your breathing duration. Go to the Breathe feature, choose the time duration or the levels and tap on start to enter the cycles of breathing and inhalation.
Note: During this period, if you swipe right or press a button, breathing is interrupted and you can choose to practice again or complete the cycle.
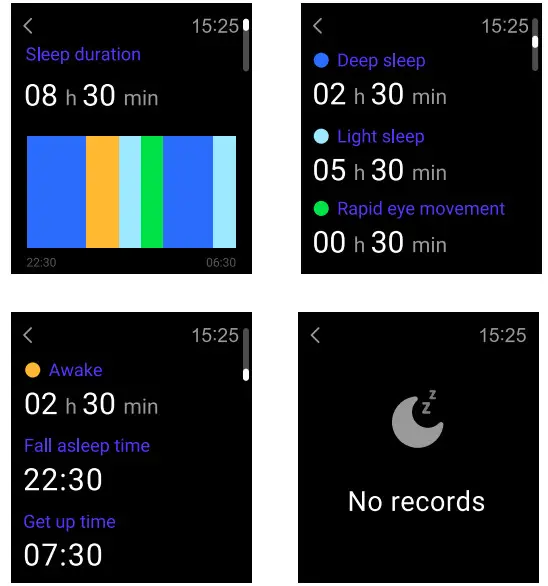
Sleep Monitor
You can view your most recent sleep record and a display of your sleep quality in various sleep stages in the NoiseFit app.
The feature will measure the device records of the user’s REM cycles, sleep states (light sleep and deep sleep), and wake time.
Weather
colorful Pro 3 supports three-day weather viewing in a location of your choice. You can view today’s current weather and for the next two days. Open the Weather app on your watch and change the location to see the weather of your current location.
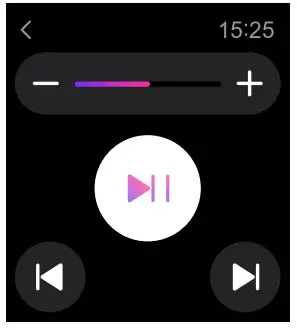
Music
You can control your favorite songs and podcasts that play from your phone, right on your wrist as long as the watch is connected with the NoiseFit app in your phone. You can play/pause music, go to the next/previous track and increase/decrease volume.
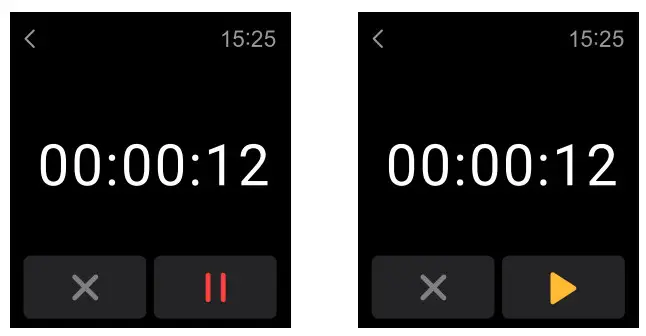
Timer
You can set a timer with a pre-set duration on the watch and the timer will remind you when the time is up.
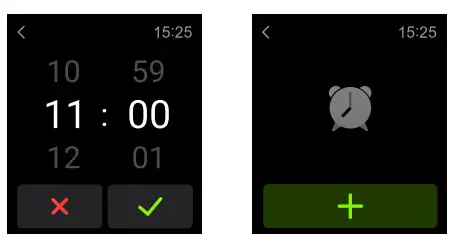
Alarm
You can add, delete, and enable/disable alarms on the watch. You can set alarms in the NoiseFit app and they’ll sync with the watch. You can also label alarms to identify them.
You can set snooze durations and the number of snoozes in the app.
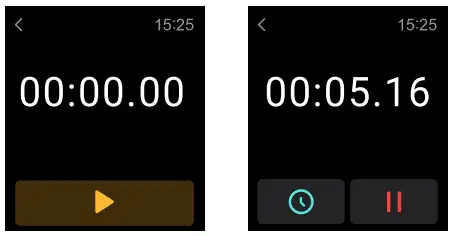
Stopwatch
A stopwatch can be set on the watch. You can also set lap times in the stopwatch.
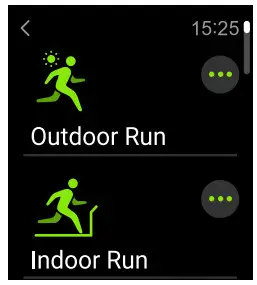
Exercise Records
You can view your most recent 50 exercise records on the watch, including detailed exercise data. You can also view the exercise records in the app.
Find Phone
You can make your phone ring using the watch when the watch is connected to the app.
Click the icon to stop the ringing.
Quick Settings
You can swipe from the watch’s home screen to gain Quick Settings access.
- Wrist Sense
- Do not disturb
- Brightness
- Find my phone
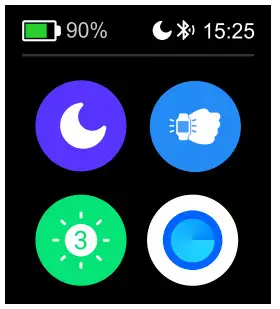
You can set the watch brightness and screen timeout duration on the watch. You can also set a switch to reduce the brightness at night.
Device Information and Tips
Device Information
The colorful Pro 3 Watch contains the following:
- TFT display
- Blood oxygen monitor
- Stress monitor
- 5ATM waterproof
- 14 sports modes
- 22mm quick-change pins
The colorful Pro 3 smartwatch stores your activity data for up to 10 days in between the time you sync your watch to the NoiseFit app. Activity data includes your steps, distance, calories, active minutes, heart rate, sleep duration and workout data. We recommend syncing the watch to the App daily.
Tips
How do I update my ColorFit Pro 3?
You can update your ColorFit Pro 3 via the NoiseFit app. Go to My Profile and select Check for updates.
How do I find my watch’s current firmware version?
You can find the watch’s current firmware on the watch. Go to Settings on the NoiseFit app. Select Device information, choose to Check for updates and update if any update is available.
How do I save the battery?
Follow these simple steps to save ColorFit Pro 3’s battery.
- Minimize the screen brightness
- Limit the notification you receive from the NoiseFit app.
How does the watch estimate how many calories have been burned?
colorful Pro 3 estimates how many calories you’ve burned based on the physical data you entered when you set up your account.
How do I change my activity goals?
You can do it through the NoiseFit app. Go to My Profile. Go to Setup and select My Objectives. Change your goals and confirm.
How do I log my weight?
You can log in your weight the first time you set up your NoiseFit app. However, you can update the weight later via the NoiseFit app. Go to My Profile, select Personal Information, and change or update your weight. You can update your birthday, height, country, and email id as well.
Disposal and Recycling Information
Electrical and electronic devices may not be disposed of with domestic waste. Consumers are obliged by law to return the electrical and electronic device at the end of their service lives to the public collecting points set up for this purpose or point of sale. Details to this are defined by the national law of the respective country. By recycling, reusing the materials, or other forms of utilizing old devices, you are making an important contribution to protecting our environment.
Regulatory and Safety Information
USA: Federal Communications Commission (FCC) Statement
This device complies with Part 15 of the FCC rules. Operation is subject to the following two conditions:
This device may cause harmful interference, and this device must accept any interference received, including interference that may cause undesired operation.
Warning: Changes or modifications not expressly approved by the party responsible for compliance could void the user’s authority to operate the equipment.
Note: This equipment has been tested and found to comply with the limits for a Class B digital device, pursuant to part 15 of the FCC Rules. These limits are designed to provide reasonable protection against harmful interference in a residential installation. This equipment generates, uses, and can radiate radio frequency energy and, if not installed and used in accordance with the instructions, may cause harmful interference to radio communications. However, there is no guarantee that interference will not occur in a particular installation.
If this 76 equipment does cause harmful interference to radio or television reception, which can be determined by turning the equipment off and on, the user is encouraged to try to correct the interference by one or more of the following measures:
- Reorient or relocate the receiving antenna
- Increase the separation between the equipment and receiver
- Connect the equipment into an outlet on a circuit different from that to which the receiver is connected
- Consult the dealer or an experienced radio/TV technician for help
In some cases, prolonged use of products may cause skin irritation. Prolonged contact may contribute to skin irritation or allergies in some users. To reduce the possibility of irritation, keep the watch and watchband clean and dry. Don’t wear it too tight and give your wrist a rest by removing the watch after an extended period of wear. If you feel soreness, tingling, numbness, burning, or stiffness in your hands or wrists while or after wearing the watch, please immediately discontinue use.
The colorful Pro 3 Watch is not a toy. The watch contains small components that could be a choking hazard and are not intended for use by small children or pets. Unless otherwise specified, devices and services are not medical devices and are not intended to diagnose, treat, cure or prevent any disease. We develop products and services to track daily activity and wellness information as accurately as possible. The accuracy of devices is not intended to be equivalent to medal devices or scientific measurement devices.
Safety Instructions
- Do not disassemble the battery on your own.
- Do not expose ColorFit Pro 3 to extremely high or low temperatures.
- The excessive temperature during charging could cause heat, smoke, fire or deformation of the battery or even explosion.
- Charge the battery in a cool, ventilated room.
- Do not open, crush, bend, deform, puncture or shred secondary cells or In the event of a battery break or leak, prevent battery liquid contact with skin or eyes. If this happens, immediately flush the areas with water (DO NOT RUB THE EYE) or seek medical help.
- Keep the batteries out of children’s reach and in a safe place to prevent danger.
- Do not place the batteries in the water.
- Do not short-circuit. Short-circuiting may damage the battery. Short-circuiting can occur when a metallic object, such as coins, causes the direct connection of positive and negative terminals of the battery.
- Do not use your product in a sauna or steam room.
- Do not dispose of batteries in the fire as that may cause an explosion. Dispose of used batteries in accordance with your local Do not dispose of it as household waste.
- Use only the charging cable supplied to charge the battery. Do not charge for more than 24 hours.
- Do not attempt to repair or maintain the watch yourself, service and maintenance should be performed by authorized technicians only. Any device failure should be referred to our after-sales service personnel.
- To prevent device damage, accessory damage, and device failure, always protect the device against strong impact or shock.
Customer Support
If you experience any problems with the watch, it may be fixed by restarting your watch.
Please get in touch with our Customer Care Team at +91 88-82-132-132 or just drop an email at [email protected]
For more information, visit us online at www.gonoise.com

SPECIFICATIONS
- Earbud Weight: 4.5 grams
- Speaker Driver Size:13 mm
- Supported Profiles: HFP, HSP, A2DP, AVRCP
- Bluetooth Version: 5.0
- Earbud Charging Time: Up to 1.5 hours
- Working Voltage: 3.7V
- Standby Time: 60 hours
- Playtime: 4 hours at 60% volume
- Bluetooth Range: 10m
- Waterproof Rating: IPX4
- Working Temperature: -1st to +60.0
CHARGING CASE SPECIFICATION
- Charging Case Weight: 38 grams
- Charging Port: USB Type-C
- Number of Earbud Charges from Case: Up to 4 times
- Case Charging Time: Up to 2 hours
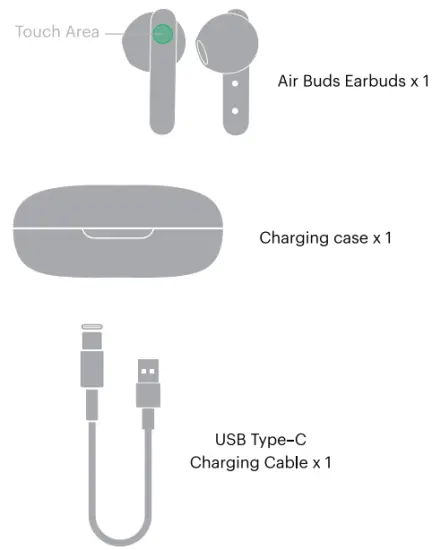
PACKAGE CONTAINS
POWER ON
The earbuds will automatically turn on once removed from the charging case.
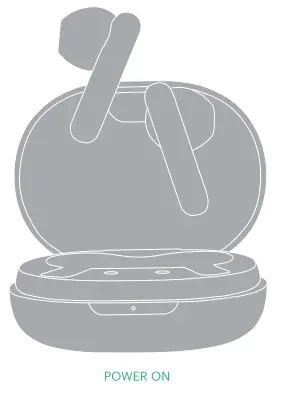 POWER OFF
The earbuds will automatically turn off once placed inside the charging case.
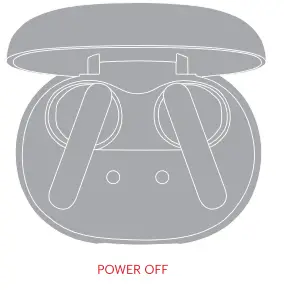 PAIRING Take out the earbuds from the charging case and turn on the Bluetooth on your device.
- Select ‘Add Device’ and from the list of devices, select Air Buds.
- Your Air Buds are now paired with your device and ready to use!
Note: Your Air Buds will automatically connect to the last paired device as soon as you remove them from the charging case again.
RESET
- Before resetting, make sure that Air Buds are fully charged and are disconnected from other Bluetooth devices.
- On your paired device, remove or delete Air Buds from the list of paired devices in the Bluetooth Menu.
- Place both the earbuds inside the charging case.
- Long press both the earbuds for 6 seconds while they are inside. Your Noise Air Buds have now been reset and are ready to pair again.
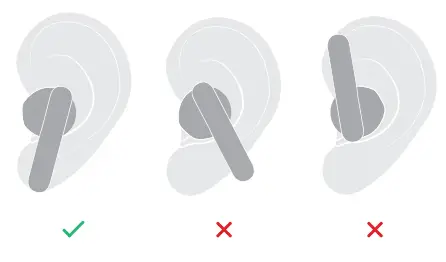
Follow the images and chart to learn how to wear the earbuds in the right manner.
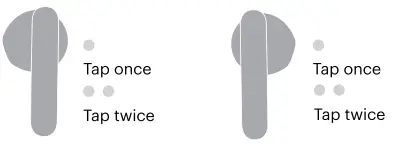
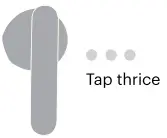
CONTROLS
 |
|
 |
|
 |
|
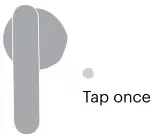 |
 |
|
 |
|
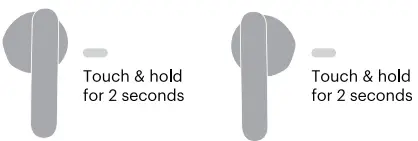 |
|
 |
CHARGING
EARBUDS
Place both earbuds in the case to charge them. The earbuds LED will light up white for 5s and then turn off.
| White |
CASE
Charge the case via the supplied USB Type-C from any PC, laptop or USB charger. White LED flashes slowly while charging constant white LED when fully charged.
| White LED Flashes | |
| White |
The warranty covers your Noise product, including accessories against manufacturing defects (if any) for 1 year from the date of purchase.
Things that are not covered in the warranty
- Unauthorized tampering, modifications or repairs of the product.
- Physical damage of the product on the account of abuse, handling, storage, installation, or testing including any use that is not in accordance with the product manual or documentation, or any other instruction provided along with the Noise product.
For further information on product replacement/refund-related queries, please refer to the terms and conditions mentioned in our online return policy section on www.gonoise.com.
WARRANTY REGISTRATION
www.gonoise.com/pages/warranty-registration
√ SUPPORT AND SERVICE
![]() 1 YEAR LIMITED WARRANTY
1 YEAR LIMITED WARRANTY
 SCAN ME
https://www.gonoise.com/pages/warranty-registration
CUSTOMER QUERY For any assistance, please reach out to us at support. noise.in
SAFETY FOR YOU AND YOUR NOISE AIR BUDS
Follow these tips and you & your Air Buds will be happy together for a very long time.
![]() Do not expose Air Buds to liquids, moisture, or humidity. It has electronics and a battery in it. Neither of them likes getting wet.
Do not expose Air Buds to liquids, moisture, or humidity. It has electronics and a battery in it. Neither of them likes getting wet.
![]() Don’t use abrasive cleaning solvents to clean your Air Buds. Wipe them down with a slightly damp cloth if and when necessary.
Don’t use abrasive cleaning solvents to clean your Air Buds. Wipe them down with a slightly damp cloth if and when necessary.
![]() Do not expose Air Buds to extremely high or low temperatures as this may damage the battery or even deform the plastic parts.
Do not expose Air Buds to extremely high or low temperatures as this may damage the battery or even deform the plastic parts.
![]() Don’t throw your Air Buds in a fire to dispose of them. The internal battery may explode.
Don’t throw your Air Buds in a fire to dispose of them. The internal battery may explode.
![]() Don’t try to disassemble your Air Buds. There are no user-serviceable parts inside it.
Don’t try to disassemble your Air Buds. There are no user-serviceable parts inside it.
![]() Try not to drop your Air Buds and keep them away from sharp objects such as keys in your pockets.
Try not to drop your Air Buds and keep them away from sharp objects such as keys in your pockets.
![]() Only charge your Noise Air Buds from 5V USB ports such as phone chargers and laptops or PCs.
Only charge your Noise Air Buds from 5V USB ports such as phone chargers and laptops or PCs.
![]() Never listen to music at high volumes or you may permanently damage your hearing.
Never listen to music at high volumes or you may permanently damage your hearing.
![]() Pay attention to your surroundings and never wear ANY headphones while riding, driving or walking in traffic. You do not come with any warranty.
Pay attention to your surroundings and never wear ANY headphones while riding, driving or walking in traffic. You do not come with any warranty.
Air Buds
Please refer to this manual before using the product
FCC Statement
This device complies with part 15 of the FCC rules. Operation is subject to the following two conditions: (1) this device may not cause harmful interference, and (2) this device must accept any interference received, including interference that may cause undesired operation. Changes or modifications not expressly approved by the party responsible for compliance could void the user’s authority to operate the equipment. NOTE: This equipment has been tested and found to comply with the limits for a Class B digital device, pursuant to part 15 of the FCC Rules. These limits are designed to provide reasonable protection against harmful interference in a residential installation. This equipment generates uses and can radiate radio frequency energy and, if not installed and used in accordance with the instructions, may cause harmful interference to radio communications. However, there is no guarantee that interference will not occur in a particular installation. If this equipment does cause harmful interference to radio or television reception, which can be determined by turning the equipment off and on, the user is encouraged to try to correct the interference by one or more of the following measures:
- Reorient or relocate the receiving antenna.
- Increase the separation between the equipment and receiver.
- Connect the equipment into an outlet on a circuit different from that to which the receiver is connected.
- Consult the dealer or an experienced radio/TV technician for help.
The device has been evaluated to meet general RF exposure requirements. The device can be used in portable exposure conditions without restriction.
ColorFit Pulse
Please refer to this manual before using the product
What’s in the box

Watch Features
- Sports Mode
- Heart Rate
- Sleep
- Blood oxygen
- Records
- BT Music
- Alarm
- Stopwatch
- Weather
- Settings
Charging the ColorFit Pulse Smart Watch
Before using your ColorFit Pulse for the first time, charge the battery to its full capacity. Use the charging cable provided with the watch to charge. On a full charge, ColorFit Pulse can last up to 10 days.
Note: The battery life and time to fully charge your device may vary as per usage and other factors.
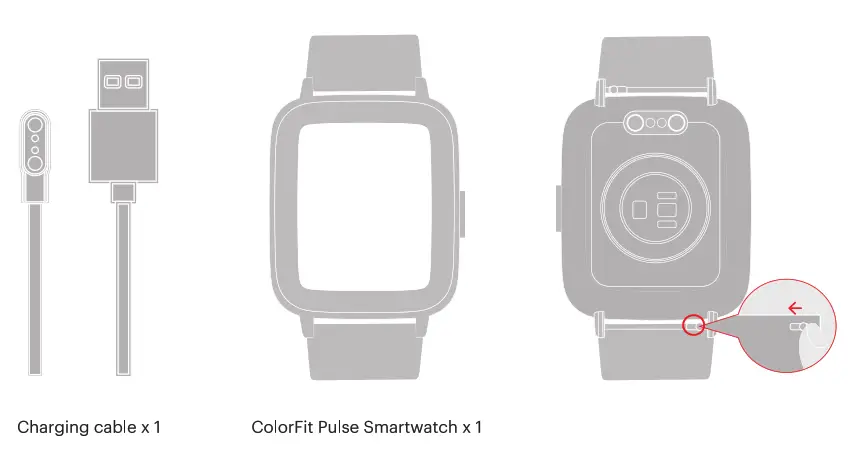
To charge ColorFit Pulse
- Plug the USB cable into a power adaptor. Plug the power adaptor into an electrical socket. (Power adaptor not included)
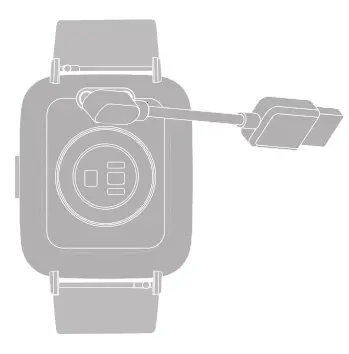
- Place the magnetic charger on the magnetic charging points of the watch.
- While your watch is charging, the screen will show the time, day, battery percentage, and charging progress.
- Once the battery is fully charged, remove it from the charging dock
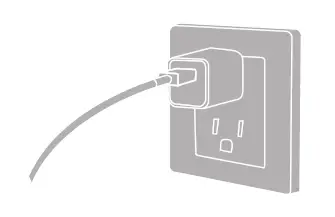
Power On
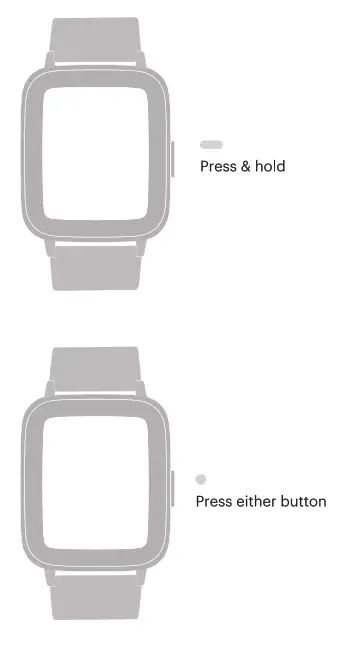
Press and hold the side button for a few seconds to turn on watch.
Power Off
Long press the side button. Select power off and confirm.
Waking Up the Watch
To preserve the battery, the watch screen turns off when not in use. To turn the screen back on, you can wake up the watch by:
- Pressing the side button
- Turning on the wrist sense
Watch Navigation
The colorful Pulse Smart Watch has a TFT Colour touch screen. Navigate the watch by tapping on the screen, swiping side to side, up and down, pressing the side button.
Home Screen Navigation
The home screen is the watch face. From the home screen:
- Swipe right to access the quick setting.
- Swipe left to go to main menu.
- Swipe up to check your records.
- Swipe down to check your message
Button Navigation
- Press the side button to turn on the watch
Setup
Before pairing, make sure that your smartphone and smartwatch are next to each other.
The app will ask for personal information such as height, weight, and sex to calculate your stride length, distance covered, calorie burn rate, and metabolic rate. When you set up your account, your name and profile picture will be visible to other users.
- Turn on Bluetooth and the location on your mobile
- In your smartphone, download the NoiseFit app from the Play Store or the App Store and install it.
- Create an account or login using an existing account.
Note: Ensure that your smartphone is running on Android 4.4+ or iOS 10+ and is connected to mobile data or a Wi-Fi network.

http://www.youduoyun.com/q/1000006.html
Pair the Watch
- Open the NoiseFit app and allow the Bluetooth and GPS positioning to be turned on.
- Feed-in your personal information and health goals in the app.
- Go to the ‘Add Device’ page in the app, select the device type and link the watch.

http://www.youduoyun.com/q/1000006.html
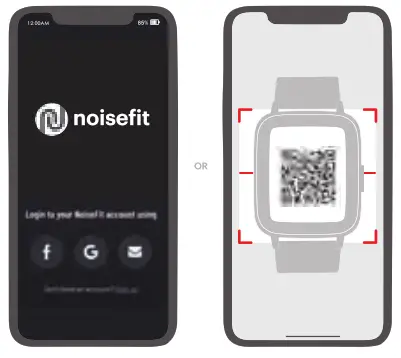
Watch Features
Sports Mode
You can browse through the sports mode and choose the sports of your choice to track your progress.
Sleep
You can view your most recent sleep record and a display of your sleep quality in various sleep stages in the watch and the NoiseFit app. The feature will record the user’s sleep states (light sleep, deep sleep, and REM cycles), awake time, wake time, and sleep time.
Records
You can view your most recent sports modes records on the watch, including detailed data like steps, distance, calories, and duration. You can also view the exercise records in the app.

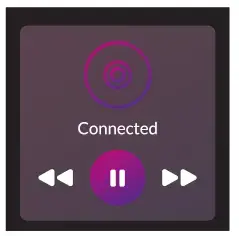
BT Music
You can control your favorite songs and podcasts that play from your phone, right on your wrist as long as the watch is connected with the NoiseFit app on your phone.
You can play/pause music, go to the next/previous track and increase/decrease volume.
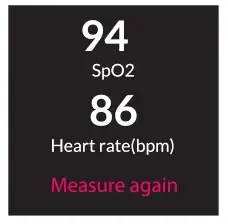
 Blood oxygen
ColorFit Pulse supports viewing of the highest and lowest values of Blood Oxygen level of the day and the measurement data throughout the day.
To measure your blood oxygen level in real-time, go to the Blood Oxygen monitor and let it measure.
Note: Make sure your arms and wrists are still and there is no space between your watch and the wrist.
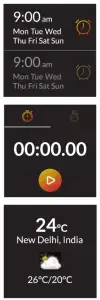
Alarm
You can set alarms in the NoiseFit app and they’ll sync with the watch. You can add up to 5 alarms.
Stopwatch
A stopwatch can be set on the watch. You can also set lap times in the stopwatch.
Weather
ColorFit Pulse supports three-day weather viewing of your location. You can turn on the weather viewing feature and let the app identify your location. You can view today’s current weather and for the next two days.
Open the Weather app on your watch to see the weather of your current location.
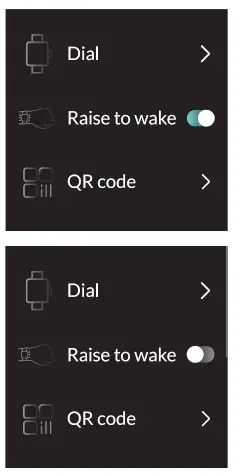
Setting
Dial
You can switch between different watch faces in the watch, choose and download cloud-based or create your own watch faces in the NoiseFit app.
Raise to wrist awake
Turn on the feature to turn on the watch screen every time you lift the watch to your eye level.
OR CODE
Scan the QR code with your smartphone to download the NoiseFit app from Play or the App Store.
System Settings
- Reboot
- Reset
- Power off
- About
Know about your smartwatch from this feature.
Find Phone
You can make your phone ring using the watch when the watch is connected to the app.
Click the icon to stop the ringing.
Quick Settings
You can swipe from the watch’s home screen to gain Quick Settings access.
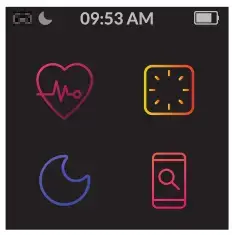
- Heart rate
- Brightness
- DND
- Find phone
Give your screen a personalized style by changing or customizing the watch face from the NoiseFit app or the watch.
On the Watch
Touch and hold the home screen. Swipe and choose from the watch faces.
In the App
Go to watch faces, select the watch face of your choice and tap save to change the watch face.
Device Information and Tips
Device Information
The colorful Pulse Watch contains the following:
- TFT display
- Blood oxygen monitor
- Stress monitor
- 5ATM waterproof
- 8 sports modes
- 19 mm straps
The colorful Pulse smartwatch stores your activity data for up to 10 days in between the time you sync your watch to the NoiseFit app. Activity data includes your steps, distance, calories, active minutes, heart rate, sleep duration, and workout data. We recommend syncing the watch to the App daily.
Tips
How do I update my ColorFit Pulse?
You can update your ColorFit Pulse via the NoiseFit app. Go to My Profile and select Check for updates.
How do I find my watch’s current firmware version?
You can find the watch’s current firmware on the watch. Go to Settings on the NoiseFit app. Select Device information, choose to check for updates and update if any update is available.
How do I save the battery?
Follow these simple steps to save the ColorFit Pulse battery.
- Minimize the screen brightness
- Limit the notification you receive from the NoiseFit app.
How does the watch estimate how many calories have been burned?
ColorFit Pulse estimates how many calories you’ve burned based on the physical data you entered when you set up your account.
How do I change my activity goals?
You can do it through the NoiseFit app. Go to My Profile. Go to Setup and select My Objectives. Change your goals and confirm.
How do I log my weight?
You can log in your weight the first time you set up your NoiseFit app. However, you can update the weight later via the NoiseFit app. Go to My Profile, select Personal Information, and change or update your weight. You can update your birthday, height, country, and email id as well.
Disposal and Recycling Information
Electrical and electronic devices may not be disposed of with domestic waste. Consumers are obliged by law to return the electrical and electronic device at the end of their service lives to the public collecting points set up for this purpose or point of sale. Details to this are defined by the national law of the respective country. By recycling, reusing the materials, or other forms of utilizing old devices, you are making an important contribution to protecting our environment.
Regulatory and Safety Information
USA: Federal Communications Commission (FCC) Statement
This device complies with Part 15 of the FCC rules. Operation is subject to the following two conditions:
This device may cause harmful interference, and this device must accept any interference received, including interference that may cause undesired operation.
Warning: Changes or modifications not expressly approved by the party responsible for compliance could void the user’s authority to operate the equipment.
Note: This equipment has been tested and found to comply with the limits for a Class B digital device, pursuant to part 15 of the FCC Rules. These limits are designed to provide reasonable protection against harmful interference in a residential installation. This equipment generates, uses, and can radiate radio frequency energy and, if not installed and used in accordance with the instructions, may cause harmful interference to radio communications. However, there is no guarantee that interference will not occur in a particular installation.
If this 76 equipment does cause harmful interference to radio or television reception, which can be determined by turning the equipment off and on, the user is encouraged to try to correct the interference by one or more of the following measures:
- Reorient or relocate the receiving antenna
- Increase the separation between the equipment and receiver
- Connect the equipment into an outlet on a circuit different from that to which the receiver is connected
- Consult the dealer or an experienced radio/TV technician for help
In some cases, prolonged use of products may cause skin irritation. Prolonged contact may contribute to skin irritation or allergies in some users. To reduce the possibility of irritation, keep the watch and watchband clean and dry. Don’t wear it too tight and give your wrist a rest by removing the watch after an extended period of wear. If you feel soreness, tingling, numbness, burning, or stiffness in your hands or wrists while or after wearing the watch, please immediately discontinue use.
The colorful Pulse Watch is not a toy. The watch contains small components that could be a choking hazard and are not intended for use by small children or pets. Unless otherwise specified, devices and services are not medical devices and are not intended to diagnose, treat, cure or prevent any disease. We develop products and services to track daily activity and wellness information as accurately as possible. The accuracy of devices is not intended to be equivalent to medal devices or scientific measurement devices.
Maintenance Instructions
- Keep the device dry and clean regularly and especially after prolonged use as moisture and dirt can build up underneath the band and can cause skin irritation.
- Do not wear the device too tight but make sure that the bottom sensor is lightly in contact with your skin and there is a gap of about one finger’s width between the wrist strap and your wrist.
- Do not use household cleaners to clean the device. Use soap-free cleaners instead.
- For stains that are difficult to remove, it
- is recommended to scrub with alcohol.
- The device is not suitable for diving,
- swimming in the sea or sauna; it is suitable
- for swimming pool, shower (cold water)
- and swimming in shallows.
- Keep it away from direct sunlight, high
- temperatures or humid conditions as it
- may damage the band over time.
Safety Instructions
- Do not disassemble the battery on your own.
- Do not expose ColorFit Pulse to extremely high or low temperatures.
- The excessive temperature during charging could cause heat, smoke, fire or deformation of the battery, or even explosion.
- Charge the battery in a cool, ventilated room.
- Do not open, crush, bend, deform, puncture or shred secondary cells or batteries. In the event of a battery break or leak, prevent battery liquid contact with skin or eyes. If this happens, immediately flush the areas with water (DO NOT RUB THE EYE) or seek medical help.
- Keep the batteries out of children’s reach and in a safe place to prevent danger.
- Do not place the batteries in the water.
- Do not short-circuit. Short-circuiting may damage the battery. Short-circuiting can occur when a metallic object, such as coins, causes the direct connection of positive and negative terminals of the battery.
- Do not use your product in a sauna or steam room.
- Do not dispose of batteries in the fire as that may cause an explosion. Dispose of used batteries in accordance with your local regulations. Do not dispose of it as household waste.
- Use only the charging cable supplied to charge the battery. Do not charge for more than 24 hours.
- Do not attempt to repair or maintain the watch yourself, service and maintenance should be performed by authorized technicians only. Any device failure should be referred to our after-sales service personnel.
- To prevent device damage, accessory damage, and device failure, always protect the device against strong impact or shock.
This equipment complies with FCC radiation exposure limits set forth for an uncontrolled environment. The device has been evaluated to meet general RF exposure requirements. The device can be used in portable exposure conditions without restriction.
Customer Support
If you experience any problems with the watch, it may be fixed by restarting your watch. Please get in touch with our Customer Care Team at +91 88-82-132-132 or just drop an email at [email protected]
For more information, visit us online at www.gonoise.com
 NOISE SHOTS XO
User Manual
Please read carefully before using the product
PACKAGE CONTAINS
- Noise Shots XO Earbuds
- Noise Shots XO Charging Case
- Eartips 6 (2 pre-installed on the earbuds)
- USB C-Type Charging Cable
- Pouch
- User Manual
EARBUD SPECIFICATIONS
- Size: 25.5* 21.8 * 266mm
- Weight: 4.5 grams
- Driver: ® mm
- Supported Profile: HSP, HFP, A2DP, AVRCP
- Earbud Battery: 40 mAh each
- Bluetooth Version: 5.0
- Earphone Charging Time: 2 Hours
- Working Voltage: 5V-1A
- Total Playtime with Case: Up to 36 Hours
- Playback Time (single charge): Up to 6 Hours
- Transmission Range: 10m
- Water Resistance: IPX7 Rating
- Working Temperature: -15°C~+60°C
CHARGING CASE SPECIFICATIONS
- Size: 58.7 mm x31.4mm
- Weight: 54 grams
- Case Battery: 720MAh
- Charging Port: USB C-Type
- Charging Case (Full) provide power to earphone: Up to 6 Times
- Charging Time: Up to 2 Hours
CALL FEATURES
- Accepting incoming call- Tap on the touch panel of either Left or Right earbud
- End a call- Tap on the touch panel of either Left or Right earbud
- Rejecting Incoming CALL- Long-press either Left or Right earbud for 2 seconds while incoming calls.
- Voice assistant- Tap thrice on the touchpanel of either the left or right earbud to activate Voice Assistant.
CHARGING YOUR SHOTS XO
Earbuds
When the earbud battery is low, the LED will illuminate in red and a voice prompt “Battery Low” will be heard.
Return the earbuds back to the charging case and the LED of the earbuds will illuminate in red when being charge. The LED of the earbuds will turn off when fully charged.
CHARGING CASE
The charging case can be charged via the included USB Type C cable from any USB charger or PC USB port. The LED indicator will show the battery level.
Wireless Charging
Connect a standard wireless charger to a power source. Place the Shots XO earbuds inside the charging case and then place them on the wireless charger.
| Charging Case LED indicator during charge |
Battery Percentage |
| Flashes one time in 2 seconds | 0-25% |
| Flashes two times in 2 seconds | 25-50% |
| Flashes three times in 2 seconds | 50-75% |
| Flashes four-time 2 seconds | 75-100% |
WARRANTY
- Warranty is applicable on the Noise product including accessories on manufacturing defects (if any) for -1 Year from the date of purchase.
Things that are not covered in the warranty:
- Unauthorized tampering, modifications or repairs of the product.
- Physical damage of the product on the account of abuse, handling, storage, installation or testing including any use that is not in accordance with the product manual or documentation, or any other instructions provided along with the noise product.
- The product has suffered any misconduct.
- Any other clause is mentioned in our online return policy.
For further information on product replacement/refund related queries, please refer to the terms and conditions mentioned in our online return policy section on www.gonoise.com
WARRANTY REGISTRATION
www.gonoise.com/pages/warranty-registration
| Service and Support | |
| Extended Warranty |
https://www.gonoise.com/pages/warranty-registration
NOTES
- Fully charge the Shots XO earbuds and the case before using it for the first time.
- Do not use a charger with an output larger than 5V-1A as it may cause battery damage.
- Do not expose Noise Shots XO to liquids, moisture or humidity or extreme temperature.
- The Shots XO earbuds are IPX7 certified, which makes them waterproof Please ensure that they are dried completely before placing them in the charging case.
NOTE: Only the earbuds are IPX7 certified and not the charging case. The case contains a battery and should be kept away from water at all times. - Do not use abrasive cleaning solvents to clean your Noise Shots XO.
- Do not throw your Noise Shots XO into the fire to dispose of it. The internal battery may explode.
- Do not attempt to disassemble your Noise Shots XO.
- Avoid dropping the Noise Shots XO and keep them away from sharp objects.
- Charge your Noise Shots XO via 5V USB ports found on phone chargers, laptops, or PCs.
- Keep out of reach of children.
- For your safety, please do not use the Shots XO while riding a bike or a cycle, driving, or walking on the road.
- Do not listen to music at high volumes for extended periods of time.
CUSTOMER QUERY
For any assistance, please reach out to us at gonoise.com/pages/register-your-complaint
OPENING SHOTS XO CASE
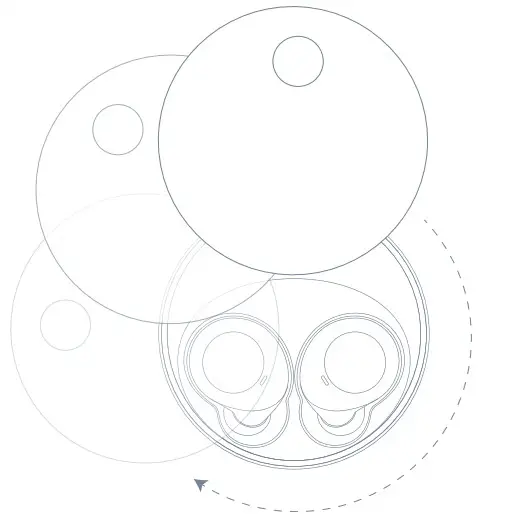
Rotate the lid in the clockwise/anticlockwise direction to slide open the case.
POWER ON
Shots XO will turn on automatically when removed from the charging case. The right earbud LED will turn White and a POWER ON prompt will be heard.
POWER OFF
Earbuds will turn off automatically once returned to the Charging Case.
PAIRING
Take out the earbuds from the case and then turn on the Bluetooth of your device.
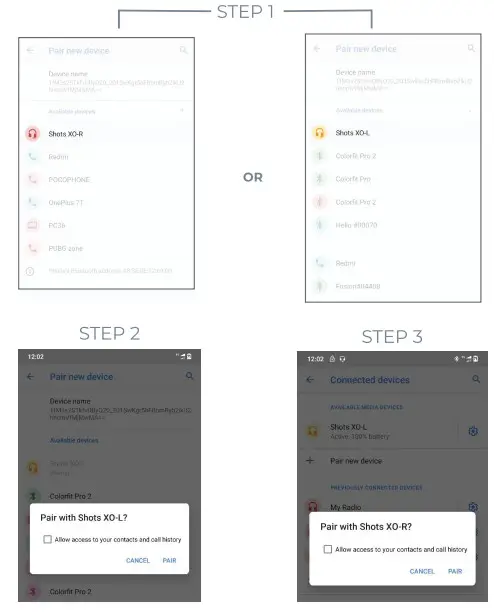
- Select the name “Shots XO – R” or “Shots XO-L” in your available devices. ( Note Only one of the earbud names, “Shots XO – R” or “Shots XO-L” would appear for connection)
- After connecting either earbud, a prompt will pop up on the screen of the device asking to pair the second earbud.
- Please select PAIR. the pairing procedure will be completed.
Note: The Earbuds will automatically power off if they do not connect any Bluetooth device within 5 minutes. Important: If the pairing process is unsuccessful, place both earbuds into the case. Remove the earbuds from the case and restart the pairing process.
RESET
- Ensure your Shots XO (charging case)is charged before starting the reset process.
- Forget/Delete your Noise Shots XO from the list of Saved Devices on your phone’s Bluetooth.
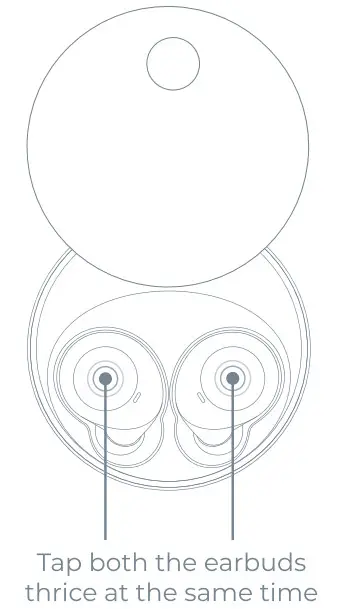
- Place both earbuds into the case.
- Tap both the earbuds three times at the same time
Note: Both LED earbuds will blink once in white and then turn red. - Take out the earbuds from the charging
Note: LED will flash white quickly and will turn on when they are synchronized successfully.
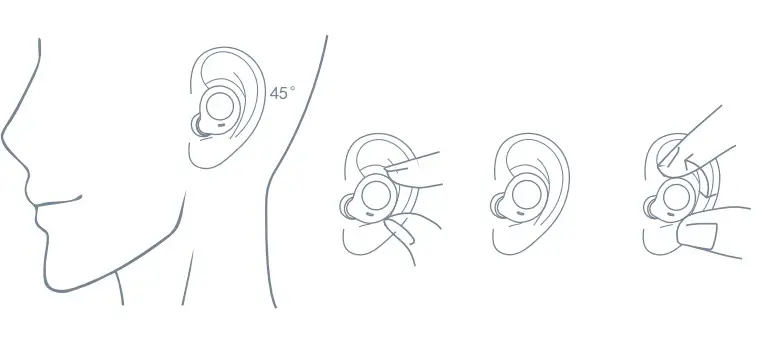
HOW TO WEAR
Insert the earbud into your ear gently.
Rotate the earbud until the wingtip fits under your ear ridge comfortably.
FUNCTION OVERVIEW
- Forward to the next song – Tap twice on the touch panel of the Right earbud while the music is playing.
- Backward to the previous song – Tap twice on the touch panel left earbud while the music is playing.
- Pause/ Resume: Tap on the touch panel of either Right or left earbud while the music is playing.
- Volume Increase – Long press and release the touch panel of the Right earbud while music is playing.
- Volume Decrease – Long press and release the touch panel of the Left earbud while music is playing.
 Thank you for buying Noise Shots XO
NOTES
Some functions may vary in certain versions of the software.
- Please charge the Noisefit Endure with the provided charger for 2.5 hours before use.
- The NoiseFit Endure is IP68 waterproof rating. It can’t be used under corrosive liquids or hot water, tea, etc. Meanwhile, it cannot be used during deep-sea diving over 3 meters.
- Please download the Da Fit app for using the NoiseFit Endure smartwatch.
Some smartphones may turn the app off in the background. Please ensure the app is running in the background by locking/whitelisting the app in the background (only in Android)
- Please ensure that there is no space between the watch and your wrist to ensure the accuracy of the health tests.
- Please avoid collision with hard objects as it may break the glass.
- Use 5V, 1A version chargers. Please note the NoiseFit Endure smartwatch does not support a quick charge. Charge under watery (sweat) conditions is prohibited to avoid short circuits and result in damage.
- This watch is an electronic monitoring product. The data is for reference only and cannot be used as a medical reference.
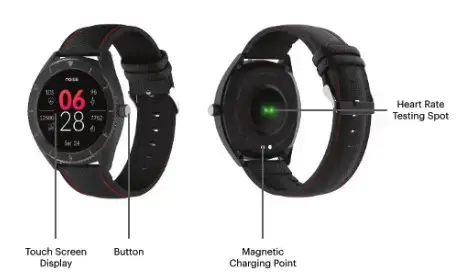
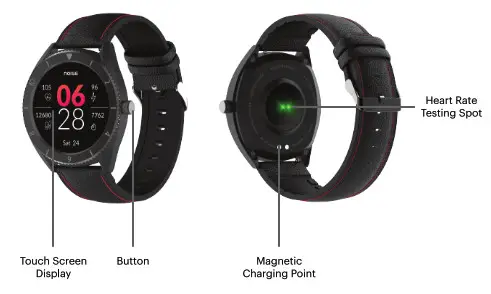
Touch Screen Display Button Magnetic Charging Point Heart Rate Testing spot
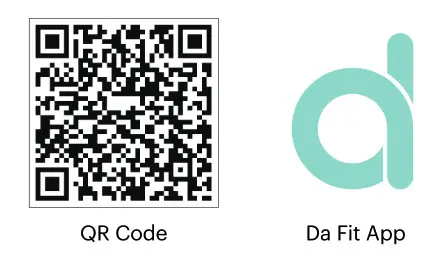
Scan the QR code to download the Da Fit app on your phone.

Note: Android app will be blocked in the background if the phone is in standby mode for more than 2 hours. Activate the app in the background platform via settings.
Go to Settings. Choose Da Fit app. Choose Show Notification
Android Users –
- Go to the device page. Click the ‘To add device’ and select Endure.
iPhone Users –
- Go to the device and select Add device, select Endure.
- Pair via Bluetooth.
- Allow Da Fit to send notifications.
Watch faces – Go to watch faces. Choose from the 3 options available.
Note: You can customize your watch face by using the editable version of the watch faces. Select the image for the gallery and save it. For cloud-based watch faces click on add more watch faces.
Notifications reminder – Tap to turn on/off and choose which apps’ notifications to be pushed to your watch.
Alarms – Select the time in the alarm and number of alarms and save.
Shutter – Open the app and select shutter. Tap the camera icon on the watch to capture the image remotely. Note: Some phones may need to turn on the camera function first before using it.
Find Device – Upon tap, the watch will vibrate for the reminder.
Time Formats – Choose either 12-hour or 24-hour format.
Unit System – Choose either the Metric System or British System.
Do Not Disturb Mode – Set the start and end time and save. Note: Once turned on, notifications cannot be pushed to the NoiseFit Endure smartwatch.
Reminders to Move – Tap to set the daily reminder to move.
Tap to turn on the quick view of the watch screen. Choose the validity period. Set start and end time and save.
- Tap to turn on the weather notifications.
- Choose the temp system and hit done.
- Feed in the city zip code to get that area’s weather updates.
Tap to turn on and provide the required information.
Update your firmware to get the best experience. Note: Please make sure that there is at least 50% battery life before upgrading. Keep your watch close to your phone during upgrading.
Tap remove to unpair the device.
Note: For iPhones, please forget the devices in the phone% Bluetooth setting to make sure the device is disconnected completely.
Basic
Power on: Long press the button for 3 seconds to turn on the watch. Short press the button to wake the watch up if the watch is at standby mode.
Power off: Long press the button for 3 seconds and select to turn the watch off.
- Swipe right to check the notification bar.
- Swipe left to go to sports mode.
- Swipe up to go menu.
- Swipe down to display the shortcuts menu.
Shortcut interface – Swipe down on the status bar to see the functions. Visual presentation of the dial with the icons on the notification bar –
- Find my phone
- Brightness
- Settings
- Connected Icon
- Battery Level
- Day & Date
Watch Face – Long press the current watch face. Swipe left or right to choose the watch face.
Notifications – The Noisefit Endure can receive messages as long as it is synced with the smartphone and Da Fit app. You’ll get notified of up to 8 messages. Click the empty button to clear the messages.
Note: Replying to text messages is not supported on the NoiseFit Endure smartwatch.
The Pedometer will work as long as the watch is turned on and display today’s steps, distance covered and calories burnt.
This mode has walking, running, cycling, skipping, badminton, basketball, yoga, football, and workout.
Click the icon to enter the corresponding workout mode. Note: The data will only be saved when exercise time is more than 5 minutes or more than 200 steps, otherwise the exercise won’t be saved.
Heart Rate – The NoiseFit Endure smartwatch will start recording the heart rate using optical sensors. The result will be shown on the screen when the heart rate data is generated.
On the Da Fit app, go to the activity page and choose Heart rate to check history records over a day, week, or month.
SPO2 Monitor – The NoiseFit Endure smartwatch will start recording the Oxygen level using optical sensors. The result will show on the NoiseFit Endure smartwatch when the oxygen data is generated. On the Da Fit app, go to the activity page and choose Blood Oxygen to check the last 7 trends.
Sleep Monitor – The default sleep monitor is set from 9:00 pm to 7:30 am. The watch can detect your sleep automatically if worn to sleep. You can check the sleep duration on the Da Fit app the following morning. The smartwatch will synchronize automatically once it is paired with the Da Fit app.
Note: There may be some variation in the actual sleeping status due to the changing sleep modes.
Music – You can control music from your smartwatch as long as it is paired with your smartwatch and synced with the Da Fit app. Note: In a few cases, you may have to open the music player in your smartphone to be remotely controlled by the NoiseFit Endure smartwatch. The Noisefit Endure does not display the music name or adjust the volume.
Go to the watch face section on your Da Fit app. Select the editable watch face. Choose the image and customize it as per your requirement and save. For cloud based watch faces click on add more watch faces.
Tap the star icon to start. Tap the play icon to start pause icon to pause and refresh icon to reset.
Tap Settings to find more functions.
Tap the screen to adjust brightness.
You can remotely control the camera once the NoiseFit Endure is paired with your smartwatch and synced with the Da Fit app.
Tap the camera on the NoiseFit Endure smartwatch. Note: Smartphone’s camera would also open.
Select the frame you want to click. Tap on the NoiseFit Endure smartwatch camera to click images.
Note: The image will be saved automatically in your phone’s gallery.
Tap the left icon to exit and tap the right icon to reset.
Note: Once reset, all the data will be cleared. The data of the paired phone will not be cleared until and unless the phone has also been reset.
You can see the device address, Bluetooth name, and firmware version here.
Refer to the following steps in case of any smartwatch malfunctioning.
- Unable to restart the watch
- This issue may occur, if the watch button is not pressed for long enough. Press again for over 3 seconds.
- Make sure to charge the watch before switching on the watch.
- Use 5V/1V adapter to charge the watch in case the watch has not been used for a long time
Auto power off – This may be due to low battery, please charge the watch before switching it on.
Short battery life –
- This may be due to an insufficient battery charge.
- Make sure that the battery is charged, for at least 2 hours.
- Charger or data line is working properly. If not then change and get a new one.
- Check the charging port and try again.
- Bluetooth hasn’t connected to or unable to connect to the watch.
Restart the watch – Turn off the bluetooth of your phone, turn on the bluetooth again and connect to the watch again.
Inaccurate sleep data –
- The sleep monitor is designed to imitate the natural pattern of falling asleep and waking up.
- Please wear the watch at all times to avoid variation in data that may occur if going to bed late or only wearing during sleep. There may not be any sleeping data generated if you go to bed at any time during the day as the defaulted sleeping time is preset to between 9:00pm to 7:30am.
CAUTION
Risk of explosion if battery is replaced by an incorrect type. Dispose of used batteries according to the instructions
 Old electrical appliances must not be disposed of together with the residual waste, but have to be disposed of separately. The disposal at the communal collecting point via private persons is for free. The owner of old appliances is responsible to bring the appliances to these collecting points or to similar collection points. With this little personal effort, you contribute to recycle valuable raw materials and the treatment of toxic substances.
- What is covered in the limited warranty period? Warranty is applicable on the Noise product including accessories on manufacturing defects (if any) for 1 Year from the date of purchase.
- What are the things that are not covered in the warranty:
• Product has been subject to unauthorized tampering modification or repairs.
• Product has suffered physical damage on the account of abuse, neglect, or improper use, handling, storage, installation, or testing, including any use that is not in accordance with the product manual, documentation, or other instructions provided along with the node product.
• Product has suffered any misconduct.
• Any other clause mentioned in our online return policy.
Note: For further information on product replacement/refund related queries, please refer to the terms and conditions mentioned in our return policy section on www.gonoise.com
Thank you for shopping from www.gonoise.com. For any assistance, please get in touch with our Customer Care Team at +918882132132 or just drop an email at [email protected]
We hope you have an amazing experience with the product.

Thankyou for your buying Noise FT Endure
 NOISE TUNE CHARGE
User Manual
Please read carefully before using the product.
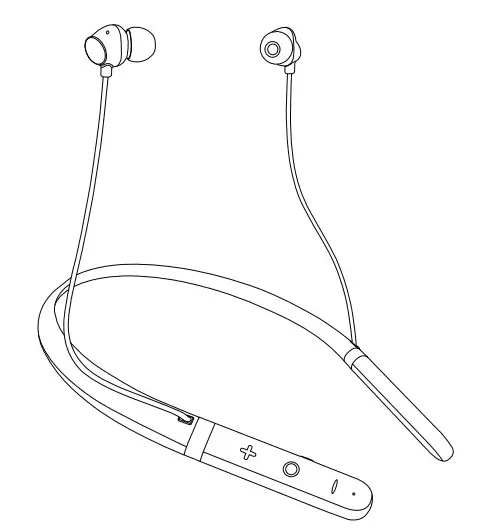
PACKAGE CONTAINS
- 1 Tune Charge Bluetooth Neckband
- 3 Pairs of Ear Tips
- (1 pair of pre-installed ear tips
- 1 Charging Cable
- Frequency Response: 2.4 G – 2.480 GHz
- Wireless Range:10 meters
- Operating Temperature: -40°C – +80°C
SPECIFICATIONS
- Bluetooth Version: v5.0
- Bluetooth Chipset: QCC 3003
- Support Profile: HSP, HFP, A2DP,
- AVRCP
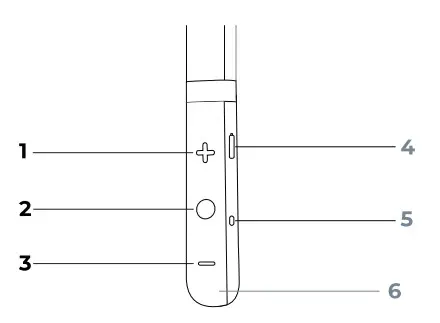
- Speakers: 010mm *2 1. Volume Up
- Frequency Range: 2.4G – 2.480GHz
- Playback/Talk Time:16 Hours
- Charging Time: 2 Hours
- Charging Voltage: 5V
- Frequency Response: 2.4 G – 2.480 GHz
- Wireless Range:10 meters
- Operating Temperature: -40°C – +80°C
OVERVIEW

- Volume Up
- Multifunction Button (MFB)
- Volume Down
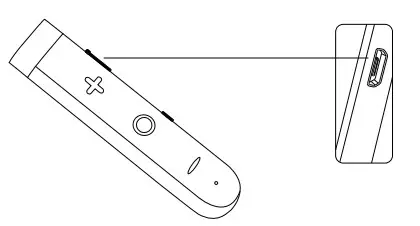
- MICRO USB Charging Point 3D Bass Booster
- LED Indicator
WEARING BLUETOOTH A NECKBAND
Note: Select ear tips that seal your ear canals for the best sound. You may need differently sized tips on the left and right.
POWER ON
Long press the MFB for 4 seconds till the blue light flashes.
Note: Once on, it will play a voice prompt “Power On”.
POWER OFF
Long press the MFB for 4 seconds till the red light flashes.
Note: While turning off, it will play a voice prompt “Power Off”.
Note: The Neckband will automatically turn off after 5 minutes if no device is connected.
CHARGING
Use the included USB cable to charge your headset. Make sure it is fully charged before first use. To preserve its battery lifespan, fully charge at least once every 45 days. Plug in the Micro-USB end of the charger into the neckband charging point.
| Battery Level | LED Indicator |
| Low Battery | Blinking Red |
| Charging | Red |
| Charged | Blue |
BLUETOOTH PAIRING
- Turn your Tune Charge on and press
- the multifunction button until the
- earbuds are in pairing mode and red
- and blue lights are flickering
- alternatively.
- Turn your smartphone’s Bluetooth on.
- Search and select Tune Charge from
- the list of Bluetooth devices.
- Your device is ready to pair.
| Mode | LED Indicator |
| Pairing Mode | Blinking red and Blue Alternatively |
| Connected to Device | Blinking Blue |
Tune Charge will automatically connect to the last connected device.
PAIRING TWO DEVICES MUSIC FUNCTIONS
- Once paired with the first device,
- turn the Bluetooth off on that device.
- Take the second device and repeat
- the pairing process.
- Turn on the Bluetooth of the first
- device and your Tune Charge will
- automatically connect to it.
- If your Tune Charge does not connect
- to the first device automatically, choose
- Tune Charge from its list of paired
- devices.
CALL FUNCTIONS
| Answer call | Press the MFB once |
| End call | Press the MFB once |
| Reject Call | Press the MFB twice |
| Last Call Redial | Press the MFB twice |
| Voice Assistant | Press and hold the MFB for 1 second |
MIUSIC FUNCTIONS
| Play/Pause | Press the MFB once |
| Next Track | Press and hold the (+) button |
| Last Track | Press and hold the (-) button |
| Bass Booster | Press the 3D Bass Booster |
| Increase Volume | Press the (+) button |
| Decrease Volume | Press the (-) button |
WARRANTY
- This Warranty is applicable on the Noise
- product including accessories on
- manufacturing defects (if any) for 1 Year
- from the date of purchase.
Things that are not covered by warranty:
- Unauthorized tampering, modifications
- or repairs of the product.
- Physical damage of the product on the
- account of abuse, handling, storage,
- installation or testing including any use
- that is not in accordance with the product
- manual or documentation, or any other
- instructions provided along with the
- product
- Any other clause(s) mentioned in our
- online return policy.
For further information on the product replacement and any refund-related queries, please refer to the terms and conditions mentioned in our online return policy section on www.gonoise.com
WARRANTY REGISTRATION
warranty-registration
![]() Service and Support
Service and Support
 Extended Warranty

https://www.gonoise.com/pages/warranty-registration
NOTES
- Do not expose your Tune Charge to
- liquids, moisture, humidity or
- extreme temperatures.
- Do not use abrasive cleaning solvents
- to clean your Tune Charge.
- Do not throw your Tune Charge into fire
- for disposal, the internal battery may
- explode
- Do not attempt to disassemble your
- Tune Charge.
- Avoid dropping your Tune Charge and
- keep it away from sharp objects.
- Charge your Tune Charge via SV USB
- ports available on mobile phone
- chargers, laptops and/or PCs.
- Keep out of reach of children.
- For your safety, please do not use your
- Tune Charge while driving, riding a two
- wheeler or walking on the road.
- Do not listen to music on your Tune
Charge at a high volume for extended periods of time.
For any assistance, please reach out to us at gonoise.com/pages/register -your-complaint

Thank you for buying Noise Tune Charge
]]>
NoiseFit Endure
Please refer to this manual before using the product
NOTES
Some functions may vary in certain versions of the software.
- Please charge the Noisefit Endure with the provided charger for 2.5 hours before use.
- The NoiseFit Endure is IP68 waterproof rating. It can’t be used under corrosive liquids or hot water, tea, etc. Meanwhile, it cannot be used during deep-sea diving over 3 meters.
- Please download the Da Fit app for using the NoiseFit Endure smartwatch.
Some smartphones may turn the app off in the background. Please ensure the app is running in the background by locking/whitelisting the app in the background (only in Android)
- Please ensure that there is no space between the watch and your wrist to ensure the accuracy of the health tests.
- Please avoid collision with hard objects as it may break the glass.
- Use 5V, 1A version chargers. Please note the NoiseFit Endure smartwatch does not support a quick charge. Charge under watery (sweat) conditions is prohibited to avoid short circuits and result in damage.
- This watch is an electronic monitoring product. The data is for reference only and cannot be used as a medical reference.
PRODUCT OVERVIEW
Touch Screen Display Button Magnetic Charging Point Heart Rate Testing spot
SYSTEM REQUIREMENTS
Scan the QR code to download the Da Fit app on your phone.
http://plus.crrepa.com/app-download/dafit
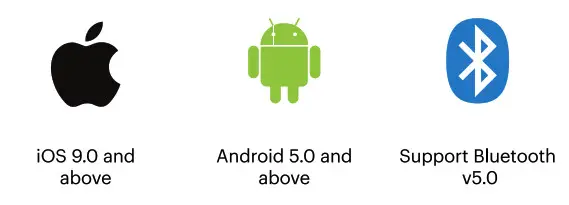
Note: Android app will be blocked in the background if the phone is in standby mode for more than 2 hours. Activate the app in the background platform via settings.
Go to Settings. Choose Da Fit app. Choose Show Notification.
![]()
CONNECTION FOR APP AND WATCH
Android Users –
- Go to the device page. Click the ‘To add device’ and select Endure.
iPhone Users –
- Go to the device and select Add device, select Endure.
- Pair via Bluetooth.
- Allow Da Fit to send notifications.
DA FIT APP SETTINGS
Watch faces – Go to watch faces. Choose from the 3 options available.
Note: You can customize your watch face by using the editable version of the watch faces. Select the image for the gallery and save it. For cloud-based watch faces click on add more watch faces.
Notifications reminder – Tap to turn on/off and choose which apps’ notifications to be pushed to your watch.
Alarms – Select the time in the alarm and number of alarms and save.
Shutter – Open the app and select shutter. Tap the camera icon on the watch to capture the image remotely. Note: Some phones may need to turn on the camera function first before using it.
OTHERS
Find Device – Upon tap, the watch will vibrate for the reminder.
Time Formats – Choose either 12-hour or 24-hour format.
Unit System – Choose either the Metric System or British System.
Do Not Disturb Mode – Set the start and end time and save. Note: Once turned on, notifications cannot be pushed to the NoiseFit Endure smartwatch.
Reminders to Move – Tap to set the daily reminder to move.
QUICK VIEW
Tap to turn on the quick view of the watch screen. Choose the validity period. Set start and end time and save.
WEATHER
- Tap to turn on the weather notifications.
- Choose the temp system and hit done.
- Feed in the city zip code to get that area’s weather updates.
PHYSIOLOGICAL CYCLE REMINDER
Tap to turn on and provide the required information.
UPGRADE
Update your firmware to get the best experience. Note: Please make sure that there is at least 50% battery life before upgrading. Keep your watch close to your phone during upgrading.
UNPAIR
Tap remove to unpair the device.
Note: For iPhones, please forget the devices in the phone% Bluetooth setting to make sure the device is disconnected completely.
SMART WATCH FUNCTIONS
Basic
Power on: Long press the button for 3 seconds to turn on the watch. Short press the button to wake the watch up if the watch is at standby mode.
Power off: Long press the button for 3 seconds and select to turn the watch off.
WATCH INTERFACE SHIFT PROCESS:
- Swipe right to check the notification bar.
- Swipe left to go to sports mode.
- Swipe up to go menu.
- Swipe down to display the shortcuts menu.
OPERATIONS ON THE DIAL
Shortcut interface – Swipe down on the status bar to see the functions. Visual presentation of the dial with the icons on the notification bar –
- Find my phone
- Brightness
- Settings
- Connected Icon
- Battery Level
- Day & Date
Watch Face – Long press the current watch face. Swipe left or right to choose the watch face.
Notifications – The Noisefit Endure can receive messages as long as it is synced with the smartphone and Da Fit app. You’ll get notified of up to 8 messages. Click the empty button to clear the messages.
Note: Replying to text messages is not supported on the NoiseFit Endure smartwatch.
PEDOMETER
The Pedometer will work as long as the watch is turned on and display today’s steps, distance covered and calories burnt.
SPORTS MODE
This mode has walking, running, cycling, skipping, badminton, basketball, yoga, football, and workout.
Click the icon to enter the corresponding workout mode. Note: The data will only be saved when exercise time is more than 5 minutes or more than 200 steps, otherwise the exercise won’t be saved.
HEALTH (Heart rate and blood oxygen)
Heart Rate – The NoiseFit Endure smartwatch will start recording the heart rate using optical sensors. The result will be shown on the screen when the heart rate data is generated.
On the Da Fit app, go to the activity page and choose Heart rate to check history records over a day, week, or month.
SPO2 Monitor – The NoiseFit Endure smartwatch will start recording the Oxygen level using optical sensors. The result will show on the NoiseFit Endure smartwatch when the oxygen data is generated. On the Da Fit app, go to the activity page and choose Blood Oxygen to check the last 7 trends.
Sleep Monitor – The default sleep monitor is set from 9:00 pm to 7:30 am. The watch can detect your sleep automatically if worn to sleep. You can check the sleep duration on the Da Fit app the following morning. The smartwatch will synchronize automatically once it is paired with the Da Fit app.
Note: There may be some variation in the actual sleeping status due to the changing sleep modes.
Music – You can control music from your smartwatch as long as it is paired with your smartwatch and synced with the Da Fit app. Note: In a few cases, you may have to open the music player in your smartphone to be remotely controlled by the NoiseFit Endure smartwatch. The Noisefit Endure does not display the music name or adjust the volume.
WATCH FACE
Go to the watch face section on your Da Fit app. Select the editable watch face. Choose the image and customize it as per your requirement and save. For cloud based watch faces click on add more watch faces.
STOPWATCH
Tap the star icon to start. Tap the play icon to start pause icon to pause and refresh icon to reset.
SETTINGS
Tap Settings to find more functions.
SCREEN BRIGHTNESS
Tap the screen to adjust brightness.
CAMERA
You can remotely control the camera once the NoiseFit Endure is paired with your smartwatch and synced with the Da Fit app.
Tap the camera on the NoiseFit Endure smartwatch. Note: Smartphone’s camera would also open.
Select the frame you want to click. Tap on the NoiseFit Endure smartwatch camera to click images.
Note: The image will be saved automatically in your phone’s gallery.
RESET
Tap the left icon to exit and tap the right icon to reset.
Note: Once reset, all the data will be cleared. The data of the paired phone will not be cleared until and unless the phone has also been reset.
ABOUT
You can see the device address, Bluetooth name, and firmware version here.
TROUBLESHOOTING
Refer to the following steps in case of any smartwatch malfunctioning.
- Unable to restart the watch
- This issue may occur, if the watch button is not pressed for long enough. Press again for over 3 seconds.
- Make sure to charge the watch before switching on the watch.
- Use 5V/1V adapter to charge the watch in case the watch has not been used for a long time
Auto power off – This may be due to low battery, please charge the watch before switching it on.
Short battery life –
- This may be due to an insufficient battery charge.
- Make sure that the battery is charged, for at least 2 hours.
- Charger or data line is working properly. If not then change and get a new one.
- Check the charging port and try again.
- Bluetooth hasn’t connected to or unable to connect to the watch.
Restart the watch – Turn off the bluetooth of your phone, turn on the bluetooth again and connect to the watch again.
Inaccurate sleep data –
- The sleep monitor is designed to imitate the natural pattern of falling asleep and waking up.
- Please wear the watch at all times to avoid variation in data that may occur if going to bed late or only wearing during sleep. There may not be any sleeping data generated if you go to bed at any time during the day as the defaulted sleeping time is preset to between 9:00pm to 7:30am.
CAUTION
Risk of explosion if battery is replaced by an incorrect type. Dispose of used batteries according to the instructions
 Old electrical appliances must not be disposed of together with the residual waste, but have to be disposed of separately. The disposal at the communal collecting point via private persons is for free. The owner of old appliances is responsible to bring the appliances to these collecting points or to similar collection points. With this little personal effort, you contribute to recycle valuable raw materials and the treatment of toxic substances.
WARRANTY INFORMATION
- What is covered in the limited warranty period? Warranty is applicable on the Noise product including accessories on manufacturing defects (if any) for 1 Year from the date of purchase.
- What are the things that are not covered in the warranty:
• Product has been subject to unauthorized tampering modification or repairs.
• Product has suffered physical damage on the account of abuse, neglect, or improper use, handling, storage, installation, or testing, including any use that is not in accordance with the product manual, documentation, or other instructions provided along with the node product.
• Product has suffered any misconduct.
• Any other clause mentioned in our online return policy.
Note: For further information on product replacement/refund related queries, please refer to the terms and conditions mentioned in our return policy section on www.gonoise.com
CUSTOMER CARE TEAM
Thank you for shopping from www.gonoise.com. For any assistance, please get in touch with our Customer Care Team at +918882132132 or just drop an email at [email protected]
We hope you have an amazing experience with the product.
Register Warranty for your Product
www.gonoise.com/pages/warranty-registration
 Service and Support Extended Warranty
 SCAN ME

https://www.gonoise.com/pages/warranty-registration

Thankyou for your buying NoiseFT Endure
]]>