


Microlife NC 150
9 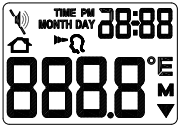
10 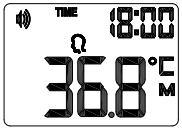
11 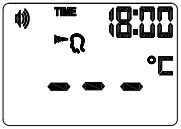
12 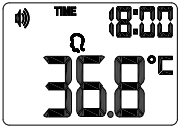
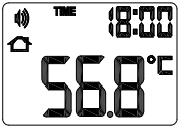
13 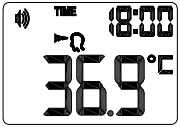 14
14 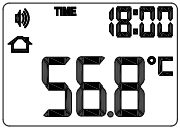
15 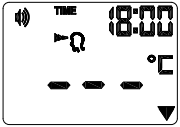
16 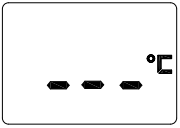
17 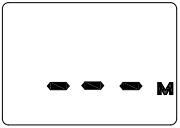
18 
19 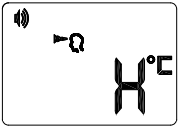
20 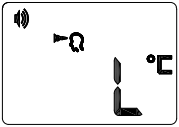
21 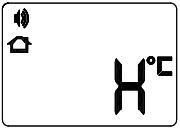 22
22 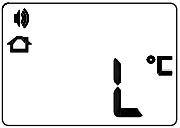
23 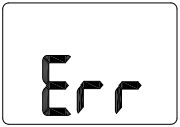 24
24  25
25 
26 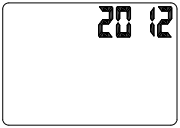
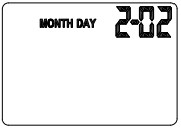
27 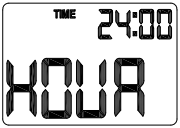

28 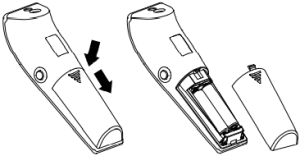

Guarantee Card
Name of Purchaser _________________________
Serial Number _________________________
Date of Purchase _________________________
Specialist Dealer _________________________
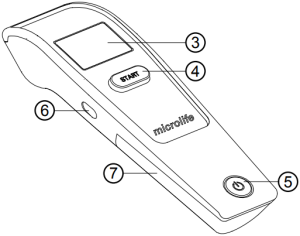
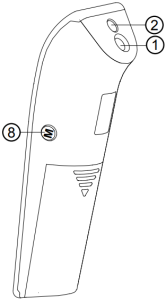
Microlife Non Contact Thermometer NC 150
- Measuring sensor
- Tracking light
- Display
- START button
- ON/OFF button
- Mode switch
- Battery compartment cover
- M-button (memory)
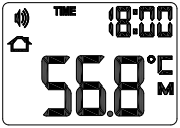
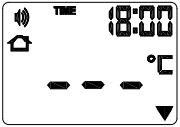
- All segments displayed
- Memory
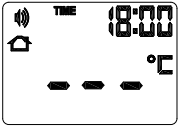
- Ready for measuring
- Measurement complete
- Body mode
- Object mode
- Low battery indicator
- Changing between Celsius and Fahrenheit
- Recall mode
- Recall the last 30 readings
- Measured temperature too high
- Measured temperature too low
- Ambient temperature too high
- Ambient temperature too low
- Error function display
- Blank display
- Flat battery
- Date/Time
- Beeper function setting
- Replacing the battery
 Read the instructions carefully before using this device.
 Type BF applied part
 Keep dry
This Microlife thermometer is a high quality product incorporating the latest technology and tested in accordance with international standards. With its unique technology, this device can provide a stable, heat-interference-free reading with each measurement. The device performs a self-test every time it is switched on to always guarantee the specified accuracy of any measurement. This Microlife thermometer is intended for the periodic measurement and monitoring of human body temperature.
This thermometer has been clinically tested and proven to be safe and accurate when used in accordance to the operating instruction manual.
Please read through these instructions carefully in order for you to understand all functions and safety information.
1. The Advantages of this Thermometer
Measures in a matter of seconds
The innovative infrared technology allows the measurement without even touching the object. This guarantees safe and sanitary measurements within seconds.
Multiple uses (wide range of measurement)
This thermometer offers a wide range of measurement from 0.1 – 99.9 °C / 32.2 – 211.8 °F, meaning the unit can be used to measure body temperature or it also has a feature allowing it to be used to measure surface temperature of the following examples:
- Milk surface temperature in a baby’s bottle
- Surface temperature of a baby’s bath
- Ambient temperature
Accurate and reliable
The unique probe assembly construction incorporates an advanced infrared sensor, ensuring that each measurement is accurate and reliable.
Gentle and easy to use
- The ergonomic design enables simple and easy use of the thermometer.
- This thermometer can even be used on a sleeping child without causing any interruption.
- This thermometer is quick, therefore child-friendly.
Multiple readings recall
Users will be able to recall the last 30 readings with a record of both time and date when entering the recall mode, enabling efficient tracking of temperature variations.
Safe and hygienic
- No direct skin contact.
- No risk of broken glass or mercury ingestion.
- Completely safe for use on children.
Fever alarm
10 short beeps and a red LCD backlight alert the patient that he/ she may have a temperature equal to or higher than 37.5 °C.
2. Important Safety Instructions
- Follow instructions for use. This document provides important product operation and safety information regarding this device. Please read this document thoroughly before using the device and keep for future reference.
- This device may only be used for the purposes described in these instructions. The manufacturer cannot be held liable for damage caused by incorrect application.
- Never immerse this device in water or other liquids. For cleaning please follow the instructions in the «Cleaning and Disinfecting» section.
- Do not use this device if you think it is damaged or notice anything unusual.
- Never open this device.
- A basic physiological effect called vasoconstriction can occur in the early stages of fever, resulting in a cool skin effect. The recorded temperature using this thermometer can, therefore, be unusually low.
- If the measurement result is not consistent with the patient’s finding or unusually low, repeat the measurement every 15 minutes or double check the result by another core body temperature measurement.
- This device comprises sensitive components and must be treated with caution. Observe the storage and operating conditions described in the «Technical Specifications» section.
- Ensure that children do not use this device unsupervised; some parts are small enough to be swallowed.
- Do not use this device close to strong electromagnetic fields such as mobile telephones or radio installations. Keep a minimum distance of 3.3 m from such devices when using this device.
- Protect it from:
– extreme temperatures
– impact and dropping
– contamination and dust
– direct sunlight
– heat and cold - If the device is not going to be used for a prolonged period the batteries should be removed.
 WARNING: The measurement results given by this device is not a diagnosis. It is not replacing the need for the consultation of a physician, especially if not matching the patient’s symptoms. Do not rely on the measurement result only, always consider other potentially occurring symptoms and the patient’s feedback. Calling a doctor or an ambulance is advised if needed.
3. How this Thermometer measures Temperature
This thermometer measures infrared energy radiated from the forehead as well as objects. This energy is collected through the lens and converted to a temperature value.
4. Control Displays and Symbols
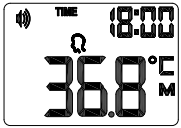
- All segments displayed 9: Press the ON/OFF button 5 to turn on the unit; all segments will be shown for 1 second.
- Ready for measuring 11: When the unit is ready for measuring, the «°C» or «°F» icon will keep flashing while the mode icon (body or object) will be displayed.
- Measurement complete 12: The reading will be shown on the display 3 with the «°C» or «°F» icon and the mode icon steady. The unit is ready for the next measurement as soon as the «°C» or «°F» icon is flashing again.
- Low battery indicator 15: When the unit is turned on, the «
 » icon will keep flashing to remind the user to replace the batteries.
5. Setting Date, Time and Beeper Functions
Setting the date and time
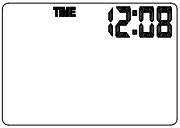
- After the new batteries are fitted, the year number flashes in the display 26. You can set the year by pressing the START button 4. To confirm and then set the month, press the M-button 8.
- Press the START button 4 to set the month. Press the M-button 8 to confirm and then set the day.
- Follow the previously mentioned instructions to set the day, 12 or 24 hour mode, hours and minutes.
- Once you have set the minutes and pressed the M-button 8, the date and time are set and the time is displayed.
 If no button is pressed for 20 seconds, the device automatically switches to ready for measuring 11.
 Cancel time setup: Press the ON/OFF button 5 during time setup. The LCD will show Date/Time icons with «–:–». After that press the ON/OFF button 5 to start the measurement. If no further action is taken within 20 seconds, the device will automatically turn off.
 Change current date and time: Press and hold the M-button 8 for approx. 3 seconds until the year number starts to flash 26. Now you can enter the new values as described above.
Setting the beeper
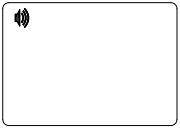
- When the device is switched off, press and hold the ON/OFF button 5 for 5 seconds to set the beeper 27.
- Press the ON/OFF button 5 again to either turn the beeper on or off. The beeper is activated when the beeper icon 27 is not crossed-out.
 If no button is pressed for 5 seconds, the device automatically switches to ready for measuring 11.
6. Changing between Body and Object Mode
For changing from body to object mode, slide the mode switch 6 at the side of the thermometer downwards. For switching back to body mode, slide the switch up again.
7. Directions for Use
Measuring in body mode
- Press the ON/OFF button 5. The display 3 is activated to show all segments for 1 second.
- When the «°C» or «°F» icon is flashing, a beep sound is heard and the thermometer is ready for measuring 11.
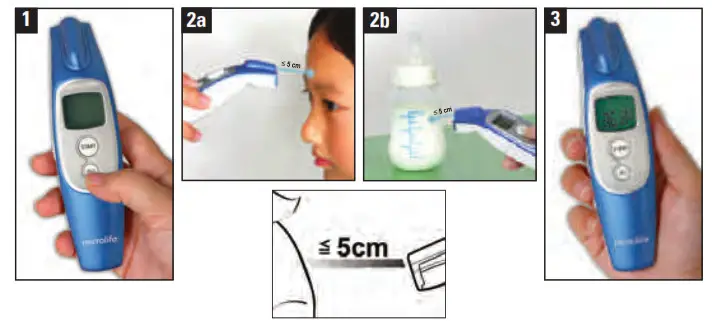
- Aim the thermometer at the center of the forehead with a distance of no more than 5 cm. Please remove any hair, sweat or dirt from the forehead before measuring to improve the accuracy of the readings.
- Press the START button 4 and ensure that the activated blue tracking light is aimed at the center of the forehead. After 3 seconds a long beep will verify the completion of measurement.
- Read the recorded temperature from the LCD display.
Measuring in object mode
- Follow steps 1-2 above, then aim the thermometer at the center of the object you want to measure with a distance of no more than 5 cm. Press the START button 4. After 3 seconds a long beep will verify the completion of measurement.
- Read the recorded temperature from the LCD display.
 NOTE:
NOTE:
- Patients and thermometer should stay in similar room condition for at least 30 minutes.
- Don’t take a measurement while or immediately after nursing a baby.
- Don’t use the thermometer in high humidity environments.
- Patients should not drink, eat or exercise before/while taking the measurement.
- Don’t move the measurement device from the measuring area before hearing the termination beep.
- 10 short beeps and a red LCD backlight alert the patient that he/she may have a temperature equal to or higher than 37.5 °C.
- Always take the temperature in the same location, since temperature readings may vary according to locations.
- Doctors recommend rectal measurement for newborn infants within the first 6 months, as all other measuring methods might lead to ambiguous results. If using a non contact thermometer on those infants, we always recommend verifying the readings with a rectal measurement.
- In the following situations it is recommended that three temperatures are taken with the highest one taken as the reading:
- Children under three years of age with a compromised immune system and for whom the presence or absence of fever is critical.
- When the user is learning how to use the thermometer for the first time until he/she has familiarized himself/herself with the device and obtains consistent readings.
- If the measurement is surprisingly low.
- Readings from different measuring sites should not be compared as the normal body temperature varies by measuring site and time of day, being highest in the evening and lowest about one hour before waking up.
Normal body temperature ranges:
– Axillar: 34.7 – 37.3 °C / 94.5 – 99.1 °F
– Oral: 35.5 – 37.5 °C / 95.9 – 99.5 °F
– Rectal: 36.6 – 38.0 °C / 97.9 – 100.4 °F
– Microlife NC 150: 35.4 – 37.4 °C / 95.7 – 99.3 °F
8. Changing between Celsius and Fahrenheit
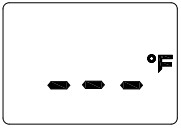
This thermometer can display temperature readings in either Fahrenheit or Celsius. To switch the display between °C and °F, simply turn OFF the unit, press and hold the START button 4 for 5 seconds; after 5 seconds, the current measurement scale («°C» or «°F» icon) will flash on the display 16. Change the measurement scale between °C and °F by pressing the START button 4. When the measurement scale has been chosen, wait for 5 seconds and the unit will automatically enter the «ready for measuring» mode.
9. How to recall 30 readings in Memory Mode
This thermometer can recall the last 30 readings with a record of both time and date.
- Recall mode 17: Press the M-button 8 to enter recall mode when the power is off. The memory icon «M» will flash.
- Reading 1 – the last reading 18: Press and release the M-button 8 to recall the last reading. Number «1» and a flashing «M» are displayed.
- Reading 30 – readings in succession: Press and release the M-button 8 consecutively to recall the last 30 readings in succession.
Pressing and releasing the M-button 8 after the last 30 readings have been recalled will resume the above sequence from reading 1.
10. Error Messages
- Measured temperature too high 19: Displays «H» when measured temperature is higher than 43.0 °C / 109.4 °F in body mode or 99.9 °C / 211.8 °F in object mode.
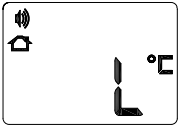
- Measured temperature too low 20: Displays «L» when measured temperature is lower than 34.0 °C / 93.2 °F in body mode or 0.1 °C / 32.2 °F in object mode.
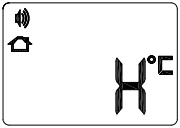
- Ambient temperature too high 21: Displays «H» and
 when ambient temperature is higher than 40.0 °C / 104.0 °F.
 - Ambient temperature too low 22: Displays «L» and
 when ambient temperature is lower than 15.0 °C / 59.0 °F in body mode or lower than 5.0 °C / 41.0 °F in object mode.
 - Error function display 23: The system has a malfunction.
- Blank display 24: Check if the batteries have been inserted correctly. Also check polarity (<+> and <->) of the batteries.
- Flat battery indicator 25: If only «
 » icon is shown on the display, the batteries should be replaced immediately.
11. Cleaning and Disinfecting
Use an alcohol swab or cotton tissue moistened with alcohol (70% Isopropyl) to clean the thermometer casing and the measuring sensor. Ensure that no liquid enters the interior of the device. Never use abrasive cleaning agents, thinners or benzene for cleaning and never immerse the device in water or other cleaning liquids. Take care not to scratch the surface of the sensor lens and the display.
12. Battery Replacement
This device is supplied with 2 new, long-life 1.5V, size AAA batteries. Batteries need replacing when this icon « » 25 is the only symbol shown on the display.
Remove the battery cover 28 by sliding it in the direction shown. Replace the batteries ensure correct polarity as shown by the symbols in the compartment.
 Batteries and electronic devices must be disposed of in accordance with the locally applicable regulations, not with domestic waste.
13. Guarantee
This device is covered by a 5 year guarantee from the date of purchase. During this guarantee period, at our discretion, Microlife will repair or replace the defective product free of charge. Opening or altering the device invalidates the guarantee.
The following items are excluded from the guarantee:
- Transport costs and risks of transport.
- Damage caused by incorrect application or non-compliance with the instructions for use.
- Damage caused by leaking batteries.
- Damage caused by accident or misuse.
- Packaging/storage material and instructions for use.
- Regular checks and maintenance (calibration).
- Accessories and wearing parts: Batteries, Probe cover (optional).
Should guarantee service be required, please contact the dealer from where the product was purchased, or your local Microlife service. You may contact your local Microlife service through our website:
www.microlife.com/support
Compensation is limited to the value of the product. The guarantee will be granted if the complete product is returned with the original invoice. Repair or replacement within guarantee does not prolong or renew the guarantee period. The legal claims and rights of consumers are not limited by this guarantee.
14. Technical Specifications
Type: Adjusted mode Non Contact Thermometer NC 150
Measuring site: Forehead
Reference body site: Sublingual
Measurement range: Body mode: 34.0 – 42.2 °C / 93.2 – 108.0 °F, Object mode: 0.1 – 99.9 °C / 32.2 – 211.8 °F
Resolution: 0.1 °C / °F
Measurement accuracy (Laboratory): ±0.2 °C, 36.0 ~ 39.0 °C / ±0.4 °F, 96.8 ~ 102.2 °F
Display: Liquid Crystal Display, 4 digits plus special icons
Clinical results: Repeatability: 0.26 °C, Bias: 0.08 °C, Limits of agreement: 1.13 °C
Acoustic: The unit is turned ON and ready for the measurement: 1 short beep.
Complete the measurement: 1 long beep (1 sec.) if the reading is less than 37.5 °C / 99.5 °F, 10 short «beep» sounds, if the reading is equal to or greater than 37.5 °C / 99.5 °F.
System error or malfunction: 3 short «bi» sounds.
Memory: 30 readings recall in the memory mode with a record of both time and date.
Backlight: The display light will be GREEN for 1 second, when the unit is turned ON.
The display light will be GREEN for 5 seconds, when a measurement is completed with a reading less than 37.5 °C / 99.5 °F.
The display light will be RED for 5 seconds, when a measurement is completed with a reading equal to or higher than 37.5 °C / 99.5 °F.
Operating conditions: Body mode: 15 – 40.0 °C / 59 – 104.0 °F, Object mode: 5 – 40.0 °C / 41 – 104.0 °F
Storage conditions: -25 – +55 °C / -13 – +131 °F, 15 – 95 % relative maximum humidity
Automatic Switch-off: Approx. 1 minute after last measurement has been taken.
Battery: 2 x 1.5 V alkaline batteries; size AAA
Battery lifetime: approx. 2000 measurements (using new batteries)
Dimensions: 141.1 x 43.3 x 36.9 mm
Weight: 90 g (with batteries), 67 g (w/o batteries)
IP Class: IP21
Reference to standards: ISO 80601-2-56; IEC 60601-1; IEC 60601-1-2 (EMC); IEC 60601-1-11
Expected service life: 5 years or 12000 measurements
This device complies with the requirements of the Medical Device Directive 93/42/EEC.
Technical alterations reserved.
According to the Medical Product User Act a biennial technical inspection is recommended for professional users. Please observe the applicable disposal regulations.
15.
Detailed user information about our thermometers and blood pressure monitors as well as services can be found at www.microlife.com.
 Microlife AG
Espenstrasse 139
9443 Widnau / Switzerland
www.microlife.com
 Microlife UAB
P. Luksio g. 32,
08222 Vilnius
Lithuania
 0044
0044
IB NC 150 S-V11 1921
Revision Date: 2021-04-19

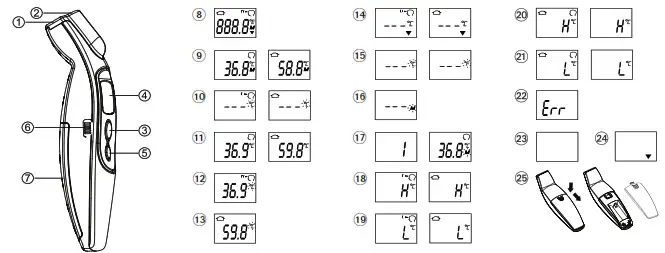
| 1. Measuring sensor 2. Tracking light 3. START button 4. Display 5. ON/OFF button 6. Mode switch 7. Battery compartment cover 8. All segments displayed 9. Memory 10. Ready for measuring 11. Measurement complete 12. Body mode 13. Object mode |
14. Low battery indicator 15. Changing between Celsius and Fahrenheit 16. Recall mode 17. Recall the last 30 readings 18. Measured temperature too high 19. Measured temperature too low 20. Ambient temperature too high 21. Ambient temperature too low 22. Error function display 23. Blank display 24. Flat battery 25. Replacing the battery |
![]() Read the instructions carefully before using the device.
Read the instructions carefully before using the device.
 Type BF applied part
 Keep dry
This Microlife thermometer is a high-quality product incorporating the latest technology and tested in accordance with international standards. With its unique technology, this device can provide a stable, heat-interference-free reading with each measurement. The device performs a self-test every time it is switched on to always guarantee the specified accuracy of any measurement. This Microlife thermometer is intended for the periodic measurement and monitoring of human body temperature. This thermometer has been clinically tested and proven to be safe and accurate when used in accordance to the operating instruction manual. Please read through these instructions carefully in order for you to understand all functions and safety information.
The Advantages of this Thermometer
Measures in a matter of seconds
The innovative infrared technology allows the measurement without even touching the object. This guarantees safe and sanitary measurements within seconds.
Multiple uses (wide range of measurement)
This thermometer offers a wide range of measurement from 0-100.0 °C / 32-212.0 °F, meaning the unit can be used to measure body temperature or it also has a feature allowing it to be used to measure the surface temperature of the following examples:
- Milk surface temperature in a baby’s bottle
- The surface temperature of a baby’s bath
- Ambient temperature
Accurate and reliable
The unique probe assembly construction incorporates an advanced infrared sensor, ensuring that each measurement is accurate and reliable.
Gentle and easy to use
- The ergonomic design enables simple and easy use of the thermometer.
- This thermometer can even be used on a sleeping child without causing any interruption.
- This thermometer is quick, therefore child-friendly.
Auto-Display Memory
The last reading is automatically displayed for 2 seconds when the unit is switched ON.
Multiple readings recall
Users will be able to recall the last 30 readings when entering the recall mode, enabling efficient tracking of temperature variations.
Safe and hygienic
- No direct skin contact.
- No risk of broken glass or mercury ingestion.
- Completely safe for use on children.
- Cleaning of the probe can be done with an alcohol moistened cotton tissue, making this thermometer completely hygienic for use by the whole family. Fever alarm 10 short beeps and a red LCD backlight alert the patient that he/ she may have a temperature equal to or higher than 37.5 °C.
Important Safety Instructions
- Follow instructions for use. This document provides important product operation and safety information regarding this device. Please read this document thoroughly before using the device and keep it for future reference.
- This device may only be used for the purposes described in these instructions. The manufacturer cannot be held liable for damage caused by incorrect application
- Never immerse this device in water or other liquids. For cleaning please follow the instructions in the «Cleaning and Disinfecting» section.
- Do not use this device if you think it is damaged or notice anything unusual.
- Never open this device.
- A basic physiological effect called vasoconstriction can occur in the early stages of fever, resulting in a cool skin effect. The recorded temperature using this thermometer can, therefore, be unusually low.
- If the measurement result is not consistent with the patient’s finding or unusually low, repeat the measurement every 15 minutes or double-check the result by another core body temperature measurement.
- This device comprises sensitive components and must be treated with caution. Observe the storage and operating conditions described in the «Technical Specifications» section.
- Ensure that children do not use this device unsupervised; some parts are small enough to be swallowed.
- Do not use this device close to strong electromagnetic fields such as mobile telephones or radio installations. Keep a minimum distance of 3.3 m from such devices when using this device.
- Protect it from: – extreme temperatures – impact and dropping – contamination and dust – direct sunlight – heat and cold
- If the device is not going to be used for a prolonged period the batteries should be removed.
 WARNING: The measurement results given by this device are not a diagnosis. It is not replacing the need for the consultation of a physician, especially if not match the patient’s symptoms. Do not rely on the measurement result only, always consider other potentially occurring symptoms and the patient’s feedback. Calling a doctor or an ambulance is advised if needed.
How this Thermometer measures Temperature
This thermometer measures infrared energy radiated from the forehead as well as objects. This energy is collected through the lens and converted to a temperature value.
Control Displays and Symbols
- All segments displayed 8: Press the ON/OFF button 5 to turn on the unit; all segments will be shown for 2 seconds.
- Memory 9: The last reading will automatically be shown on the display for 2 seconds.
- Ready for measuring AT: When the unit is ready for measuring, the «°C» or «°F» icon will keep flashing while the mode icon (body or object) will be displayed.
- Measurement complete AK: The reading will be shown on the display 4 with the «°C» or «°F» icon and the mode icon steady. The unit is ready for the next measurement as soon as the «°C» or «°F» icon is flashing again.
- Low battery indicator AN: When the unit is turned on, the «
 » icon will keep flashing to remind the user to replace the batteries.
Changing between Body and Object Mode
For changing from the body to object mode, slide the mode switch 6 at the side of the thermometer downwards. For switching back to body mode, slide the switch up again.
Directions for Use
Measuring in body mode
- Press the ON/OFF button 5. Display 4 is activated to show all segments for 2 seconds.
- The last measurement reading will automatically be shown on the display for 2 seconds with the «M» icon 9.
- When the «°C» or «°F» icon is flashing, a beep sound is heard and the thermometer is ready for measuring AT.
- Aim the thermometer at the center of the forehead with a distance of no more than 5 cm. Please remove any hair, sweat or dirt from the forehead before measuring to improve the accuracy of the readings.
- Press the START button 3 and ensure that the activated blue tracking light is aimed at the center of the forehead. After 3 seconds a long beep will verify the completion of measurement.
- Read the recorded temperature from the LCD display.
Measuring in object mode
- Follow steps 1-3 above, then aim the thermometer at the center of the object you want to measure with a distance of no more than 5 cm. Press the START button 3. After 3 seconds a long beep will verify the completion of measurement.
- Read the recorded temperature from the LCD display.
 NOTE:
NOTE:
- Patients and thermometers should stay in similar room conditions for at least 30 minutes.
- Don’t take a measurement while or immediately after nursing a baby.
- Don’t use the thermometer in high humidity environments.
- Patients should not drink, eat or exercise before/while taking the measurement.
- Don’t move the measurement device from the measuring area before hearing the termination beep.
- Use an alcohol swab to carefully clean the probe and wait for 15 minutes before taking a measurement on another patient.
- 10 short beeps and a red LCD backlight alert the patient that he/she may have a temperature equal to or higher than 37.5 °C.
- Always take the temperature in the same location, since temperature readings may vary according to location.
- Doctors recommend rectal measurement for newborn infants within the first 6 months, as all other measuring methods might lead to ambiguous results. If using a noncontact thermometer on those infants, we always recommend verifying the readings with a rectal measurement.
- In the following situations, it is recommended that three temperatures are taken with the highest one taken as the reading:
1. Children under three years of age with a compromised immune system and for whom the presence or absence of fever is critical.
2. When the user is learning how to use the thermometer for the first time until he/she has familiarized himself/
herself with the device and obtains consistent readings.
3. If the measurement is surprisingly low. - Readings from different measuring sites should not be compared as the normal body temperature varies by measuring site and time of day, being highest in the evening and lowest about one hour before waking up.
Normal body temperature ranges:
– Axillar: 34.7 – 37.3 °C / 94.5 – 99.1 °F
– Oral: 35.5 – 37.5 °C / 95.9 – 99.5 °F
– Rectal: 36.6 – 38.0 °C / 97.9 – 100.4 °F
– Microlife NC 100: 35.4 – 37.4 °C / 95.7 – 99.3 °F
Changing between Celsius and Fahrenheit
This thermometer can display temperature readings in either Fahrenheit or Celsius. To switch the display between °C and °F, simply turn OFF the unit, press and hold the START button 3 for 5 seconds; after 5 seconds, the current measurement scale («°C» or «°F» icon) will flash on the display AO. Change the measurement scale between °C and °F by pressing the START button 3. When the measurement scale has been chosen, wait for 5 seconds and the unit will automatically enter the «ready for measuring» mode.
How to recall 30 readings in Memory Mode
This thermometer can recall the last 30 readings.
- Recall mode 16: Press the START button 3 to enter Recall mode when power is off. The memory icon «M» will flash.
- Reading 1 – the last reading 17: Press and release the START button 3 to recall the last reading. Display 1 alone with a memory icon.
- Reading 30 – readings in succession: Press and release the START button 3 consecutively to recall the last 30 readings in succession.
Pressing and releasing the START button 3 after the last 30 readings have been recalled will resume the above sequence from reading 1.
Error Messages
- Measured temperature too high 18: Displays «H» when the measured temperature is higher than 42.2 °C / 108 °F in body mode or 100 °C / 212 °F in object mode.
- Measured temperature too low 19: Displays «L» when the measured temperature is lower than 34.0 °C / 93.2°F in body mode or 0 °C / 32 °F in object mode.
- Ambient temperature too high 20: Displays «H» and
 when the ambient temperature is higher than 40.0 °C / 104.0 °F.
 - Ambient temperature too low 21: Displays «L» and
 when the ambient temperature is lower than 16.0 °C /60.8 °F in body mode or lower than 5.0 °C / 41.0 °F in object mode.
 - Error function display 22: The system has a malfunction
- Blank display 23: Check if the batteries have been inserted correctly. Also, check the polarity (<+> and <->) of the batteries.
- Flat battery indicator BN: If only «
 » icon is shown on the display, the batteries should be replaced immediately.
Cleaning and Disinfecting
Use an alcohol swab or cotton tissue moistened with alcohol (70% Isopropyl) to clean the thermometer casing and the measuring sensor. Ensure that no liquid enters the interior of the device. Never use abrasive cleaning agents, thinners or benzene for cleaning and never immerse the device in water or other cleaning liquids. Take care not to scratch the surface of the sensor lens and the display.
Battery Replacement
This device is supplied with 2 new, long-life 1.5V, size AAA batteries. Batteries need replacing when this icon « » 24 is the only symbol shown on the display.
Remove the battery cover 25 by sliding it in the direction shown. Replace the batteries – ensure correct polarity as shown by the symbols in the compartment.
 Batteries and electronic devices must be disposed of in accordance with the locally applicable regulations, not with domestic waste.
Guarantee
This device is covered by a 2-year guarantee from the date of purchase. During this guarantee period, at our discretion, Microlife will repair or replace the defective product free of charge.
Opening or altering the device invalidates the guarantee.
The following items are excluded from the guarantee:
- Transport costs and risks of transport.
- Damage caused by the incorrect application or non-compliance with the instructions for use.
- Damage caused by leaking batteries.
- Damage caused by accident or misuse.
- Packaging/storage material and instructions for use.
- Regular checks and maintenance (calibration).
- Accessories and wearing parts: Battery.
Should guarantee service be required, please contact the dealer from where the product was purchased or your local Microlife service. You may contact your local Microlife service through our website: www.microlife.com/support Compensation is limited to the value of the product. The guarantee will be granted if the complete product is returned with the original invoice. Repair or replacement within the guarantee does not prolong or renew the guarantee period. The legal claims and rights of consumers are not limited by this guarantee.
Technical Specifications
Type: Non Contact Thermometer NC 100
Measurement range: Body mode: 34.0-42.2 °C / 93.2-108.0 °F
Object mode: 0-100.0 °C / 32-212.0 °F
Resolution: 0.1 °C / °F
Measurement accuracy:±0.2 °C, 36.0 ± 39.0 °C ±0.4 °F, 96.8
Laboratory: ±102.2 °F
Display: Liquid Crystal Display, 4 digits plus specifics
Acoustic: The unit is turned ON and ready for the measurement: 1 short beep.
Complete the measurement: 1 long beep(1 sec.) if the reading is less than 37.5 °C / 99.5 °F, 10 short «beep» sounds if the reading is equal to or greater than 37.5 °C / 99.5 °F.
System error or malfunction: 3 short «bi» sounds.
Memory: Auto-Display the last measured temperature 30 readings recall in the memory mode
Backlight: The display light will be GREEN for 3 seconds when the unit is turned ON. The display light will be GREEN for 5 seconds, when a measurement is completed with reading less than 37.5 °C / 99.5 °F. The display light will be RED for 5 seconds when a measurement is completed with a reading equal to or higher than 37.5 °C / 99.5 °F.
Operating conditions: Body mode: 15-40.0 °C / 59-104.0 °F
Object mode: 5-40.0 °C / 41-104.0 °F
Storage conditions: -25- +55°C / -13- +131°F 15 – 95 % relative maximum humidity
Automatic Switch-off: Approx. 1 minute after last measurement has been taken.
Battery: 2 x 1.5 V alkaline batteries; size AAA
Battery approx. 2000 measurements
lifetime: (using new batteries)
Dimensions: 150 x 40 x 39 mm
Weight: 81 g (with batteries), 56 g (w/o batteries)
IP Class: IP21
Reference to standards: ASTM E1965; IEC 60601-1; IEC 60601-1-2 (EMC); IEC 60601-1-11
Expected service life: 5 years or 12000 measurements
This device complies with the requirements of the Medical Device Directive 93/42/EEC. Technical alterations reserved. According to the Medical Product User Act a biennial technical inspection is recommended for professional users. Please observe the applicable disposal regulations.
www.microlife.com
Detailed user information about our thermometers and blood pressure monitors, as well as services, can be found at www.microlife.com.

 Microlife AG
Espenstrasse 139
9443 Widnau / Switzerland
www.microlife.com
 0044
0044
IB NC 100 V17-2 4520
Revision-Date: 2020-10-13
IB BP 3BXO-A 3804_4 16/9/04 13:24 Page 1
CE0044

IB BP 3BXO-A 3804_4 16/9/04 13:24 Page 3
Automatic Blood Pressure Monitor
Instruction Manual
Table of contents
1. Introduction
1.1. Features of ‘as easy as 123’
1.2. Important information about self-measurement
2. Important information on the subject of blood-pressure and its measurement
2.1. How does high/low blood-pressure arise?
2.2. Which values are normal?
2.3. What can be done, if regular high/low values are obtained?
3. The various components of the blood-pressure monitor
4. Putting the blood-pressure monitor into operation
4.1. Inserting the batteries
4.2. Using a mains adapter (optional accessory)
4.3. Tube connection
5. Carrying out a measurement
5.1. Before the measurement
5.2. Common sources of error
5.3. Fitting the cuff
5.4. Measuring procedure
5.5. Memory – displaying the last measurement
5.6. Discontinuing a measurement
6. Error messages/malfunctions
7. Care and maintenance, recalibration
8. Guarantee
9. Reference to standards
10. Technical specifications
11. Contact details
IB BP 3BXO-A 3804_4 16/9/04 13:24 Page 2
1. Introduction
1.1. Features
The ‘as easy as 123’ blood-pressure monitor is a fully automatic, digital blood-pressure measuring device for use on the upper arm, which enables very fast and reliable measurement of the systolic and diastolic blood-pressure as well as the pulse frequency by way of the oscillometric method of measuring.The device offers a very high and clinical tested measurement accuracy and has been specifically designed for ease of use.
Thanks to the large LCD display of ‘as easy as 123’, both operational status and cuff pressure are visible for the entire duration of the measurement.
Before using, please read through this instruction manual carefully and then keep it in a safe place. For further questions on the subject of blood-pressure and its measurement, please contact your doctor.
Attention!
1.2. Important information about self-measurement
- Do not forget: self-measurement means Control, not diagnosis or treatment. Unusual values must always be discussed with your doctor. Under no circumstances should you alter the dosages of any drugs prescribed by your doctor.
- The pulse display is not suitable for checking the frequency of heart pacemakers!
- In cases of cardiac irregularity (Arrhythmia), measurements made with this instrument should only be evaluated after consultation with the doctor.
Electromagnetic interference
The device contains sensitive electronic components (Microcomputer). Therefore, avoid strong electrical or electromagnetic fields in the direct vicinity of the device (e.g. mobile telephones, microwave cookers). These can lead to temporary impairment of the measuring accuracy.
2. Important information on the subject of blood-pressure and its Measurement
2.1. How does high/low blood-pressure arise?
The level of blood-pressure is determined in a part of the brain, the so-called circulatory centre, and adapted to the respective situation by way of feedback via the nervous system.
To adjust the blood-pressure, the strength and frequency of the heart (Pulse), as well as the width of circulatory blood vessels is altered. The latter is effected by way of fine muscles in the blood-vessel walls.The level of arterial blood-pressure changes periodically during the heart activity: During the «blood ejection» (Systole) the value is maximal (systolic blood-pressure value), at the end of the heart’s «rest period» (Diastole) minimal (diastolic blood-pressure value).
The blood-pressure values must lie within certain normal ranges in order to prevent particular diseases.
2.2. Which values are normal?
Blood pressure is too high if at rest, the diastolic pressure is above 90 mm Hg and/or the systolic blood-pressure is over 140 mm Hg. In this case, please consult your doctor immediately. Long-term values at this level endanger your health due to the associated advancing damage to the blood vessels in your body.
With blood-pressure values that are too low, i.e. systolic values under 100 mm Hg and/or diastolic values under 60 mm Hg, likewise, please consult your doctor.
Even with normal blood-pressure values, a regular self-check with your blood-pressure monitor is recommended. In this way you can detect possible changes in your values early and react appropriately.
If you are undergoing medical treatment to control your blood pressure, please keep a record of the level of your blood pressure by carrying out regular self-measurements at specific times of the day. Show these values to your doctor. Never use the results of your measurements to alter independently the drug doses prescribed by your doctor.
Table for classifying blood-pressure values (units mm Hg) according to World Health Organization:

2.3. What can be done, if regular increased/low values are obtained?
a) Please consult your doctor.
b) Increased blood-pressure values (various forms of hypertension) are associated long- and medium term with considerable risks to health. This concerns the arterial blood vessels of your body, which are endangered due to constriction caused by deposits in the vessel walls (Arteriosclerosis). A deficient supply of blood to important organs (heart, brain, muscles) can be the result. Furthermore, with long-term continuously increased blood-pressure values, the heart will become structurally damaged.
3
IB BP 3BXO-A 3804_4 16/9/04 13:24 Page 4
c) There are many different causes of the appearance of high blood pressure. We differentiate between the common primary (essential) hypertension, and secondary hypertension. The latter group can be ascribed to specific organic malfunctions. Please consult your doctor for information about the possible origins of your own increased blood pressure values.
d) There are measures which you can take, not only for reducing a medically established high blood pressure, but also for prevention. These measures are part of your general way of life:
A) Eating habits
- Strive for a normal weight corresponding to your age. Reduce overweight!
- Avoid excessive consumption of common salt.
- Avoid fatty foods.
B) Previous illnesses
- Follow consistently any medical instructions for treating previous illness such as:
- Diabetes (Diabetes mellitus)
- Fat metabolism disorder
- Gout
C) Habits
- Give up smoking completely
- Drink only moderate amounts of alcohol
- Restrict your caffeine consumption (Coffee)
D) Physical constitution
- After a preliminary medical examination, do regular sport.
- Choose sports which require stamina and avoid those which require strength.
- Avoid reaching the limit of your performance.
- With previous illnesses and/or an age of over 40 years, please consult your doctor before beginning your sporting activities. He will advise you regarding the type and extent of types of sport that are possible for you.
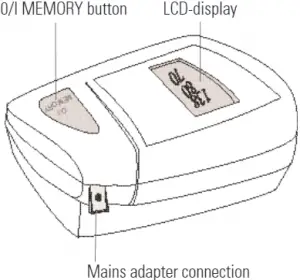
3. The various components of the ‘as easy as 123’
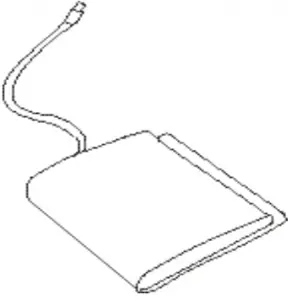
The illustration shows the blood-pressure monitor ‘as eas as 123’ consisting of:
a) Measuring unit
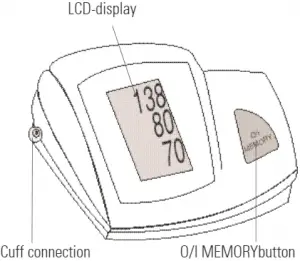
b) Upper arm cuff:
Type M for arm circumference 22–32 cm
Type L for arm circumference 32–42 cm
(Type L – available as special accessory)
5
IB BP 3BXO-A 3804_4 16/9/04 13:24 Page 6
4. Putting the blood-pressure monitor into operation
4.1. Inserting the batteries
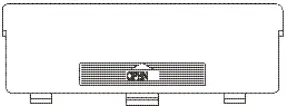
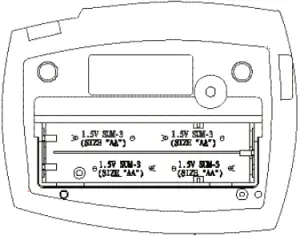
After you have unpacked your device, first insert the batteries. The battery compartment is located on the back side of the device (see illustration).
a) Remove cover as illustrated
b) Insert the batteries (4 x size AA 1,5 V), there by observing the indicated polarity.
c) If the battery warning appears in the display, the batteries are empty and must be replaced by new ones:

Attention!
- After the battery warning appears, the device is blocked until the batteries have been replaced.
- Please use «AA» Long-Life or Alkaline 1.5V Batteries.The use of 1.2V Accumulators is not recommended.
- If the blood-pressure monitor is left unused for long periods, please remove the batteries from the device.
4.2. Using a mains adapter (optional accessory)
It is possible to operate this blood-pressure instrument through a mains adaptor (output 6 V DC / 600 mA with plug). Make certain that you use a mains adaptor which fulfils the legal requirements (CE sign ).
a) Plug the plug into the socket at the left side of the instrument.
b) Plug the mains adaptor into a 230V power socket.
c) Test that power is available by pressing the O/I MEMORY button.
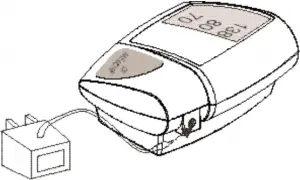
Note:
- No power is taken from the batteries while the mains adaptor is connected to the instrument.
- If the mains voltage is interrupted during the measurement (e.g. by removal of the mains adaptor from the mains socket), the instrument must be reset by removing the plug from its socket.
- Please consult a specialist dealer if you have questions relating to the mains adaptor.
6
4.3. Tube connection
Insert the cuff tube into the opening provided on theleft side of the instrument, as shown in the diagram.
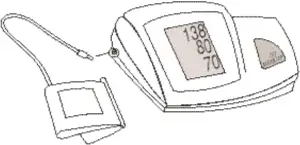
5. Carrying out a measurement
5.1. Before the measurement:
- Avoid eating, smoking as well as all forms of exertion directly before the measurement. All these factors influence the measurement result. Try and find time to relax by sitting in an armchair in a quiteatmosphere for about 5 minutes before the measurement.
- Remove any garment that fits closely to your upper arm.
- Measure always on the same arm (normally left).
- Attempt to carry out the measurements regularly at the same time of day, since the blood-pressure changes during the course of the day.
5.2. Common sources of error
Note: Comparable blood-pressure measurements always require the same conditions! These are normally always quiet conditions.
- All efforts by the patient to support the arm can increase the blood-pressure. Make sure you are in a comfortable, relaxed position and do not activate any of the muscles in the measurement arm during the measurement. Use a cushion for support if necessary.
- If the arm artery lies considerably lower (higher) than the heart, an erroneously higher (lower) blood-pressure will be measured! (Each 15 cm difference in height results in a measurement error of 10mm Hg!)
- Cuffs that are too narrow or too short result in false measurement values. Selecting the correct cuff is of extraordinary importance. The cuff size is dependent upon the circumference of the arm (measured in the centre). The permissible range is printed on the cuff. If this is not suitable for your use, please contact your dealer.
Note: Only use clinically approved Original-Cuffs! - A loose cuff or a sideways protruding air-pocket causes false measurement values.
5.3. Fitting the cuff
a) Push the cuff over the left upper arm so that the tube point sin the direction of the lower arm.

b) Lay the cuff on the arm as illustrated. Make certain that the lower edge of the cuff lies approximately 2 to 3 cm above the elbow and that the rubber tube leaves the cuff on the inner side of the arm.
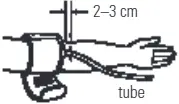
Important! The mark (ca. 3 cm long bar) must lie over the artery which runs down the inner side of the arm.
7
IB BP 3BXO-A 3804_4 16/9/04 13:24 Page 8
c) Tighten the free end of the cuff and close the cuff with the closer.

d) There must be no free space between the arm and the cuff as this would influence the result. Clothing must not restrict the arm.

e) Secure the cuff with the Velcro closer in such a way that it lies comfortably and is not too tight. Lay the arm on the table (palm upwards) so that the cuff is at the same height as the heart. Make sure that the tube is not kinked.

f) Remain seated quietly for 2 minutes before you begin the measurement.
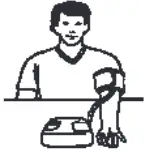
Note:
If it is not possible to fit the cuff to the left arm, it can also be placed on the right one. However all measurements should be made using the same arm

5.4. Measuring procedure
After the cuff has been appropriately positioned the measurement can begin:
a) Press the O/I MEMORY button, – the pump begins to inflate the cuff. In the display, the increasing cuff-pressure is continually displayed.
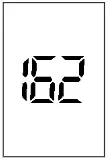
b) After reaching the inflation pressure, the pump stops and the pressure slowly falls away. The cuff-pressure (large characters) is displayed during the measurement.
c) When the device has detected the pulse, the heart symbol in the display begins to blink and a peep tone is audible for every pulse beat.
8
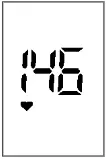
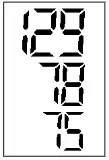
d) When the measurement has been concluded, a long peep tone sounds. The measured systolic and diastolic blood-pressure values as well as the pulse frequency are now displayed.
e) The measurement results are displayed, until you switch the device off. If no button is pressed for 5 minutes, the device switches automatically off, to save the batteries.
5.5. Memory – displaying the last measurement
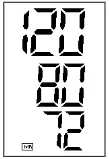
The last measured result is stored in the instrument until a new measurement is carried out or the batteries are empty or removed. You can call up the stored value at any time by pressing the O/I MEMORY button for at least 3 seconds.
5.6. Discontinuing a measurement
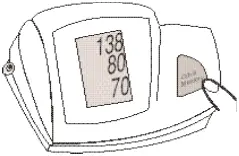
If it is necessary to interrupt a blood pressure measurement for any reason (e.g the patient feels unwell), the O/I MEMORY button can be pressed at any time. The device then immediately lowers the cuff-pressure automatically.
6. Error messages/malfunctions
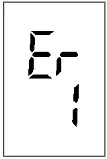
If an error occurs during a measurement, the measurement is discontinued and a corresponding error code is displayed.(Example Error no. 1)
Error No. Possible cause(s)
ERR 1 The systolic pressure was determined but afterwards the cuff pressure fell below 20mm Hg. This situation can occur, for example, if the tube becomes unplugged after the systolic blood pressure has been measured. Further possible cause: No pulse has been detected.
ERR 2 Unnatural pressure impulses influence the measurement result. Reason: The arm was moved during the measurement (Artefact).
9
IB BP 3BXO-A 3804_4 16/9/04 13:24 Page 10
ERR 3 Inflation of the cuff takes too long. The cuff is not correctly seated or the hose connection is not sealed
ERR 5 The measured results have indicated an unacceptable difference between the systolic and diastolic pressure. Take another measurement, carefully following the instructions. Contact your doctor, if you still obtain unusual results.
LO Below 40 pulses per min.
HI 200 or more pulses per min.
Other possible malfunctions and their eliminations
If problems occur when using the device, the following points should be checked and if necessary, the corresponding measures are to be taken:
Malfunction Remedy
The display remains empty when the instrument is switched on although the batteries are in place.
- Check whether the batteries are installed with the correct polarity and correct if necessary.
- If the display is unusual, remove the batteries and then exchange them for new.
The pressure does not rise although the pump is running.
- Check the connection of the cuff tube and connect properly if necessary.
The device frequently fails to measure the blood pressure values, or the values measured are too low (too high).
- Fit the cuff correctly on the arm.
- Before starting the measurement make sure that the cuff is not fitted too tightly and that there is no rolled-up sleeve exerting pressure on the arm above the measuring position. Take off articles of clothing if necessary.
- Measure the blood pressure again in complete peace and quiet.
Every measurement results in different values although the device functions normally and the values displayed.
- Please read the following information and the points listed under «Common sources of error». Repeat the measurement.
The blood pressure values measured differ from those measured by the doctor.
- Record the daily development of the values and consult your doctor about them.
 Further information
The level of blood-pressure is subject to fluctuations even with healthy people. Important thereby is, that comparable measurements always require the same conditions (Quiet conditions)!
You must consult your specialist dealer or chemist if there are technical problems with the blood-pressure instrument. Never attempt to repair the instrument yourself!
Any unauthorised opening of the instrument invalidates all guarantee claims!
10
7. Care and maintenance, recalibration
a) Do not expose the device to either extreme temperatures,humidity, dust or direct sunlight.
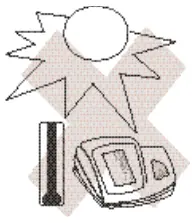
b) The cuff contains a sensitive air-tight bubble. Handle this carefully and avoid all types of straining through twisting or buckling.
c) Clean the device with a soft, dry cloth. Do not use petrol,thinners or similar solvent. Spots on the cuff can be removed carefully with a damp cloth and soapsuds. The cuff must not be washed!

d) Handle the tube carefully. Do not pull on it. Likewise, this is not to be buckled or laid over sharp edges.
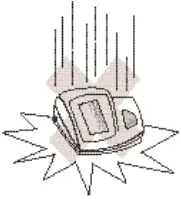
e) Do not drop the instrument or treat it roughly in any way.Avoid strong vibrations.
f) Never open the device! Otherwise the manufacturer calibration becomes invalid!
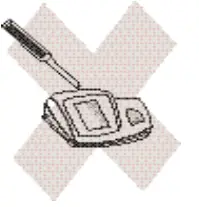
g) Remove the batteries if the device will not be used for along time. Do not use batteries beyond their date of expiry.
Periodical recalibration
Sensitive measuring devices must from time to time be checked for accuracy. We therefore recommend aperiodical inspection of the static pressure display every 2 years.
Your specialist dealer would be pleased to provide more extensive information about this.
8. Guarantee
The ‘as easy as 123’ blood-pressure monitor is guaranteed for 2 years from date of purchase. This guarantee includes the instrument and the cuff. The guarantee does not apply to damage caused by improper handling, accidents, not following the operating instructions or alterations made to the instrument by third parties. Please retain your proof of purchase to confirm the start of your 2 year guarantee period.
11
IB BP 3BXO-A 3804_4 16/9/04 13:24 Page 12
9. Reference to standards
Device standard:
Device corresponds to the requirements of the European standard fornon-invasive blood-pressure monitor
EN1060-1 / 12:95
EN1060-3 / 09:97
EN1060-4
Electromagn. compatibility:Device fulfills the stipulations of the European standard EN 60601-1-2
The stipulations of the EU-Guidelines 93/42/EWG for Medical Products Class IIa have been fulfilled.
10. Technical specifications:
Weight:
465 g (with batteries)
Size:
131 (W) x 174 (L) x 73 (H) mm
Storage temperature:
–5 to +50°C
Humidity:
15 to 85% relative humidity maximum
Operation temperature:
10 to 40°C
Display:
LCD-Display (Liquid Crystal Display)
Measuring method:
oscillometric
Pressure sensor:
capacitive
Measuring range:
SYS/DIA: 30 to 280 mmHg
Pulse: 40 to 200 per minute
Cuff pressure display range:
0–299 mmHg
Memory:
Storing the last measurment automatically
Measuring resolution:
1 mmHg
Accuracy:
Pressure within ± 3 mmHg
Pulse ± 5 % of the reading
Power source:
a) 4 dry cells (batteries) UM-3, size AA, 1.5 V
b) mains adaptor 6 V DC 600 mA (voltage 4.5 V DC to 6 V DC)
Accessories:
cuff type M for arm circumference 22– 32 cm
cuff type L for arm circumference 32– 42 cm
Technical alterations reserved!
11. Contact details:
Microlife UK, Number 8 The Green,
St. Leonards-on-Sea, East Sussex TN38 0SY,
Tel: + 44 (0) 1424 43 43 00 Fax: + 44 (0) 1424 43 43 11
Email: [email protected] Web: www.microlife.uk.com
Introduction
Features of your Automatic Blood Pressure Monitor
Your blood pressure monitor is a fully automatic digital blood pressure measuring device for use by adults on the upper arm at home or in your doctor’s/nurse’s office. It enables very fast and reliable measurement of the systolic and diastolic blood pressure as well as the pulse by way of the oscillometric method. This device offers clinically proven accuracy and has been designed to be user friendly.
Before using, please read this instruction manual carefully and then keep it in a safe place. Please contact your doctor for further questions on the subject of blood pressure and its measurement.
Attention!
Important information about self-measurement
- Self-measurement means control, not diagnosis or treatment. Unusual values must always be discussed with your doctor. Under no circumstances should you alter the dosages of any drugs prescribed by your doctor.
- The pulse display is not suitable for checking the frequency of heart pacemakers.
- In cases of irregular heartbeat, measurements made with this instrument should only be evaluated after consultation with your doctor.
Electromagnetic interference:
The device contains sensitive electronic components. Avoid strong electrical or electromagnetic fields in the direct vicinity of the device (e.g., mobile telephones, microwave ovens). These can lead to temporary impairment of the measuring accuracy.
Important information on blood pressure and its measurement
How does high/low blood pressure arise?
Your level of blood pressure is determined in the circulatory center of the brain and adjusts to a variety of situations through feedback from the nervous system. To adjust blood pressure, the strength and frequency of the heart (pulse), as well as the width of circulatory blood vessels is altered.
Blood vessel width is affected by fine muscles in the blood vessel walls.
Your level of arterial blood pressure changes periodically during heart activity. During the “blood ejection” (Systole), the value is highest (systolic blood pressure value). At the end of the heart’s “rest period” (Diastole), pressure is lowest (diastolic blood pressure value).
Blood pressure values must lie within certain normal ranges in order to prevent particular diseases.
Which values are normal?
Blood pressure is too high if your diastolic pressure is above 100 mmHg and/or your systolic blood pressure is over 160 mmHg, while at rest. In this case, please consult your physician immediately. Long-term values at this level endanger your health due to continual damage to the blood vessels in your body.
If your systolic blood pressure values are between 140 mmHg and 159 mmHg and/or the diastolic blood pressure values are between 90 mmHg and 99 mmHg, consult your physician. Regular self-checks are necessary.
If you have blood pressure values that are too low (i.e., systolic values under 105 mmHg and/or diastolic values under 60 mmHg), consult your physician.
Even with normal blood pressure values, a regular self-check with your blood pressure monitor is recommended. You can detect possible changes in your values early and react appropriately.
If you are undergoing medical treatment to control your blood pressure, keep a record of values along with time of day and date. Show these values to your physician. Never use the results of your measurements to independently alter the drug doses prescribed by your physician.
Which values are normal?
The following standards for assessing high blood pressure (in adults) have been established by the National Institutes of Health JNC7, 2003.
| Category | Systolic
(mmHg) |
Diastolic
(mmHg) |
| Normal | <120 | and <80 |
| Pre-Hypertension | 120-139 | or 80-89 |
| Hypertension | ||
| Stage 1 Hypertension | 140-159 | or 90-99 |
| Stage 2 Hypertension | ≥160 | or ≥100 |
Further information
- If your values are mostly normal under resting conditions but exceptionally high under conditions of physical or psychological stress, it is possible that you are suffering from so-called “labile hypertension.” Consult your doctor.
- Correctly measured diastolic blood pressure values above 120 mmHg require immediate medical treatment.
This device is not intended for use on children 12 years of age or younger.
What can be done if regular high or low values are obtained?
- Consult your doctor.
- Increased blood pressure values (various forms of hypertension) are associated with considerable health risks over time. Arterial blood vessels in your body are endangered due to constriction caused by deposits in the vessel walls (arteriosclerosis). A deficient supply of blood to important organs (heart, brain, muscles) can result from arteriosclerosis. Furthermore, the heart will become structurally damaged with increased blood pressure values.
- There are many different causes of high blood pressure. We differentiate between the common primary (essential) hypertension and secondary hypertension. The latter group can be ascribed to specific organ malfunctions. Please consult your doctor for information about the possible origins of your own increased blood pressure values.
- There are measures which you can take to reduce and even prevent high blood pressure. These measures must be permanent lifestyle changes.
Eating habits
- Strive for a normal weight corresponding to your age. See your doctor for your ideal weight.
- Avoid excessive consumption of common salt.
- Avoid fatty foods.
Previous illnesses
- Consistently follow all medical instructions for treating illness such as:
- Diabetes (diabetes mellitus)
- Fat metabolism disorder
- Gout
Habits
- Give up smoking completely.
- Drink only moderate amounts of alcohol.
- Restrict your caffeine consumption (e.g., coffee).
Physical constitution
- After a preliminary medical examination, do regular exercise.
- Choose sports which require stamina and avoid those which require strength.
- Avoid reaching the limit of your performance.
- With previous illnesses and/or an age of over 40 years, please consult your doctor before beginning your exercise routine. You must receive advice regarding the type and extent of exercise that is appropriate for you.
Components of your blood pressure monitor
Measuring unit
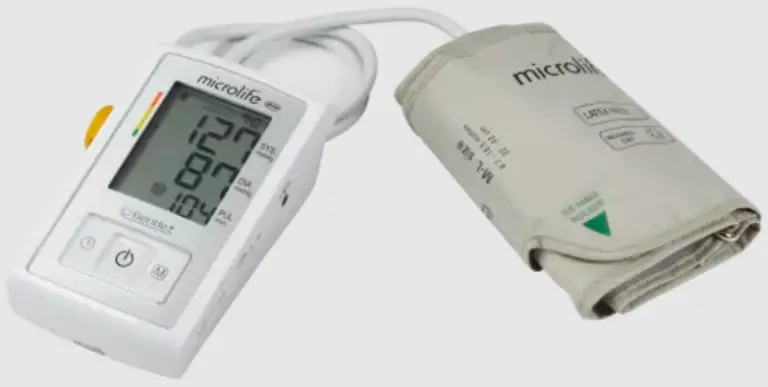
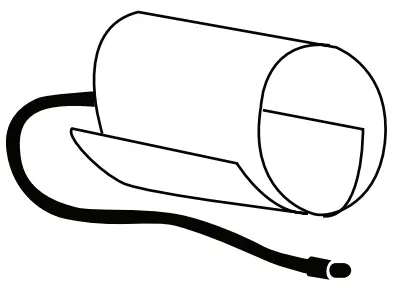
Wide Range Cuff: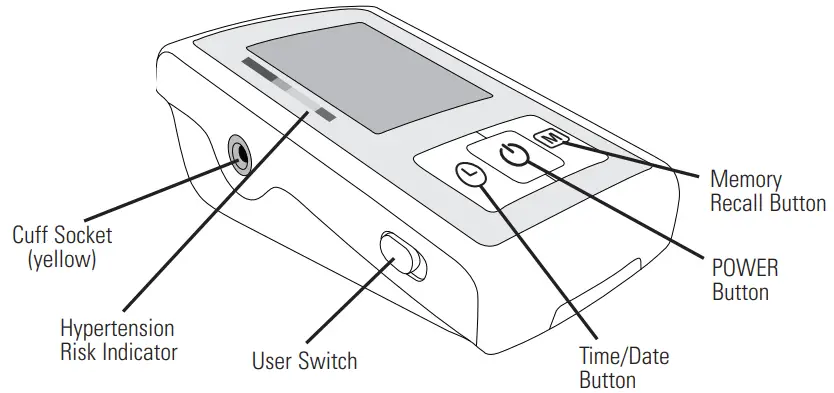
Wide Range Cuff:
For arm circumference 22 cm – 42 cm (8.7” – 16.5”)
If you ever need to buy a replacement cuff, call us toll-free at 1-800-568-4147.
Please Note:
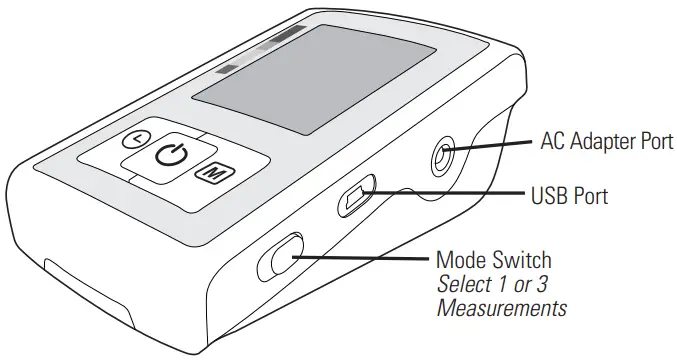
Arm circumference should be measured with a measuring tape in the middle of the relaxed upper arm. Do not force cuff connection into the opening. Make sure the cuff connection is not pushed into the AC adapter port. If the cuff is too small, call 1-800-568-4147 for further information.
Using your blood pressure monitor for the first time
Inserting the batteries
After you have unpacked your device, insert the batteries. The battery compartment is located on the bottom of the device.
- Remove the battery cover.
- Insert the batteries (4 x size AA 1.5 V), observing the indicated polarity.
- If a battery warning appears in the display, the batteries are discharged and must be replaced.
Low Battery Indicator
Attention!
- After the low battery indicator appears, the device won’t function until the batteries have been replaced.
- Please use “AA” Long-Life or Alkaline 1.5 V batteries.
- If the blood pressure monitor is not used for long periods, remove the batteries from the device.
Setting the date and time
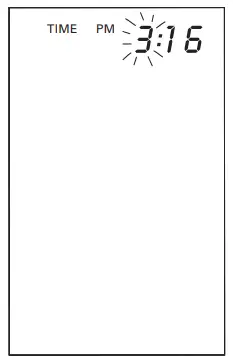
- After the new batteries are activated, the year number flashes in the display. You can advance the year by pressing the “M” button. To confirm and then set the month, press the TIME button.

Memory Button
Time/Date Button
- You can now set the month using the “M” button. To confirm and then set the day, press the TIME button.


- Please follow the instructions above to set the day, hour and minutes.
- Once you have set the last minute and pressed the TIME button, the date and time are set and the time is displayed.
- If you want to change the date and time, press and hold the TIME button down for approximately 3 seconds until the year number starts to flash. Now you can enter the new values as described above.
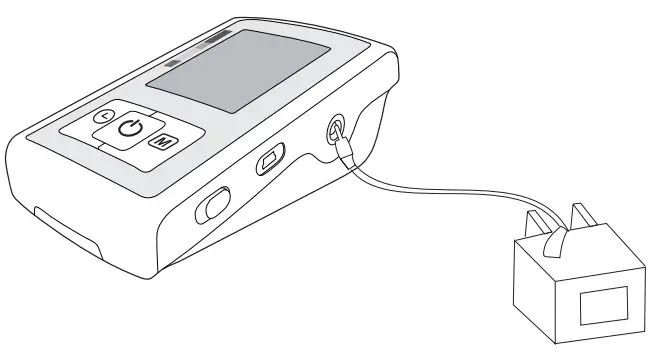
Using the AC power adapter
You may also operate this monitor using the included AC adapter. Use only the included AC adapter to avoid damaging the unit.
- Ensure that the AC adapter and cable are not damaged.
- Plug the adapter cable into the AC adapter port on the right side of monitor.
- Plug the AC adapter into a 110 V power socket (U.S. or Canada).
- Test that power is available by pressing the POWER button.
Note:
- No power is taken from the batteries while the AC adapter is connected to the instrument.
- If the power is interrupted during a measurement (e.g., by removal of the adapter from the wall socket), the instrument must be reset by removing the plug from the instrument.
If you have any questions regarding the AC adapter, call us at 1-800-568-4147.
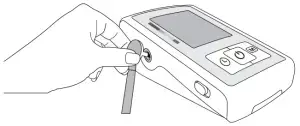
Cuff tube connection
Insert the yellow cuff tube connector into the yellow socket on the left side of the instrument.
Select the user
This blood pressure monitor is designed to store 99 measurements for each of two users.
Before taking a measurement, be certain that the correct user has been selected.
- User 1: slide the user switch upwards to the User 1 icon
- User 2: slide the user switch downwards to the User 2 icon

Select measuring mode: standard or Microlife Averaging Mode (MAM)
This instrument enables you to select either standard (single measurement) or measurement averaging mode (automatic triple measurement).
- To select Standard mode, push the switch on the side of the instrument upward to Position “1.”

- To select Averaging mode, push the switch downward to Position “3.” Note the “MAM” icon will illuminate on the display.
If you select 1, then only one measurement will betaken. If you select 3, the unit will inflate and deflate three times resulting in one final average.
Microlife Averaging Mode (MAM)
- In Microlife Averaging Mode (MAM), three measurements are automatically taken in succession and the result is then automatically analyzed and displayed. Because your blood pressure constantly fluctuates, a result determined in this way is more reliable than one produced by a single measurement.
- After pressing the POWER button the selected Microlife Averaging Mode appears in the display as the MAM symbol.
- The bottom, right-hand section of the display shows a 1, 2 or 3 to indicate which of the 3 measurements is currently being taken.
Measurement procedure
Please note: You should always be seated before and during measurement.
Before measurement
- Avoid eating and smoking as well as all forms of exertion directly before measurement. These factors influence the measurement result. Find time to relax by sitting in an armchair in a quiet atmosphere for about ten minutes before your measurement.
- Remove any garment that fits closely to your upper arm.
- Always measure on the same arm (normally left).
- Compare measurements at the same time of day, since blood pressure changes during the course of the day (as much as 20–40 mmHg).
Common sources of error
Note: Comparable blood pressure measurements always require the same conditions. Conditions should always be quiet.
- All efforts by the user to support the arm can increase blood pressure.
Make sure you are in a comfortable, relaxed position and do not flex any of the muscles in the measurement arm during the measurement.
Use a cushion for support if necessary. - If the arm artery lies considerably lower or higher than the heart, an erroneously high or low blood pressure will be measured. Each 15 cm (6”) difference in height between your heart and the cuff results in a measurement error of 10 mmHg.
- Cuffs that are too narrow or too short result in false measurement values. Selecting the correct cuff is extremely important. Cuff size is dependent upon the circumference of the arm (measured in the center).
The permissible range is printed on the cuff. If this is not suitable for your use, please call 1-800-568-4147. - A loose cuff or a sideways protruding air pocket causes false measurement values.
- With repeated measurements, blood accumulates in the arm, which can lead to false results. Consecutive blood pressure measurements should be repeated after a 1 minute pause or after your arm has been held up in order to allow the accumulated blood to flow away.
Fitting the cuff
- Pass the end of the cuff through the flat metal ring so that a loop is formed. The hook and loop material must be facing outward. (Ignore this step if the cuff has already been prepared.)
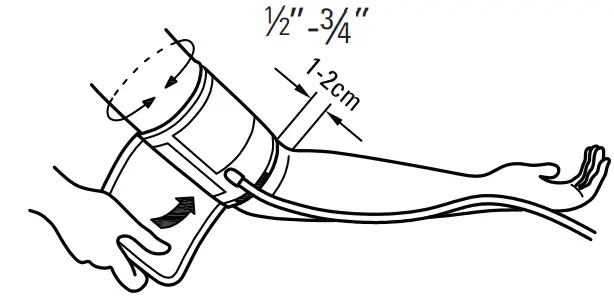
- Slide the cuff onto your upper left arm. The rubber tube should be on the inside of your arm extending downward to your hand.
Make certain the cuff lies approximately 1/2” to 3/4” (1 to 2 cm) above the elbow.
8.7” – 16.5”
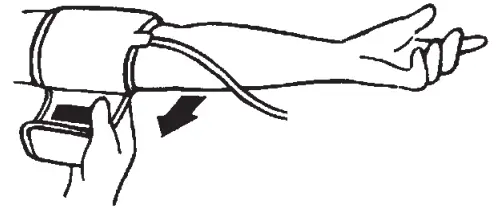
IMPORTANT: The red strip on the edge of the cuff (Artery Mark) must lie over the artery which runs down the inner side of the arm.
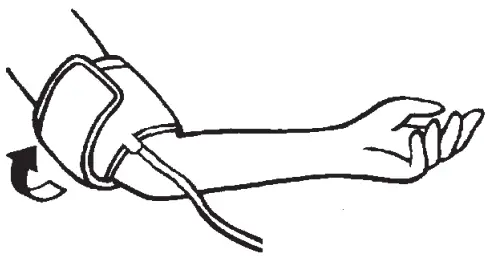
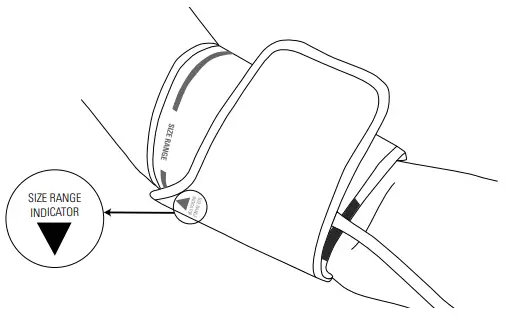
TIP: Align red artery mark to pinky finger. - To secure the cuff, wrap it around your arm and press the hook and loop material together. Check the size range indicator on the cuff. The green arrow should point within the green size range on the inside of the cuff.
- There should be little free space between the arm and the cuff. You should be able to fit 2 fingers between your arm and the cuff. Clothing must not restrict the arm.
Any piece of clothing which does must be removed. Cuffs that don’t fit properly result in false measurement values.
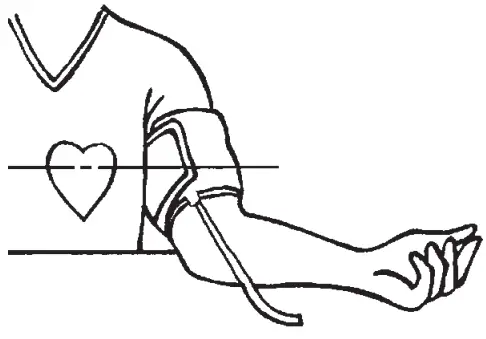
Measure your arm circumference if you are not sure of proper fit. - Lay your arm on a table so the cuff is at the same height as your heart. Make sure the tube is not kinked.
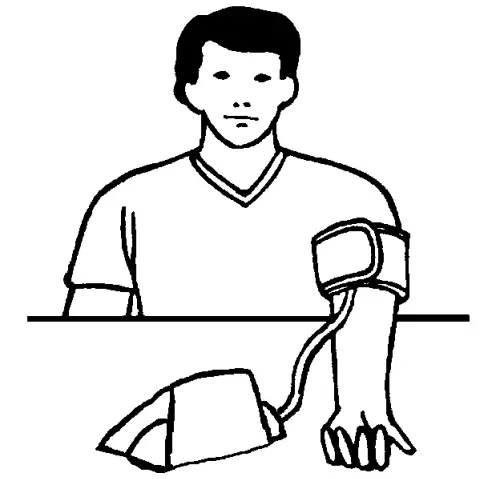
- Remain seated quietly for five minutes before you begin the measurement.
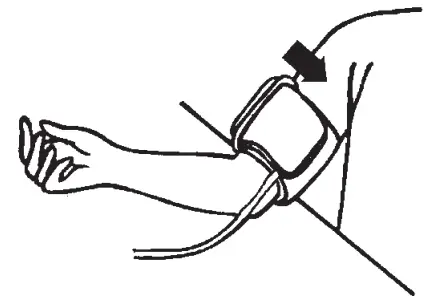
Comment
If it is not possible to fit the cuff to your left arm, it can also be placed on your right arm. However, all measurements should be made using the same arm.
Comparable blood pressure measurements always require the same conditions (relax for several minutes before a reading).
Cuff on right arm
Measuring procedure
After the cuff has been appropriately positioned the measurement can begin:
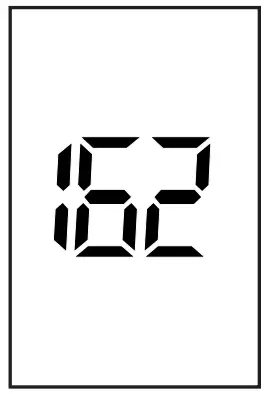
- Press the POWER button. After the system check, the monitor displays OK and the pump begins to inflate the cuff. On the display, the increasing cuff pressure is continually shown.
Pumping Pressure
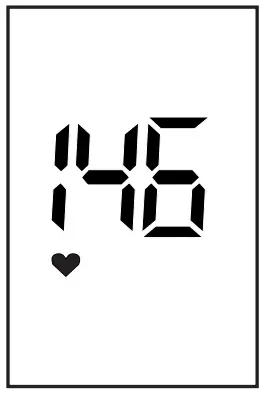
- After automatically reaching an individual pressure, the pump stops and the pressure slowly falls. The cuff pressure is displayed during the measurement.
- When the device has detected your pulse, the heart symbol in the display begins to blink.
- When the measurement has been concluded, the air will automatically release from the cuff. The measured systolic and diastolic blood pressure values, as well as the pulse, are now displayed.
Measuring
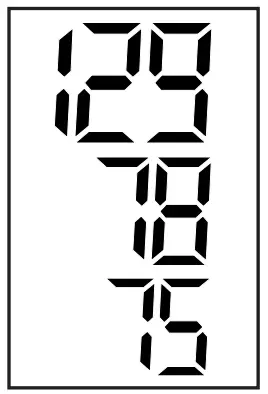
- The measurement results are displayed until you switch the device off. If no button is pressed for 1 minute, the device switches off automatically.
- Systolic
- Diastolic
- Pulse
- When the unit is set to the MAM (Microlife Averaging Mode) setting, 3 separate measurements will take place in succession, after which your result is calculated and displayed as a single, averaged measurement (individual results are not displayed). There is a 15 second resting time between each measurement. A count-down indicates the remaining time between measurements.
If one of the measurements causes an error message, it will be repeated one more time. If any additional error occurs, the measurement will be discontinued and error code displayed.
Memory – displaying the last 99 measurements
At the end of a measurement, this monitor automatically stores each result with date and time. This unit stores 99 memories for each of 2 users.
Viewing the stored values
With the unit off, press the “M” button. The display first shows “A,” then shows an average of all measurements stored in the unit. Please note:
Measurements for each user are averaged and stored separately. Be certain that you are viewing the measurements for the correct user.
Pressing the “M” button again displays the previous value. To view a particular stored memory, press and hold the “M” button to scroll to that stored reading.
Memory full
When the memory has stored 99 results, a new, measured value is stored by overwriting the oldest value.
Clear all values
If you are sure that you want to permanently remove all stored values, hold down the “M” button (the instrument must have been switched off beforehand) until “CL” appears and then release the button. If you do not want to clear the values, press the POWER button. To permanently clear the memory, press the “M” button while “CL” is flashing.
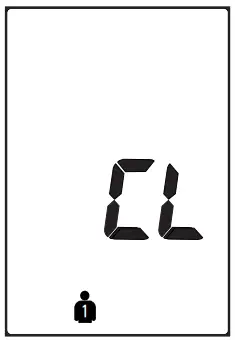
Individual values cannot be cleared.
Discontinuing a measurement
If it is necessary to interrupt a blood pressure measurement for any reason (e.g., the patient feels unwell), the POWER button can be pressed at any time. The device then immediately lowers the cuff pressure automatically and enters sleep mode.
Hypertension risk indicator
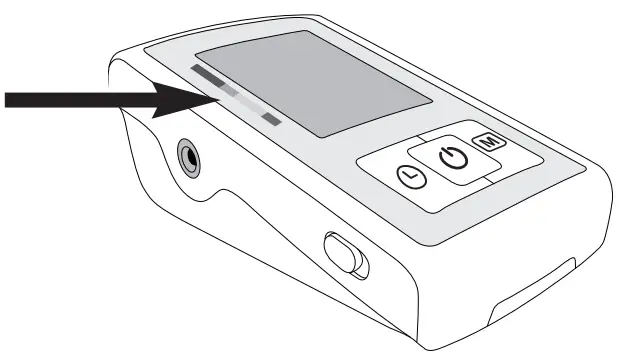
The bars on the left-hand edge of the display show you the range within which the indicated blood pressure value lies. Depending on the position of the triangle indicator, the readout value is either within the normal (green), borderline (yellow) or danger (orange, dark orange) range.
The classification is based on standards established by the National Institutes of Health JNC7, 2003.
Refer to the chart in section 2.2 of this instruction manual for details of the classifications.
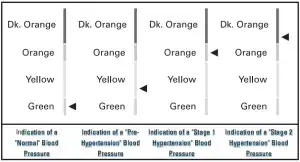
A triangle is displayed to the right of the traffic light bar according to your measurement.
- If your triangle is in the green zone, your measurement is “Normal,” according to NIH standards.
- If your triangle is in the yellow zone, your measurement is “Pre-Hypertension.”
- If your triangle is in the orange zone, it is “Stage 1 Hypertension.”
- If your triangle is in the dark orange zone, it is “Stage 2 Hypertension.”.

Irregular heartbeat detector
The appearance of this symbol 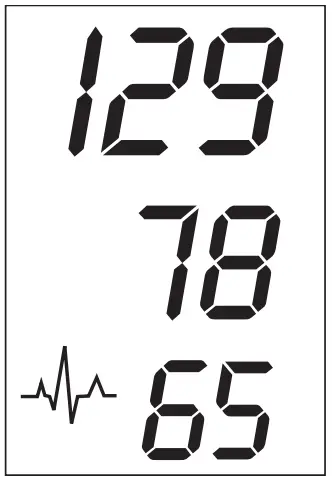 indicates that certain pulse irregularities were detected during the measurement. In this case, the result may deviate from your normal basal blood pressure – repeat the measurement. In most cases, this is no cause for concern. However, if the symbol appears on a regular basis (e.g., several times a week with measurements taken daily), we advise you to tell your doctor.
Please show your doctor the following explanation:
Information on frequent appearance of the irregular heartbeat symbol
This instrument is an oscillometric blood pressure monitor device that also analyzes pulse frequency during measurement. The instrument is clinically tested.
If pulse irregularities occur during the measurement, the irregular heartbeat symbol is displayed with the measurement.
If the symbol appears frequently or if it suddenly appears more often than usual, we recommend the patient seek medical advice. The instrument does not replace a cardiac examination but serves to detect pulse irregularities at an early stage.
Battery charge indicator
Batteries almost discharged
When the batteries are approximately 75% used, the battery symbol will flash a few times as soon as the instrument is switched on (if at least one of the batteries still has some charge).

Although the instrument will continue to measure reliably, you should obtain replacement batteries.
Batteries discharged – replacements required
When the batteries are discharged, the battery symbol will appear, unblinking, as soon as the instrument is switched on. You cannot take any further measurements and must replace the batteries.

- Open the battery compartment on the bottom of the instrument.
- Replace the batteries – ensure they are correctly connected, as shown on the symbols in the compartment.
- The memory retains all values although date and time (and possibly also set alarm times) must be reset – the year number will flash automatically after the batteries are replaced.
- To set date and time, follow the procedure described in Section 4.3.
Note:
Use four new, Long-Life 1.5 V AA batteries. Do not use batteries beyond their expiration date. If the monitor is not going to be used for a prolonged period, the batteries should be removed.
Using rechargeable batteries
You can also operate this instrument using rechargeable batteries.
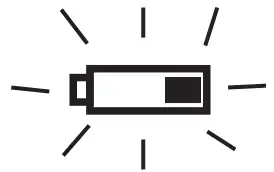
- Please use only type “NiMH” reusable batteries.
- If the battery symbol (
 ) appears, the batteries must be removed and recharged. They must not remain inside the instrument, as they may become damaged through total discharge even when switched off. The batteries must NOT be discharged in the blood pressure monitor. If you do not intend to use the instrument for a week or more, always remove the rechargeable batteries.
 - Recharge these batteries using an external charger and follow manufacturer’s instructions carefully.
Software functions
This unit can be used in connection with your personal computer (PC) running the PC Link blood pressure analyzer software. Your PC will allow a capacity of monitoring 80 patients, each with 1000 data (note: overuse will lower system efficiency). The memory data can be transferred to the PC by connecting the monitor via the included USB cable.
System Requirements for Blood Pressure Analyzer Software:
- Windows XP, Vista, 7,8
- CD-ROM Drive
- Minimum 256MB RAM
- 500MB Available Hard Disk Space
- USB Port Version 1.0 or Higher
- Compatible Blood Pressure Monitor with USB Port
Note: The software does not work with Mac computers.
Installation and data transmission
- Insert CD into CD ROM drive of your PC. The installation will start automatically. If not, click on SETUP.EXE.
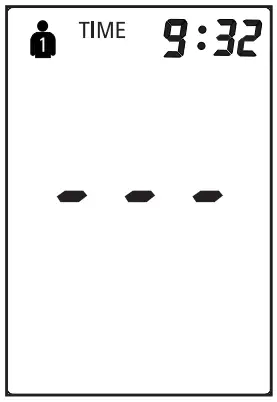
- Connect the monitor via USB cable with the PC. Three horizontal bars will appear on the display and last for 3 seconds.
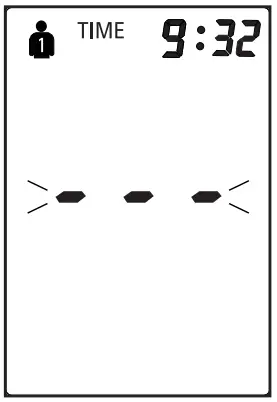
- The bars will then flash to indicate that the connection between computer and device is successfully made. As long as the cable is plugged, the bars will keep flashing and the buttons are disabled.
During the connection, the device is completely controlled by the computer. Please refer to the “Help” file in the software for detailed instructions or call 1-800-568-4147.
Error messages/troubleshooting
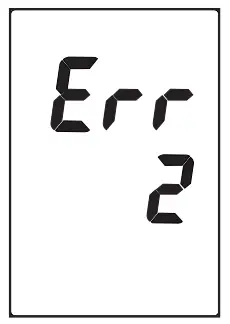
If an error occurs during a measurement, the measurement is discontinued and a corresponding error code is displayed (example: Error no. 2).

Error No. Possible cause(s)/Solutions
- ERR 1
The tube may have loosened, or no pulse was detected.* Ensure cuff connections are tight with proper cuff placement. See section 5.3. - ERR 2
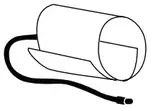
Unnatural pressure impulses influenced the measurement result. Reason: The arm was moved during the measurement (artefact). Repeat measurement, keeping still and quiet. - ERR 3
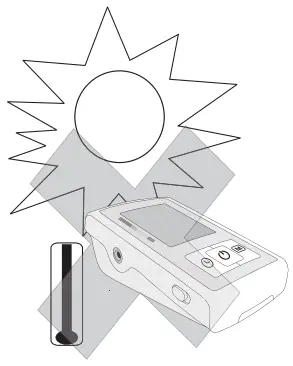
Inflation of the cuff takes too long. The cuff is not correctly seated or the hose connection is not tight.
Re-position cuff and repeat the measurement. - ERR 5
The measured readings indicated an unacceptable difference between systolic and diastolic pressures.
Take another reading following directions carefully.
Contact your doctor if you continue to get unusual readings. - HI
The cuff pressure is too high. Relax for 5 minutes and repeat the measurement.* - LO
The pulse is too low (less than 40). Repeat the measurement.
If this or any other problem occurs repeatedly, please consult your doctor.
Other possible errors and their solutions
If problems occur when using the device, the following points should be checked and, if necessary, the corresponding measures are to be taken:
| Malfunction | Remedy |
| The display remains blank when the instrument is switched on although the batteries are in place. |
|
| The pressure does not rise although the pump is running. | Check the connection of the cuff tube and connect properly. |
| The device frequently fails to measure blood pressure values or the values measured are too low or high |
|
| Every measurement results in a different value, although the device functions normally and normal values are displayed. | Please read the following information and points listed in Section 5.2 “Common sources of error.” Repeat the measurement. Please note: Blood pressure fluctuates continually so successive measurements will show some variability |
| Blood pressure values differ from those measured by my doctor. | Record the daily development of the measured values and consult your doctor. Please note: Individuals visiting their doctor frequently experience anxiety which can result in a higher reading than at home under resting conditions. |
| After the instrument has inflated the cuff the pressure falls very slowly, or not at all. (No reasonable measurement possible.) |
|
Care and maintenance
- Do not expose the device to either extreme temperatures, humidity, dust or direct sunlight.
- The cuff contains a sensitive airtight bubble. Handle this cuff carefully and avoid all types of stress through twisting or buckling.

- Clean the device with a soft, dry cloth. Do not use gasoline, thinners or similar solvents. Spots on the cuff can be removed carefully with a damp cloth and soapsuds.
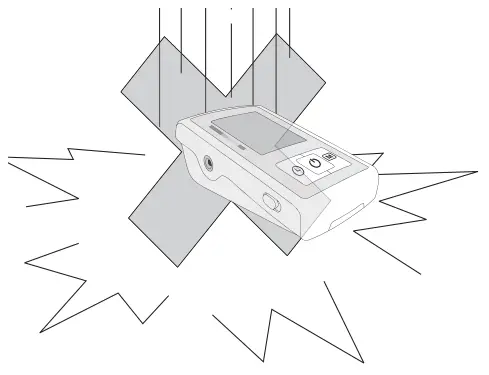
The cuff must not be washed in a dishwasher, clothes washer or submerged in water.
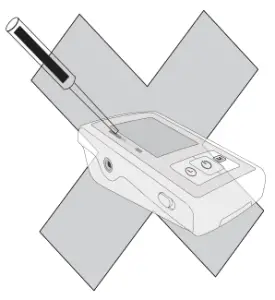
- Handle the tube carefully. Do not pull on it.
Do not allow the tubing to kink and keep it away from sharp edges. - Do not drop the monitor or treat it roughly in any way. Avoid strong vibrations.
- Never open the monitor. This invalidates the manufacturer’s warranty.

- Batteries and electronic instruments must be disposed of in accordance with the locally applicable regulations, not with domestic waste.
Further information
Blood pressure is subject to fluctuations, even in healthy people.
Comparable measurements always require the same conditions (quiet conditions)! If fluctuations in readings are larger than 15 mmHg, and/or you hear irregular pulse tones, consult your doctor.
Never attempt to repair the instrument yourself.
Any unauthorized opening of the instrument invalidates all warranty claims.
Warranty
Your Automatic Blood Pressure Monitor is guaranteed for 5 years against manufacturer defects for the original purchaser only, from date of purchase. The warranty does not apply to damage caused by improper handling, accidents, professional use, not following the operating instructions or alterations made to the instrument by third parties. 5 year warranty only applies to the instrument. All accessories including the cuff, AC adapter and software are guaranteed for one year.
There are no user serviceable parts inside. Batteries or damage from old batteries is not covered by the warranty.
Please note: According to international standards, your monitor should be checked for accuracy every 2 years.
Certifications
- Device standard: Device corresponds to the requirements of the standard for non-invasive blood pressure monitors:
AAMI/ANSI SP10
IEC 60601-1
IEC 60601-1-2 - Electromagnetic compatibility: Device fulfills the stipulations of the International standard IEC 60601-1-2
- Clinical testing: Clinical performance tests were carried out in the US according to ANSI/AAMI SP10 standard.
The B.H.S. (British Hypertension Society) clinical protocol was used to measure the accuracy of this product. Blood pressure units using the same measurement technology are graded “AA” for systolic/diastolic accuracy by independent investigators using the BHS protocol. This is the highest grading available for blood pressure monitors. Please see bhsoc.org for more information.
Technical specifications:
- Weight: . . . . . . . . . . . . . . . . . . . . . . . . .368 g (with batteries)
- Size: . . . . . . . . . . . . . . . . . . . . . . . . . . .85 (W) x 143 (L) x 58 (H) mm
- Storage temperature: . . . . . . . . . . . . . .-20 to +55°C (-4° to +131°F)
- Humidity: . . . . . . . . . . . . . . . . . . . . . . .15 to 90% relative humidity maximum
- Operation temperature: . . . . . . . . . . . .10 to 40°C (50° to 104°F)
- Display: . . . . . . . . . . . . . . . . . . . . . . . . .LCD (Liquid Crystal Display)
- Measuring method: . . . . . . . . . . . . . . .Oscillometric
- Pressure sensor: . . . . . . . . . . . . . . . . . .Capacitive
- Measuring range:
- SYS/DIA: . . . . . . . . . . . . . . . . . . . . .30 to 280 mmHg
- Pulse: . . . . . . . . . . . . . . . . . . . . . . . .40 to 200 per minute
- Cuff pressure display range: . . . . . . . .0-299 mmHg
- Memory: . . . . . . . . . . . . . . . . . . . . . . . .Automatically stores the last 99 measurements for 2 users (total 198)
- Measuring resolution: . . . . . . . . . . . . .1 mmHg
- Accuracy: . . . . . . . . . . . . . . . . . . . . . . .Pressure within ± 3 mmHg or 2% of reading >200 mmHg Pulse ± 5% of the reading
- Power source: . . . . . . . . . . . . . . . . . . . . a) 4 AA batteries, 1.5 V
b) AC adapter 6 V DC 600 mA (voltage 4.5 V DC to 6 V DC) - Accessories: . . . . . . . . . . . . . . . . . . . . . . .Cuff type: Wide range cuff for arm circumference 22-42 cm (8.7”-16.5”) BP analyzer software CD USB (A to mini B) cable Storage case Technical alterations reserved.
Made in China

Read the instructions carefully before using this device.
Type BF applied part.
Not for use on children 12 years of age or younger.
How to contact us
Microlife USA, Inc. 1617 Gulf to Bay Blvd 2nd Floor Clearwater, FL 33755
Toll Free Help Line: 1-800-568-4147
Email: [email protected]
Fax: (727) 451-0492
www.microlifeusa.com
Made in China

MT 550
IB MT 550 E-V10 1021, Revision Date: 2021-02-12
Description of this Thermometer
- ON/OFF button
- Display
- Battery compartment cover
- Measuring sensor / measuring tip
- Cleaning and disinfecting area (entire thermometer surface)
Important Safety Instructions
- Follow instructions for use. This document provides important product operation and safety information regarding this device. Please read this document thoroughly before using the device and keep for future reference.
- This device is only to be used for measuring human body temperature through oral, rectal or axillary. Do not attempt to take temperatures at other sites, such as in the ear, as it may result in false readings and may lead to injury.
- Do not use this device if you think it is damaged or notice anything unusual.
- We recommend cleaning this device according to the cleaning instructions before first use for personal hygiene.
- The minimum measurement time until the beep is heard must be maintained without exception! Consider that different measurement locations may require continued measuring even after the beep, see section «Measuring methods / Normal body temperature».
- Do not attempt rectal measurements on persons with rectal disorders. Doing so may aggravate or worsen the disorder.
- Ensure that children do not use this device unsupervised; some parts are small enough to be swallowed. Be aware of the risk of strangulation in case this device is supplied with cables or tubes.
- Do not use this device close to strong electromagnetic fields such as mobile telephones or radio installations. Keep a minimum distance of 3.3 m from such devices when using this device.
- Protect the device from impact and dropping!
- Avoid bending the thermometer probe more than 45°!
- Avoid ambient temperatures above 60 °C. NEVER boil this device!
- Use only the commercial disinfectants listed in the section «Cleaning and Disinfecting» to clean the device to avoid damage to the device.
- We recommend this device is tested for accuracy every two years or after mechanical impact (e.g. being dropped). Please contact your local Microlife-Service to arrange the test.
 WARNING: The measurement result given by this device is not a diagnosis! Do not rely on the measurement result only.
 Batteries and electronic devices must be disposed of in accordance with the locally applicable regulations, not with domestic waste.
 Read the instructions carefully before using this device.
 Type BF applied part
Turning on the Thermometer
To turn on the thermometer, press the ON/OFF button 1; a short beep signals «thermometer ON». A display test is performed. All segments should be displayed.
The last measurement reading will be shown on the display 2 automatically for 2 seconds with the «M» icon.
Then at an ambient temperature of less than 32 °C, an «L» and a flashing «°C» or «°F» appear at the display field 2. The thermometer is ready for use now.
Function Test
Correct functioning of the thermometer is tested automatically each time it is turned on. If a malfunction is detected (measurement inaccuracy), this is indicated by «ERR» on the display, and a measurement becomes impossible. In this case, the thermometer must be replaced.
Using the Thermometer
Choose the preferred measuring method. When taking a measurement, the current temperature is continuously displayed and the «°C» symbol flashes. If the beep is heard 5 times and the «°C» is no longer flashing, the predictive end-temperature has been determined and the thermometer can be read now.
40 short beeps and a red LCD backlight alert the patient that he/she may have a temperature equal to or higher than 37.5 °C. Reference: Oral temperature.
To achieve comparable results allow a 1 minute interval time between measurements.
To prolong the battery life, turn off the thermometer by briefly pressing the ON/OFF button 1. Otherwise the thermometer will automatically turn off after about 10 minutes.
Changing from °C to °F
With the thermometer turned off, press and hold the ON/OFF button 1 for 5 seconds until «M» disappears. Shortly press the ON/OFF button to switch between °C or °F. Wait 3 seconds till «°C» or «°F» starts blinking and press ON/OFF button again to confirm your selection. The thermometer is set to your selection for future use.
Measuring methods / Normal body temperature
- In the armpit (axillary) / 34.7 – 37.3 °C
Wipe the underarm with a dry towel. Place the measuring sensor 4 under the arm into the center of the armpit so the tip is touching the skin and position the patient’s arm next to the patient’s body. This ensures that the room air does not affect the reading. Because the axillary takes more time to reach its stable temperature wait at least 5 minutes, regardless of the beep sound. - In the mouth (oral) / 35.5 – 37.5 °C
Do not eat or drink anything hot or cold 10 minutes before the measurement. The mouth should remain closed up to 2 minutes before starting a reading.
Position the thermometer in one of the two pockets under the tongue, to the left or right of the root of the tongue. The measuring sensor 4 must be in good contact with the tissue. Close your mouth and breathe evenly through the nose to prevent the measurement from being influenced by inhaled/exhaled air.
If this is not possible due to blocked airways, another method for measuring should be used.
Approx. measuring time: 10 seconds! - In the anus (rectal) / 36.6 – 38.0 °C
Carefully insert the measuring sensor 4 of the thermometer 2 to 3 cm into the anal aperture.
The use of a probe cover and the use of a lubricant is recommended. If you are unsure of this measurement method, you should consult a professional for guidance/training.
Approx. measuring time: 10 seconds!
Cleaning and Disinfecting
For disinfection in home use environment, use a 70% Isopropyl alcohol swab or a cotton tissue moistened with 70% Isopropyl alcohol to wipe surface pollutants off the thermometer probe. Always start wiping from the end of the thermometer probe (approx. at the middle of the thermometer) towards the thermometer tip. Afterwards the entire thermometer (see number 5 in the drawing) should be immersed in 70% Isopropyl alcohol for at least 5 minutes (max. 24 hours). After immersion, let the disinfectant dry off for 1 minute before next use.
For professional use: You may apply probe covers (available as accessory). Contact Microlife for further details concerning suitable disinfectants for your thermometer model.
Battery Replacement
When the « » symbol (upside-down triangle) appears in the display, the battery is flat and needs replacing. To replace the battery remove the battery compartment cover 3 from the thermometer. Insert the new battery with the + at the top. Make sure you have a battery of the same type to hand. Batteries can be purchased at any electrical store.
Technical Specifications
Type: Maximum thermometer
Measurement range: 32.0 °C to 43.9 °C
Temp. < 32.0 °C: display «L» for low (too low)
Temp. > 43.9 °C: display «H» for high (too high)
Measurement accuracy: ± 0.1 °C; 34 °C – 42 °C
± 0.2 °C; 32.0 – 33.9 °C and 42.1 – 43.9 °C
Operating conditions: 10 – 40 °C; 15-95 % relative maximum humidity
Storage conditions: -25 – +60 °C; 15-95 % relative maximum humidity
Battery: 3V; CR1632
Battery lifetime: approx. 3200 measurements (using a new battery)
IP Class: IP67
Reference to standards: EN 12470-3, clinical thermometers;
ASTM E1112; IEC 60601-1; IEC 60601-1-2 (EMC); IEC 60601-1-11
Expected service life: 5 years or 10000 measurements
This device complies with the requirements of the Medical Device Directive 93/42/EEC.
Technical alterations reserved.
Guarantee
This device is covered by a lifetime guarantee from the date of purchase. During this guarantee period, at our discretion, Microlife will repair or replace the defective product free of charge.
Opening or altering the device invalidates the guarantee.
The following items are excluded from the guarantee:
- Transport costs and risks of transport.
- Damage caused by incorrect application or non-compliance with the instructions for use.
- Damage caused by leaking batteries.
- Damage caused by accident or misuse.
- Packaging/storage material and instructions for use.
- Regular checks and maintenance (calibration).
- Accessories and wearing parts: Battery.
Should guarantee service be required, please contact the dealer from where the product was purchased, or your local Microlife service. You may contact your local Microlife service through our website:
www.microlife.com/support
Compensation is limited to the value of the product. The guarantee will be granted if the complete product is returned with the original invoice. Repair or replacement within guarantee does not prolong or renew the guarantee period. The legal claims and rights of consumers are not limited by this guarantee.
 Microlife UAB, P. Lukšio g. 32
08222 Vilnius, Lithuania
 Microlife AG, Espenstrasse 139
9443 Widnau / Switzerland
 0044
0044
 NC 150 BT
Non-Contact Thermometer
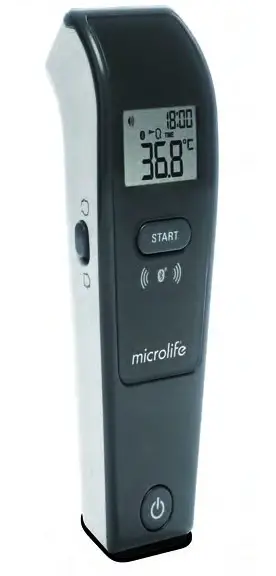
Microlife NC 150 BT
 |
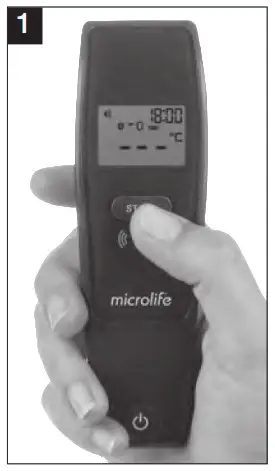 |
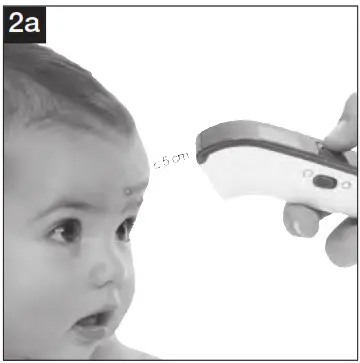
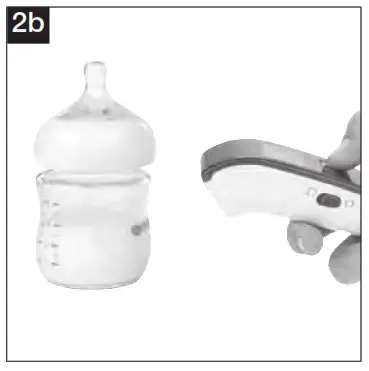
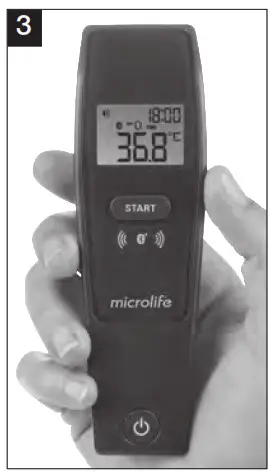
Microlife Non-Contact Thermometer NC 150 BT
| 1 | Measuring sensor | 15 | Low battery indicator |
| 2 | Tracking light | 16 | Changing between Celsius and Fahrenheit |
| 3 | Display | 17 | Recall mode |
| 4 | START button | 18 | Recall the last 30 readings |
| 5 | ON/OFF button | 19 | Measured temperature too high |
| 6 | Mode switch | 20 | Measured temperature too low |
| 7 | Battery compartment cover | 21 | Ambient temperature too high |
| 8 | M-button (memory) | 22 | Ambient temperature too low |
| 9 | All segments displayed | 23 | Error function display |
| 10 | Memory | 24 | Blank display |
| 11 | Ready for measuring | 25 | Flat battery |
| 12 | Measurement complete | 26 | Date/Time |
| 13 | Body mode | 27 | Beeper function setting |
| 14 | Object mode | 28 | Replacing the battery |
![]() Read the instructions carefully before using this device.
Read the instructions carefully before using this device.
![]() Type BF applied part
Type BF applied part
![]() Keep dry
Keep dry
This Microlife thermometer is a high-quality product incorporating the latest technology and tested in accordance with international standards. With its unique technology, this device can provide a stable, heat-interference-free reading with each measurement. The device performs a self-test every time it is switched on to always guarantee the specified accuracy of any measurement. This Microlife thermometer is intended for the periodic measurement and monitoring of human body temperature. This thermometer has been clinically tested and proven to be safe and accurate when used in accordance with the operating instruction manual. Please read through these instructions carefully in order for you to understand all functions and safety information.
Table of Contents
- The Advantages of this Thermometer
• Measures in a matter of seconds
• Multiple uses (wide range of measurement)
• Accurate and reliable
• Gentle and easy to use
• Multiple readings recall
• Safe and hygienic
• Fever alarm
• Bluetooth® Function - Important Safety Instructions
- How this Thermometer measures Temperature
- Control Displays and Symbols
- Setting Date, Time, and Beeper Functions
- Changing between Body and Object Mode
- Directions for Use
- Changing between Celsius and Fahrenheit
- How to recall 30 readings in Memory Mode
- Bluetooth® Function
• Downloading the «Microlife Connected Health +» App
• How the Bluetooth® Function Works
• Bluetooth® Icon Indicator
• App Tutorial - Error Messages
- Cleaning and Disinfecting
- Battery Replacement
- Guarantee
- Technical Specifications
- www.microlife.com
Guarantee Card (see Back Cover)
- The Advantages of this Thermometer
Measures in a matter of seconds
The innovative infrared technology allows the measurement without even touching the object. This guarantees safe and sanitary measurements within seconds.
Multiple uses (wide range of measurement)
This thermometer offers a wide range of measurement from 0.1 – 99.9 °C / 32.2 – 211.8 °F, meaning the unit can be used to measure body temperature or it also has a feature allowing it to be used to measure surface temperature of the following examples:
• Milk surface temperature in a baby’s bottle
• Surface temperature of a baby’s bath
• Ambient temperature
Accurate and reliable
The unique probe assembly construction incorporates an advanced infrared sensor, ensuring that each measurement is
accurate and reliable.
Gentle and easy to use
• The ergonomic design enables simple and easy use of the thermometer.
• This thermometer can even be used on a sleeping child without causing any interruption.
• This thermometer is quick, therefore child-friendly.
Multiple readings recall
Users will be able to recall the last 30 readings with a record of both time and date when entering the recall mode, enabling efficient tracking of temperature variations.
Safe and hygienic
• No direct skin contact.
• No risk of broken glass or mercury ingestion.
• Completely safe for use on children.
Fever alarm
10 short beeps and a red LCD backlight alert the patient that he/ she may have a temperature equal to or higher than 37.5 °C.
Bluetooth® Function
This device connects to the «Microlife Connected Health+» App by using Bluetooth® 4.0 and enables easy monitoring of temperature. - Important Safety Instructions
• Follow instructions for use. This document provides important product operation and safety information regarding this device. Please read this document thoroughly before using the device and keep for future reference.
• This device may only be used for the purposes described in these instructions. The manufacturer cannot be held liable for
damage caused by the incorrect application.
• Never immerse this device in water or other liquids. For cleaning please follow the instructions in the «Cleaning and Disinfecting» section.
• Do not use this device if you think it is damaged or notice anything unusual.
• Never open this device.
• A basic physiological effect called vasoconstriction can occur in the early stages of fever, resulting in a cool skin effect. The
recorded temperature using this thermometer can, therefore, be unusually low.
• If the measurement result is not consistent with the patient’s finding or unusually low, repeat the measurement every 15 minutes or double check the result by another core body temperature measurement.
• This device comprises sensitive components and must be treated with caution. Observe the storage and operating conditions described in the «Technical Specifications» section.
• Ensure that children do not use this device unsupervised; some parts are small enough to be swallowed.
• Do not use this device close to strong electromagnetic fields such as mobile telephones or radio installations. Keep a minimum distance of 3.3 m from such devices when using this device.
• Protect it from:
– extreme temperatures
– impact and dropping
– contamination and dust
– direct sunlight
– heat and cold
• If the device is not going to be used for a prolonged period the batteries should be removed.

WARNING: The measurement results given by this device is not a diagnosis. It is not replacing the need for the consultation of a physician, especially if not matching the patient’s symptoms. Do not rely on the measurement result only, always consider other potentially occurring symptoms and the patient’s feedback. Calling a doctor or an ambulance is advised if needed. - How this Thermometer measures Temperature
This thermometer measures infrared energy radiated from the forehead as well as objects. This energy is collected through the lens and converted to a temperature value. - Control Displays and Symbols|
• All segments displayed 9: Press the ON/OFF button 5 to turn on the unit; all segments will be shown for 1 second.
• Ready for measuring AK: When the unit is ready for measuring, the «°C» or «°F» icon will keep flashing while the mode icon (body or object) will be displayed.
• Measurement complete AL: The reading will be shown on the display 3 with the «°C» or «°F» icon and the mode icon
steady. The unit is ready for the next measurement as soon as the «°C» or «°F» icon is flashing again.
• Low battery indicator AO: When the unit is turned on, the icon will keep flashing to remind the user to replace the batteries.
- Setting Date, Time and Beeper Functions
Setting the date and time
1. After the new batteries are fitted, the year number flashes in the display BP. You can set the year by pressing the START button 4. To confirm and then set the month, press the M-button 8.
2. Press the START button 4 to set the month. Press the M- button 8 to confirm and then set the day.
3. Follow the previously mentioned instructions to set the day, 12 or 24-hour mode, hours, and minutes.
4. Once you have set the minutes and pressed the M-button 8, the date and time are set and the time is displayed.
 If no button is pressed for 20 seconds, the device automatically switches to ready for measuring AK.
 Cancel time setup: Press the ON/OFF button 5 during time setup. The LCD will show Date/Time icons with «–:–». After that press the ON/OFF button 5 to start the measure-ment. If no further action is taken within 20 seconds, the
device will automatically turn off.
 Change current date and time: Press and hold the M button 8 for approx. 3 seconds until the year number starts to flash BP. Now you can enter the new values as described above.
Setting the beeper
1. When the device is switched off, press and hold the ON/OFF button 5 for 5 seconds to set the beeper BQ.
2. Press the ON/OFF button 5 again to either turn the beeper on or off. The beeper is activated when the beeper icon BQ is not crossed out.
 If no button is pressed for 5 seconds, the device automatically switches to ready for measuring AK.
 - Changing between Body and Object Mode
For changing from the body to object mode, slide the mode switch 6 at the side of the thermometer downwards. For switching back to body mode, slide the switch up again. - Directions for Use
Measuring in body mode
1. Press the ON/OFF button 5. The display 3 is activated to show all segments for 1 second.
2. When the «°C» or «°F» icon is flashing, a beep sound is heard and the thermometer is ready for measuring AK.
3. Aim the thermometer at the center of the forehead with a distance of no more than 5 cm. Please remove any hair, sweat, or dirt from the forehead before measuring to improve the accuracy of the readings.
4. Press the START button 4 and ensure that the activated blue tracking light is aimed at the center of the forehead. After 3 seconds a long beep will verify the completion of measurement.
5. Read the recorded temperature from the LCD display.
Measuring in object mode
1. Follow steps 1-2 above, then aim the thermometer at the center of the object you want to measure with a distance of no more than 5 cm. Press the START button 4. After 3 seconds a long beep will verify the completion of measurement.
2. Read the recorded temperature from the LCD display.
 NOTE:
NOTE:
• Patients and thermometer should stay in similar room conditions for at least 30 minutes.
• Don’t take a measurement while or immediately after nursing a baby.
• Don’t use the thermometer in high humidity environments.
• Patients should not drink, eat or exercise before/while taking the measurement.
• Don’t move the measurement device from the measuring area before hearing the termination beep.
• 10 short beeps and a red LCD backlight alert the patient that he/ she may have a temperature equal to or higher than 37.5 °C.
• Always take the temperature in the same location, since temperature readings may vary according to locations.
• Doctors recommend rectal measurement for newborn infants within the first 6 months, as all other measuring methods might lead to ambiguous results. If using a noncontact thermometer on those infants, we always recommend verifying the readings with a rectal measurement.
• In the following situations it is recommended that three temperatures are taken with the highest one taken as the reading:
1. Children under three years of age with a compromised immune system and for whom the presence or absence of fever is critical.
2. When the user is learning how to use the thermometer for the first time until he/she has familiarized himself/herself with
the device and obtains consistent readings.
3. If the measurement is surprisingly low.
• Readings from different measuring sites should not be compared as the normal body temperature varies by measuring site and time of day, being highest in the evening and lowest about one hour before waking up.
Normal body temperature ranges:
– Axillar: 34.7 – 37.3 °C / 94.5 – 99.1 °F
– Oral: 35.5 – 37.5 °C / 95.9 – 99.5 °F
– Rectal: 36.6 – 38.0 °C / 97.9 – 100.4 °F
– Microlife NC 150 BT: 35.4 – 37.4 °C / 95.7 – 99.3 °F
- Changing between Celsius and Fahrenheit
This thermometer can display temperature readings in either Fahrenheit or Celsius. To switch the display between °C and °F, simply turn OFF the unit, press and hold the START button 4 for 5 seconds; after 5 seconds, the current measurement scale («°C» or «°F» icon) will flash on the display AP. Change the measurement scale between °C and °F by pressing the START button 4. When the measurement scale has been chosen, wait for 5 seconds and the unit will automatically enter the «ready for measuring» mode. - How to recall 30 readings in Memory Mode
This thermometer can recall the last 30 readings with a record of
both time and date.
• Recall mode 17: Press the M-button 8 to enter recall mode when the power is off. The memory icon «M» will flash.
• Reading 1 – the last reading AR: Press and release the M button 8 to recall the last reading. Number «1» and a flashing
«M» is displayed.
• Reading 30 – readings in succession: Press and release the M-button 8 consecutively to recall the last 30 readings in succession.
Pressing and releasing the M-button 8 after the last 30 readings have been recalled will resume the above sequence from reading 1. - Bluetooth ® Function
This device can be used in conjunction with a smartphone running the «Microlife Connected Health+» App. The measurement results will be automatically transferred via Bluetooth ®.
Downloading the «Microlife Connected Health+» App
Download «Microlife Connected Health+» App for free from Google Play™ (Android) or App Store (iOS) and install it on your smartphone.®
How the Bluetooth Function works ®
The Bluetooth function on your device will automatically turn on and will be ready to connect with the «Microlife connected Health+» App after the device is switched on. Your device will automatically upload the data once it is connected to the smartphone.
Bluetooth ® Icon Indicator
The Bluetooth® icon indicator on your device, located in the middle-left portion of the display, is designed to provide information about the connection between your device and smartphone.
 NOTE:
NOTE:
• The Bluetooth function is enabled: The Bluetooth ® icon indi-cator AK appears steady on the display.
• The Bluetooth® icon indicator AK flashes when connecting with a device or uploading data to the device.
• The Bluetooth® function is automatically switched off during measurement; after measurement, the device will switch it on and upload the data to the «Microlife Connected Health+» App.
App Tutorial
To access the tutorial, select «Tutorial» in the menu of the «Microlife Connected Health+» App (located in the upper left corner on the screen). - Error Messages
• Measured temperature too high AS: Displays «H» when the measured temperature is higher than 43 °C / 109.4 °F in body mode or 99.9 °C / 211.8 °F in object mode.
• Measured temperature too low BT: Displays «L» when the measured temperature is lower than 34 °C / 93.2 °F in body
mode or 0.1 °C / 32.2 °F in object mode.
• Ambient temperature too high BK: Displays «H» and when the ambient temperature is higher than 40.0 °C / 104.0 °F.
• Ambient temperature too low BL: Displays «L» and when the ambient temperature is lower than 15.0 °C / 59.0 °F in body mode or lower than 5.0 °C / 41.0 °F in object mode.
• Error function display BM: The system has a malfunction.
• Blank display BN: Check if the batteries have been inserted correctly. Also, check polarity (<+> and <->) of the batteries.
• Flat battery indicator BO: If only icon is shown on the display, the batteries should be replaced immediately.
 - Cleaning and Disinfecting
Use an alcohol swab or cotton tissue moistened with alcohol (70% Isopropyl) to clean the thermometer casing and the measuring sensor. Ensure that no liquid enters the interior of the device. Never use abrasive cleaning agents, thinners or benzene for cleaning, and never immerse the device in water or other cleaning liquids. Take care not to scratch the surface of the sensor lens and the display. - Battery Replacement
This device is supplied with 2 new, long-life 1.5V, size AAA batteries. Batteries need replacing when this icon BO is the
only symbol shown on the display. Remove the battery cover BR by sliding it in the direction shown. Replace the batteries – ensure correct polarity as shown by the symbols in the compartment.
 Batteries and electronic devices must be disposed of in accordance with the locally applicable regulations, not with domestic waste.
 - Guarantee
This device is covered by a 5 year guarantee from the date of purchase. During this guarantee period, at our discretion, Microlife will repair or replace the defective product free of charge. Opening or altering the device invalidates the guarantee.
The following items are excluded from the guarantee:
• Transport costs and risks of transport.
• Damage caused by incorrect application or non-compliance with the instructions for use.
• Damage caused by leaking batteries.
• Damage caused by accident or misuse.
• Packaging/storage material and instructions for use.
• Regular checks and maintenance (calibration).
• Accessories and wearing parts: Batteries, Probe cover (optional).
Should guarantee service be required, please contact the dealer from where the product was purchased or your local Microlife service. You may contact your local Microlife service through our website: www.microlife.com/support
Compensation is limited to the value of the product. The guarantee will be granted if the complete product is returned with the original invoice. Repair or replacement within the guarantee does not prolong or renew the guarantee period. The legal claims and rights of consumers are not limited by this guarantee.
- Technical Specifications
Type: Non Contact Thermometer NC 150 BT Measurement range: Body mode: 34.0 – 43.0 °C / 93.2 – 109.4 °F
Object mode: 0.1 – 99.9 °C / 32.2 – 211.8 °FResolution: 0.1 °C / °F Measurement ± 0.2 °C, 35.0˜42.0 °C / ˜0.4 °F, 95.0˜107.6 °F
± 0.3 °C, 34.0 ˜ 34.9 °C and 42.1˜43.0 °C /
± 0.5 °F, 93.2 ~ 94.8 °F and 107.8 ~ 109.4 °F
Object mode:
±1.0 °C, 0.1 ~ 99.9 °C / ±2 °F, 32.2 ~ 211.8 °FDisplay: Liquid Crystal Display, 4 digits plus special icons Acoustic: The unit is turned ON and ready for the measurement: 1 short beep. Complete the
measurement: 1 long beep (1 sec.) if the reading is less than 37.5 °C / 99.5 °F, 10 short
«beep» sounds if the reading is equal to or greater than 37.5 °C / 99.5 °F.
System error or malfunction: 3 short «bi» sounds.Memory: 30 readings recall in the memory mode with a record of both time and date. Backlight The display light will be GREEN for 1 second when the unit is turned ON.
The display light will be GREEN for 5 seconds when a measurement is completed with a reading less than 37.5 °C / 99.5 °F.
The display light will be RED for 5 seconds when a measurement is completed with a reading equal to or higher than 37.5 °C / 99.5 °F.Operating conditions: Body mode: 15 – 40.0 °C / 59 – 104.0 °F Object mode: 5 – 40.0 °C / 41 – 104.0 °F 15 – 95 % relative maximum humidity Storage -25 – +55 °C / -13 – +131 °F conditions: 15 – 95 % relative maximum humidity Automatic Switch-off: Approx. 1 minute after the last measurement has been taken. Communication: Bluetooth® Low Energy 4.0 Compatibility: iOS: iOS 9.0 or newer Android: Android 4.4 or newer Battery: Battery 2 x 1.5 V alkaline batteries; size AAA approx. 1500 measurements lifetime: (using new batteries) Dimensions: 141.1 x 43.3 x 36.9 mm Weight: 90 g (with batteries), 67 g (w/o batteries) IP Class: IP21 Reference tostandards: ASTM E1965; IEC 60601-1; IEC 60601-1-2 (EMC); IEC 60601-1-11 Expected service life: 5 years or 12000 measurements This device complies with the requirements of the Medical Device Directive 93/42/EEC. Technical alterations reserved. According to the Medical Product User Act, a biennial technical inspection is recommended for professional users. Please observe the applicable disposal regulations. ®
The Bluetooth word mark and logos are registered trademarks owned by Bluetooth SIG, Inc. and any use of such marks by Microlife Corp. is under license. Other trademarks and trade names are those of their respective owners. - www.microlife.com?
Detailed user information about our thermometers and blood pressure monitors as well as services can be found at www.microlife.com.
Guarantee Card
| Name of Purchaser | |
| Serial Number | |
| Date of Purchase | |
| Specialist Dealer |
![]() Microlife AG
Microlife AG
Espenstrasse 139
9443 Widnau / Switzerland www.microlife.com
![]()
IB NC 150 BT E-V11 3720
Revision Date: 2020-08-26
microlife NEB 200 Compressor Nebuliser

Compressor Nebuliser
- Piston compressor
- Power lead
- ON/OFF Switch
- Air filter compartment
- Nebuliser
-a: Vaporiser head - Air tube
- Mouthpiece
- Adult face mask
- Child face mask
- Replacing air filter
- Assembling nebuliser kit
- Nose piece
- Air filter

Dear Customer,
This nebuliser is an aerosol therapy system suitable for domestic use. This device is used for the nebulisation of liquids and liquid medication (aerosols) and for the treat-ment of the upper and lower respiratory tract.
If you have any questions, problems or want to order spare parts please contact your local Microlife-Customer Service. Your dealer or pharmacy will be able to give you the address of the Microlife dealer in your country. Alternatively, visit the internet at www.microlife.com where you will find a wealth of invaluable information on our products.
Stay healthy – Microlife AG!
Explanation of Symbols
Important Safety Instructions
- Follow instructions for use. This document provides important product operation and safety information regarding this device. Please read this document thoroughly before using the device and keep for future reference.
- This device may only be used for the purposes described in these instructions. The manufacturer cannot be held liable for damage caused by incorrect application.
- Retain instructions in a safe place for future reference.
- Do not operate the unit in presence of any anesthetic mixture inflammable with oxygen or nitrogen protoxide.
- This device is not suitable for anaesthesia and lung ventilation.
- This device should only be used with original accessories as shown in these instructions.
- Do not use this device if you think it is damaged or notice anything unusual.
- Never open this device.
- This device comprises sensitive components and must be treated with caution. Observe the storage and operating conditions described in the «Technical Specifications» section.
- Protect it from:
- water and moisture
- extreme temperatures
- impact and dropping
- contamination and dust
- direct sunlight
- heat and cold
- Comply with the safety regulations concerning the electrical devices and in particular:
- Never touch the device with wet or moist hands.
- Place the device on a stable and horizontal surface during its operation.
- Do not pull the power cord or the device itself to unplug it from the power socket.
- The power plug is a separate element from the grid power; keep the plug accessible when the device is in use.
- Before plugging in the device, make sure that the electrical rating, shown on the rating plate on the bottom of the unit, corresponds to the mains rating.
- In case the power plug provided with the device does not fit your wall socket, contact qualified personnel for a replacement plug with that of a suitable one. In general, the use of adapters, simple or multiple, and/ or extension cables is not recommended. If their use is indispensable, it is necessary to use types complying with safety regulations, paying attention that they do not exceed the maximum power limits, indicated on adapters and extension cables.
- Do not leave the unit plugged in when not in use; unplug the device from the wall socket when it is not in operation.
- The installation must be carried out according to the instructions of the manufacturer. An improper installation can cause damage to persons, animals or objects, for which the manufacturer cannot be held responsible.
- Do not replace the power lead of this device. In case of a power lead damage, contact a technical service center authorized by the manufacturer for its replacement.
- The power supply cord should always be fully unwound in order to prevent dangerous overheating.
- Before performing any maintenance or cleaning operation, turn off the device and disconnect the plug from the main supply.
- Only use the medication prescribed for you by your doctor and follow your doctor’s instructions with regard to dosage, duration and frequency of the therapy.
- Depending on the pathology, only use the treatment that is recommended by your doctor.
- Only use the nose piece if expressly indicated by your doctor, paying special attention NEVER to introduce the bifurcations into the nose, but only positioning them as close as possible.
- Check in the medicine instruction leaflet for possible contraindications for use with common aerosol therapy systems.
- Do not position the equipment so that it is difficult to operate the disconnection device.
- For greater hygienic safety, do not use the same accessories for more than one person.
- Never bend the nebuliser over 60°.
- Do not use this device close to strong electromagnetic fields such as mobile telephones or radio installations. Keep a minimum distance of 3.3 m from such devices when using this device.
- Ensure that children do not use this device unsupervised; some parts are small enough to be swallowed.
Be aware of the risk of strangulation in case this device is supplied with cables or tubes. - Use of this device is not intended as a substitute for a consultation with your doctor.
Preparation and Usage of this Device
Prior to using the device for the first time, we recommend cleaning it as described in the section «Cleaning and Disinfecting».
- Assemble the nebuliser kit AK. Ensure that all parts are complete.
- Fill the nebuliser with the inhalation solution as per your doctor’s instructions. Ensure that you do not exceed the maximum level.
- Connect the nebuliser with the air tube 6 to compressor 1 and plug the power lead 2 into the socket (230V 50 Hz AC).
- To start the treatment, set ON/OFF switch 3 into the «I» position.
- The mouthpiece gives you a better drug delivery to the lungs.
- Choose between adult 8 or child face mask 9 and make sure that it encloses the mouth and nose area completely.
- Use all accessories including the nose piece AL as prescribed by your doctor.
- During inhalation, sit upright and relaxed at a table and not in an armchair, in order to avoid compressing your respiratory airways and impairing the treatment effectiveness. Do not lie down while inhaling. Stop inhalation if you feel unwell.
- After completing the inhalation period recommended by your doctor, switch the ON/OFF switch 3 to position «O» to turn off the device and unplug it from the socket.
- Empty the remaining medication from the nebuliser and clean the device as described in the section «Cleaning and Disinfecting».
- This device was designed for intermittent use of 30 min. On / 30 min. Off. Switch off the device after 30 min. use and wait for another 30 min. before you resume treatment.
- The device requires no calibration.
- No modification to the device is permitted.
Cleaning and Disinfecting
Thoroughly clean all components to remove medication residuals and possible impurities after each treatment. Use a soft and dry cloth with non-abrasive cleaners to clean the compressor.
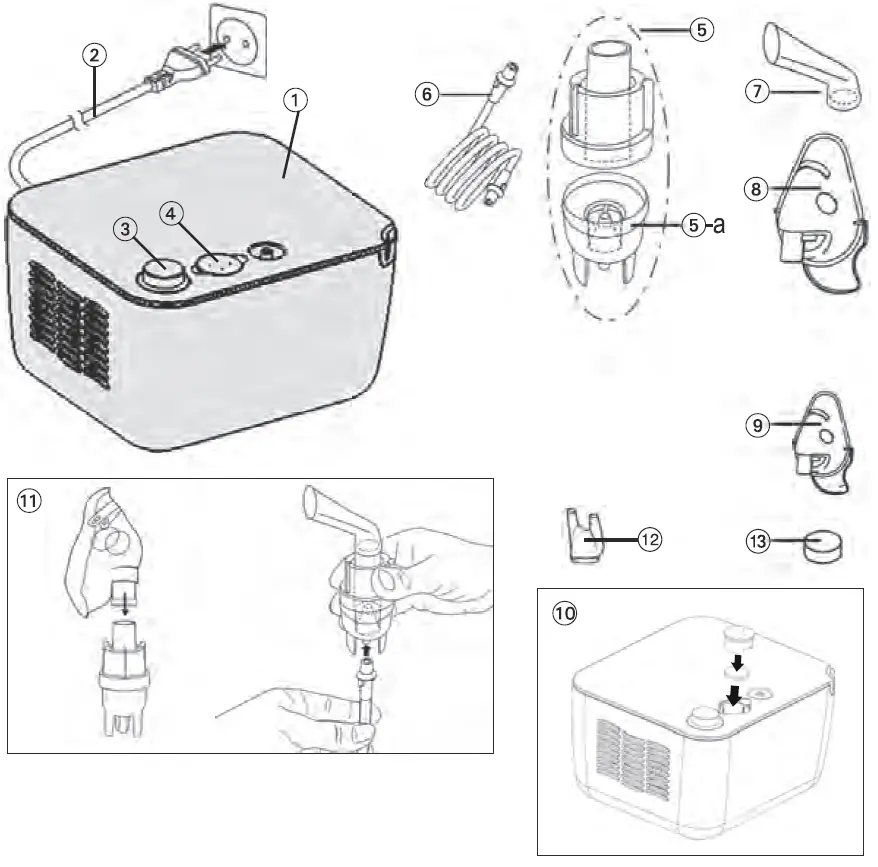 Make sure that the internal parts of the device are not in contact with liquids and that the power plug is disconnected.
Cleaning and disinfecting of the accessories
Follow carefully the cleaning and disinfecting instructions of the accessories as they are very important to the performance of the device and success of the therapy.
Before and after each treatment
Disassemble the nebuliser 5 by turning the top counterclockwise and remove the medicine conduction cone.
Wash the components of the disassembled nebuliser, the mouthpiece 7 and the nose piece AL by using tap water; dip in boiling water for 5 minutes. Reassemble the nebuliser components and connect it to the air tube connector, switch the device on and let it work for 10-15 minutes.
- Wash masks and air tube with warm water.
- Only use cold disinfecting liquids following the manufacturer’s instructions.
- Do not boil nor autoclave the air tube and masks.
Maintenance, Care, and Service
Order all spare parts from your dealer or pharmacist, or contact Microlife-Service (see foreword).
Replacement of the nebuliser
Replace the nebuliser 5 after a long period of inactivity, in cases where it shows deformities, breakage, or when the vaporiser head 5-a is obstructed by dry medicine, dust, etc. We recommend to replace the nebuliser after a period between 6 months and 1 year depending on the usage.
Only use original nebulisers!
Replacement of the air filter
In normal conditions of use, the air filter AM must be replaced approximately after 500 working hours or after each year. We recommend to periodically check the air filter (10-12 treatments) and if the filter shows a grey or brown colour or is wet, replace it. Extract the filter and replace it with a new one.
- Do not try to clean the filter for reusing it.
- The air filter shall not be serviced or maintained while in use with a patient.
- Only use original filters! Do not use the device without filter!
Malfunctions and Actions to take
The device cannot be switched on
- Ensure the power lead 2 is correctly plugged into the socket.
- Ensure the ON/OFF switch 3 is in the position «I».
- Make sure that the device has been operating within operating limits indicated in this manual (30 min On / 30 min Off).
The nebuliser functions poorly or not at all
- Ensure the air tube 6 is correctly connected at both ends.
- Ensure the air tube is not squashed, bent, dirty or blocked. If necessary, replace with a new one.
- Ensure the nebuliser 5 is fully assembled and the colored vaporiser head 5-a is placed correctly and not obstructed.
- Ensure the required medication has been added.
Guarantee
This device is covered by a 5 year guarantee from the date of purchase. During this guarantee period, at our discretion, Microlife will repair or replace the defective product free of charge. Opening or altering the device invalidates the guarantee.
The following items are excluded from the guarantee:
- Transport costs and risks of transport.
- Damage caused by incorrect application or noncompliance with the instructions for use.
- Damage caused by leaking batteries.
- Damage caused by accident or misuse.
- Packaging/storage material and instructions for use.
- Regular checks and maintenance (calibration).
- Accessories and wearing parts: Nebuliser, masks, mouthpiece, nose piece, tube, filters, nasal washer (optional).
Should guarantee service be required, please contact the dealer from where the product was purchased, or your local Microlife service. You may contact your local Microlife service through our website: www.microlife.com/support
Compensation is limited to the value of the product. The guarantee will be granted if the complete product is returned with the original invoice. Repair or replacement within guarantee does not prolong or renew the guarantee period. The legal claims and rights of consumers are not limited by this guarantee.
Technical Specifications
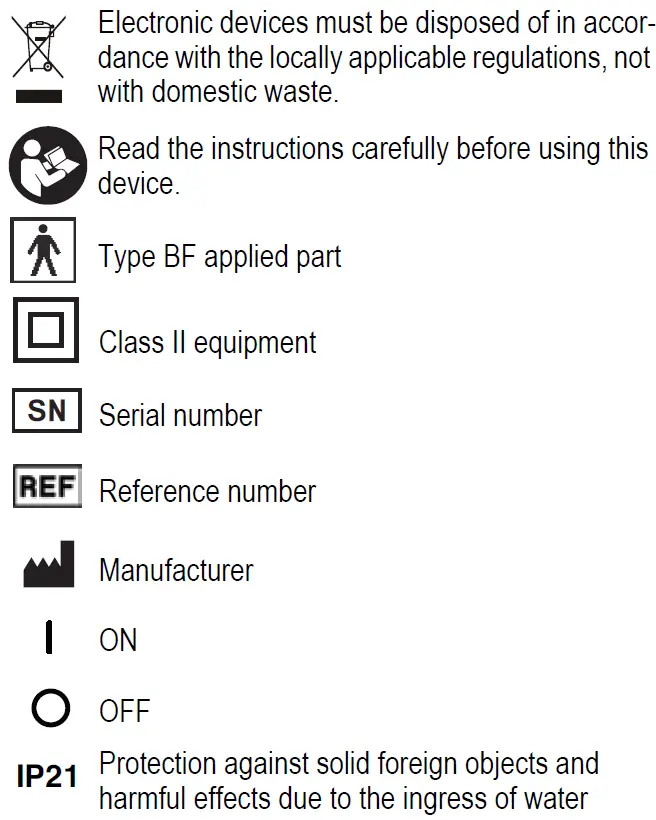
This device complies with the requirements of the Medical Device Directive 93/42/EEC. Class II device as regards protection against electric shocks. Nebuliser, mouthpiece and masks are type BF applied parts.
The technical specifications may change without prior notice.
microlife MT 3001 Digital Thermometer Instruction Manual

MT 3001
Description of this Thermometer

- ON/OFF button
- Display
- Battery compartment cover
- Measuring sensor / measuring tip
- Cleaning and disinfecting area (thermometer probe only)
Important Safety Instructions
- Follow instructions for use. This document provides important product operation and safety information regarding this device. Please read this document thoroughly before using the device and keep for future reference.
- This device is only to be used for measuring human body temperature through oral, rectal or axillary. Do not attempt to take temperatures at other sites, such as in the ear, as it may result in false readings and may lead to injury.
- Do not use this device if you think it is damaged or notice anything unusual.
- We recommend cleaning this device according to the cleaning instructions before first use for personal hygiene.
- The minimum measurement time until the beep is heard must be maintained without exception! Consider that different measurement locations may require continued measuring even after the beep, see section «Measuring methods / Normal body temperature».
- For safety reasons (risk of rectal perforation) rectal measurement in children younger than 3 years must be performed only by trained health care personnel (professional user). Use another measurement method instead. For rectal fever measurement in small children younger than 3 years, thermometers with a flexible tip are available.
- Do not attempt rectal measurements on persons with rectal disorders.
Doing so may aggravate or worsen the disorder. - Ensure that children do not use this device unsupervised; some parts are small enough to be swallowed. Be aware of the risk of strangulation in case this device is supplied with cables or tubes.
- Do not use this device close to strong electromagnetic fields such as mobile telephones or radio installations. Keep a minimum distance of 3.3 m from such devices when using this device.
- Protect the device from impact and dropping!
- Avoid ambient temperatures above 60 °C. NEVER boil this device!
- Use only the commercial disinfectants listed in the section «Cleaning and Disinfecting» to clean the device to avoid damage to the device.
- We recommend this device is tested for accuracy every two years or after mechanical impact (e.g. being dropped). Please contact your local Microlife-Service to arrange the test.

Turning on the Thermometer
To turn on the thermometer, press the ON/OFF button (1); a short beep signals «thermometer ON». A display test is performed. All segments should be displayed.
Then at an ambient temperature of less than 32 °C, an «L» and a flashing «°C» appear at the display field (2). The thermometer is now ready for use.
Function Test
Correct functioning of the thermometer is tested automatically each time it is turned on. If a malfunction is detected (measurement inaccuracy), this is indicated by «ERR» on the display, and a measurement becomes impossible. In this case, the thermometer must be replaced.
Using the Thermometer
Choose the preferred measuring method. When taking a measurement, the current temperature is continuously displayed and the «°C» symbol flashes. If the beep is heard 10 times and the «°C» is no longer flashing, this means that the measured increase in temperature is less than 0.1 °C in 16 seconds.
To prolong the battery life, turn off the thermometer by briefly pressing the ON/OFF button (1). Otherwise the thermometer will automatically turn off after about 10 minutes.
Storage of Measured Values
If the ON/OFF button (1) is pressed for more than 3 seconds when turning on the thermometer, the automatically stored maximum temperature during the last measurement will be displayed. At the same time, a «M» for memory will appear on the display. About 2 seconds after the button is released, the temperature value disappears and the thermometer is ready for measurement.
Measuring methods / Normal body temperature
In the armpit (axillary) / 34.7 – 37.3 °C
Wipe the underarm with a dry towel. Place the measuring sensor (4) under the arm into the center of the armpit so the tip is touching the skin and position the patient’s arm next to the patient’s body. This ensures that the room air does not affect the reading. Because the axillary takes more time to reach its stable temperature wait at least 5 minutes, regardless of the beep sound.
In the mouth (oral) / 35.5 – 37.5 °C
Do not eat or drink anything hot or cold 10 minutes before the measurement. The mouth should remain closed up to 2 minutes before starting a reading.
Position the thermometer in one of the two pockets under the tongue, to the left or right of the root of the tongue. The measuring sensor (4) must be in good contact with the tissue. Close your mouth and breathe evenly through the nose to prevent the measurement from being influenced by inhaled/ exhaled air.
If this is not possible due to blocked airways, another method for measuring should be used.
Approx. measuring time: 1 minute!
In the anus (rectal) / 36.6 – 38.0 °C
Attention: For the prevention of rectal perforation in children (younger than 3 years), we recommend using another measuring method, or the use of a thermometer with flexible tip. Carefully insert the measuring sensor (4) of the thermometer 2 to 3 cm into the anal aperture.
The use of a probe cover and the use of a lubricant is recommended.
If you are unsure of this measurement method, you should consult a professional for guidance/training.
Approx. measuring time: 1 minute!
Cleaning and Disinfecting
For disinfection in home use environment, use a 70% Isopropyl alcohol swab, or a cotton tissue moistened with 70% Isopropyl alcohol to wipe surface pollutants off the thermometer probe (note: consider the application and safety instruction of the disinfectant manufacturer). Always start wiping from the end of the thermometer probe (approx. at the middle of the thermometer) towards the thermometer tip. Afterwards the entire thermometer probe (see number (5) in the drawing) should be immersed in 70% Isopropyl alcohol for at least 5 minutes (max. 24 hours). After immersion, let the disinfectant dry off for 1 minute before next use. Avoid immersing or wiping the display to protect it from fading.
The thermometer is not intended for professional use.
Battery Replacement
When the «▼» symbol (upside-down triangle) appears in the display, the battery is flat and needs replacing. To replace the battery remove the battery compartment cover (3) from the thermometer. Insert the new battery with the + at the top. Make sure you have a battery of the same type to hand. Batteries can be purchased at any electrical store.
Technical Specifications
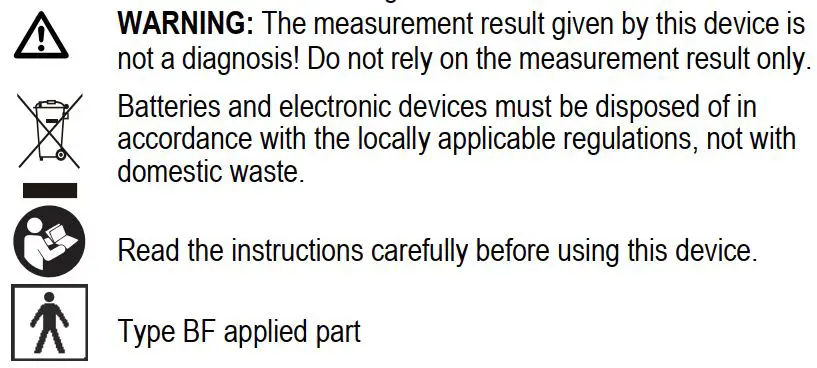
This device complies with the requirements of the Medical Device Directive 93/42/EEC.
Technical alterations reserved.
Guarantee
This device is covered by a lifetime guarantee from the date of purchase. During this guarantee period, at our discretion, Microlife will repair or replace the defective product free of charge.
Opening or altering the device invalidates the guarantee.
The following items are excluded from the guarantee:
- Transport costs and risks of transport.
- Damage caused by incorrect application or non-compliance with the instructions for use.
- Damage caused by leaking batteries.
- Damage caused by accident or misuse.
- Packaging/storage material and instructions for use.
- Regular checks and maintenance (calibration).
- Accessories and wearing parts: Battery.
Should guarantee service be required, please contact the dealer from where the product was purchased, or your local Microlife service. You may contact your local Microlife service through our website: www.microlife.com/support
Compensation is limited to the value of the product. The guarantee will be granted if the complete product is returned with the original invoice. Repair or replacement within guarantee does not prolong or renew the guarantee period. The legal claims and rights of consumers are not limited by this guarantee.
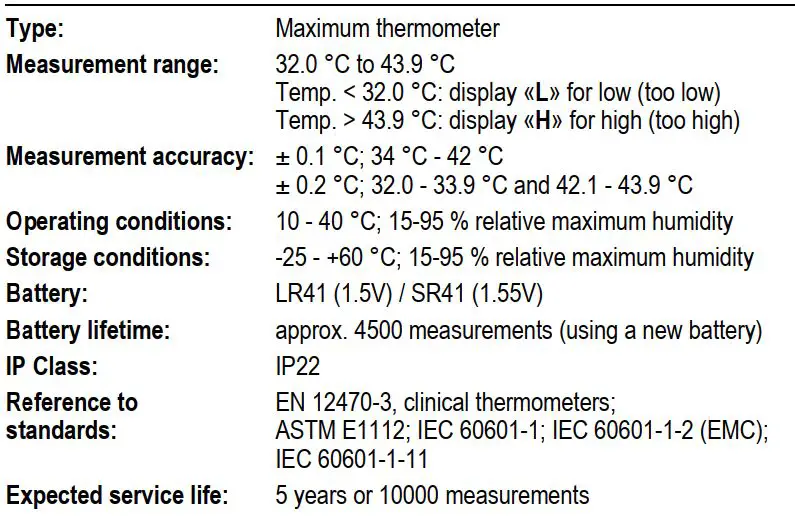


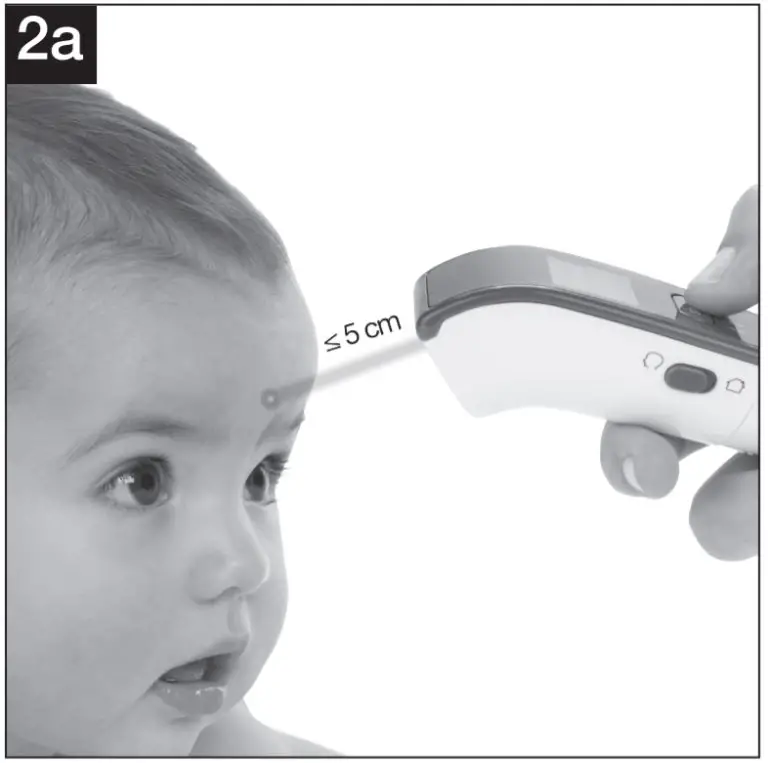
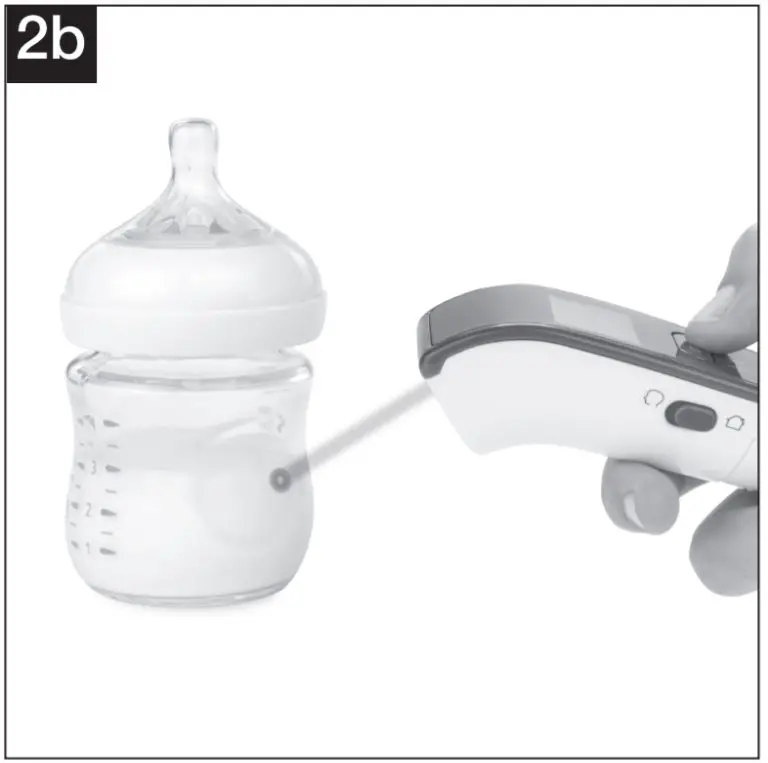
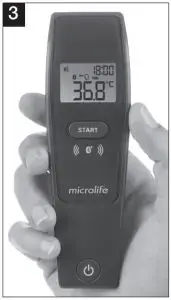
Microlife NC150 BT Overview
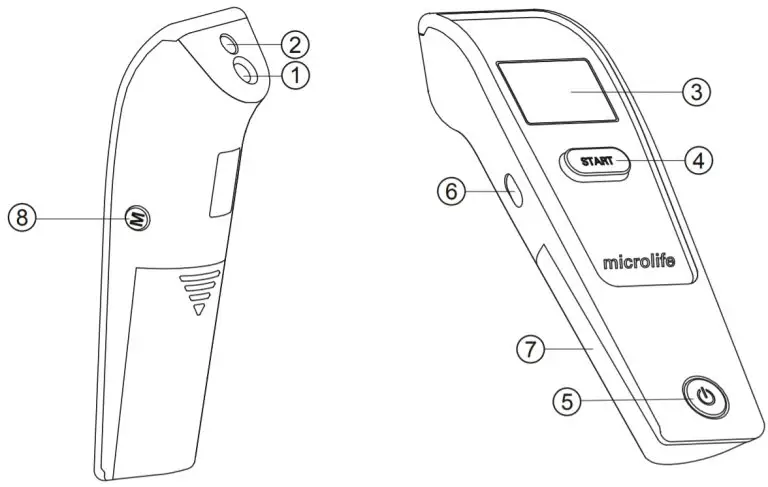
- Measuring sensor
- Tracking light
- Display
- START button
- ON/OFF button
- Mode switch
- Battery compartment cover
- M-button (memory)
- All segments displayed
- Memory
- Ready for measuring
- Measurement complete
- Body mode
- Object mode
- Low battery indicator
- Recall mode
- Recall the last 30 readings
- Measured temperature too high
- Measured temperature too low
- Ambient temperature too high
- Ambient temperature too low
- Error function display
- Blank display
- Flat battery
- Date/Time
- Beeper function setting
- Replacing the battery
Microlife Non Contact Thermometer NC150 BT
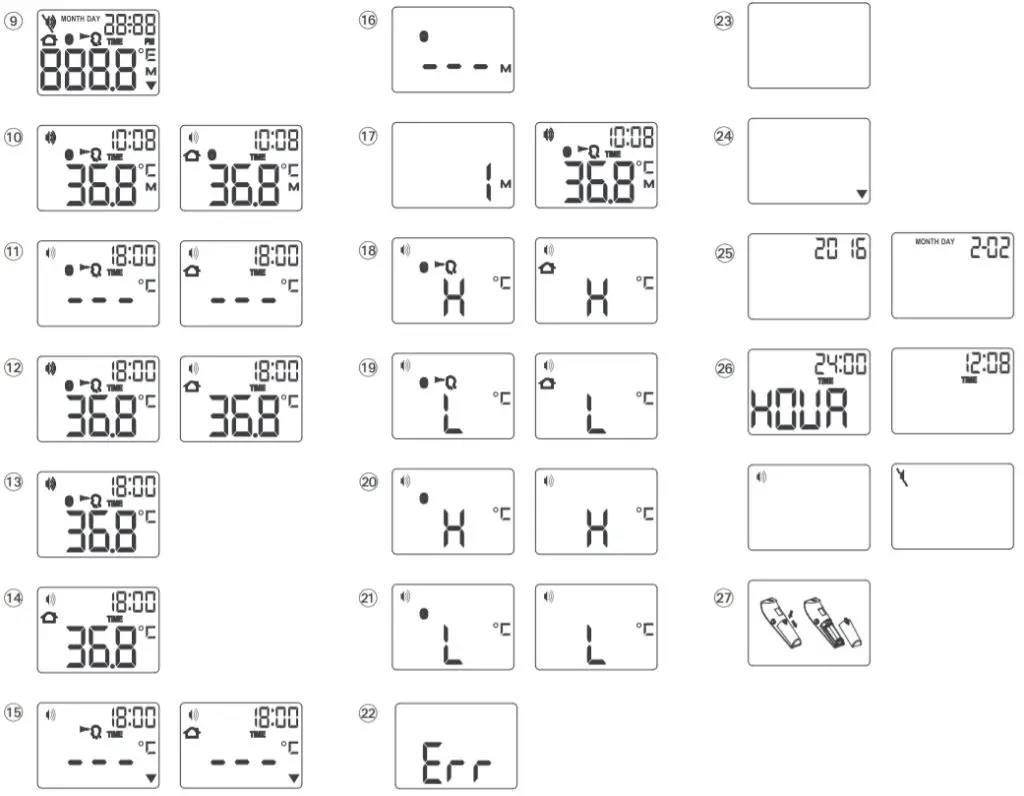 Read the instructions carefully be fore using this device
 Type BF applied part
 Keep dry
This Microlife thermometer is a high quality product incorporating the latest technology and tested in accordance with international standards. With its unique technology, this device can provide a stable, heat-interference-free reading with each measurement.
The device performs a self test every time it is switched on to always guarantee the specified accuracy of any measurement.
This Microlife thermometer is in tended for the periodic measurement and monitoring of human body temperature.
This thermometer has been clinically tested and proven to be safe and accurate when used in accordance to the operating instruction manual.
Please read through these instructions carefully in order for you to understand all functions and safety information.
The Advantages of this Thermometer
Measures in a matter of seconds
The innovative infrared technology allows the measurement without even touching the object. This guarantees safe and sanitary measurements within seconds.
Multiple uses (wide range of measurement)
This thermometer offers a wide range of measurement from 0.1 – 99.9 °C , meaning the unit can be used to measure body temperature or it also has a feature allowing it to be used to measure surface temperature of the following examples:
- Milk surface temperature in a baby’s bottle
- Surface temperature of a baby’s bath
- Ambient temperature
Accurate and reliable
The unique probe assembly construction incorporates an advanced infrared sensor, ensuring that each measurement is accurate and reliable.
Gentle and easy to use
- The ergonomic design enables simple and easy use of the thermometer.
- This thermometer can even be used on a sleeping child without causing any interruption.
- This thermometer is quick, therefore child-friendly.
Multiple readings recall
Users will be able to recall the last 30 readings with a record of both time and date when entering the recall mode, enabling efficient tracking of temperature variations.
Safe and hygienic
- No direct skin contact.
- No risk of broken glass or mercury ingestion.
- Completely safe for use on children.
Fever alarm
10 short beeps and a red LCD backlight alert the patient that he/ she may have a temperature equal to or higher than 37.2 °C.
Bluetooth Function
This device connects to the «Microlife Connected Health+» App by using Bluetooth® 4.0 and enables easy monitoring of temperature.
Important Safety Instructions
- Follow instructions for use. This document provides important product operation and safety information regarding this device.
- Please read this document thoroughly before using the device and keep for future reference.
- This device may only be used for the purposes described in these instructions. The manufacturer cannot be held liable for damage caused by incorrect application.
- Never immerse this device in water or other liquids. For cleaning please follow the instructions in the «Cleaning and Disinfecting» section.
- Do not use this device if you think it is damaged or notice anything unusual.
- Never open this device.
- A basic physiological effect called vasoconstriction can occur in the early stages of fever, resulting in a cool skin effect. The recorded temperature using this thermometer can, therefore, be unusually low.
- If the measurement result is not consistent with the patient’s finding or unusually low, repeat the measurement every 15 minutes or double check the result by another core body temperature measurement.
- This device comprises sensitive components and must be treated with caution. Observe the storage and operating conditions described in the «Technical Specifications» section.
- Ensure that children do not use this device unsupervised; some parts are small enough to be swallowed.
- Do not use this device close to strong electromagnetic fields such as mobile telephones or radio installations. Keep a minimum distance of 3.3 m from such devices when using this device.
- Protect it from:
- extreme temperatures
- impact and dropping
- contamination and dust
- direct sunlight
- heat and cold
- If the device is not going to be used for a prolonged period the batteries should be removed.
The measurement results given by this device is not a diagnosis. It is not replacing the need for the consultation of a physician, especially if not matching the patient’s symptoms. Do not rely on the measurement result only, always consider other potentially occurring symptoms and the patient’s feedback. Calling a doctor or an ambulance is advised if needed.
How this Thermometer measures Temperature
This thermometer measures infrared energy radiated from the forehead as well as objects. This energy is collected through the lens and converted to a temperature value.
Control Displays and Symbols
- All segments displayed 9: Press the ON/OFF button 5 to turn on the unit; all segments will be shown for 1 second.
- Ready for measuring AK: When the unit is ready for measuring, the «°C» icon will keep flashing while the mode icon (body or object) will be displayed.
- Measurement complete AL: The reading will be shown on the display 3 with the «°C» icon and the mode icon steady. The unit is ready for the next measurement as soon as the «°C» icon is flashing again.
- Low battery indicator AO: When the unit is turned on, the «
 » icon will keep flashing to remind the user to replace the batteries.
Setting Date, Time and Beeper Functions
Setting the date and time
- After the new batteries are fitted, the year number flashes in the display 25. You can set the year by pressing the START button
- To confirm and then set the month, press the M-button 8.
- Press the START button 4 to set the month. Press the Mbutton 8 to confirm and then set the day.
- Follow the previously mentioned instructions to set the day, 12 or 24 hour mode, hours and minutes.
- Once you have set the minutes and pressed the M-button 8, the date and time are set and the time is displayed.
 If no button is pressed for 20 seconds, the device automatically switches to ready for measuring AK.
 Cancel time setup: Press the ON/OFF button 5 during time setup. The LCD will show Date/Time icons with «–:–». After that press the ON/OFF button 5 to start the measurement. If no further action is taken within 20 seconds, the
device will automatically turn off.
 Change current date and time: Press and hold the Mbutton 8 for approx. 3 seconds until the year number starts to flash 25. Now you can enter the new values as described above.
Setting the beeper
- When the device is switched off, press and hold the ON/OFF button 5 for 5 seconds to set the beeper 26.
- Press the ON/OFF button 5 again to either turn the beeper on or off. The beeper is activated when the beeper icon 26 is not crossed-out.
 If no button is pressed for 5 seconds, the device automatically switches to ready for measuring AK.
Changing between Body and Object Mode
For changing from body to object mode, slide the mode switch 6 at the side of the thermometer downwards. For switching back to body mode, slide the switch up again.
Directions for Use
Measuring in body mode
- Press the ON/OFF button 5. The display 3 is activated to show all segments for 1 second.
- When the «°C» icon is flashing, a beep sound is heard and the thermometer is ready for measuring AK.
- Aim the thermometer at the center of the forehead with a distance of no more than 5 cm. Please remove any hair, sweat or dirt from the forehead before measuring to improve the accuracy of the readings.
- Press the START button 4 and ensure that the activated blue tracking light is aimed at the center of the forehead.
After 1 second a long beep will verify the completion of measurement. - Read the recorded temperature from the LCD display.
Measuring in object mode
- Follow steps 1-2 above, then aim the thermometer at the center of the object you want to measure with a distance of no more than 5 cm. Press the START button 4. After 1 second a long beep will verify the completion of measurement.
- Read the recorded temperature from the LCD display.
 NOTE:
NOTE:
- Patients and thermometer should stay in similar room condition for at least 30 minutes.
- Don’t take a measurement while or immediately after nursing a baby.
- Don’t use the thermometer in high humidity environments.
- Patients should not drink, eat or exercise before/while taking the measurement.
- Don’t move the measurement device from the measuring area before hearing the termination beep.
- 10 short beeps and a red LCD backlight alert the patient that he/she may have a temperature equal to or higher than 37.2 ° C.
- Always take the temperature in the same location, since temperature readings may vary according to locations.
- Doctors recommend rectal measurement for newborn infants within the first 6 months, as all other measuring methods might lead to ambiguous results. If using a non contact thermometer on those infants, we always recommend verifying the readings with a rectal measurement.
- In the following situations it is recommended that three temperatures are taken with the highest one taken as the reading:
- Children under three years of age with a compromised immune system and for whom the presence or absence of fever is critical.
- When the user is learning how to use the thermometer for the first time until he/she has familiarized himself/herself with the device and obtains consistent readings.
- If the measurement is surprisingly low.
- Readings from different measuring sites should not be compared as the normal body temperature varies by measuring site and time of day, being highest in the evening and lowest about one hour before waking up.
Normal body temperature ranges:
- Axillar: 34.7 – 37.3 °C
- Oral: 35.5 – 37.5 °C
- Rectal: 36.6 – 38.0 °C
- Microlife NC 150 BT: 35.4 – 37.4 °C
How to recall 30 readings in Memory Mode
This thermometer can recall the last 30 readings with a record of both time and date.
- Recall mode 16 Press the M-button 8 to enter recall mode when the power is off. The memory icon «M» will flash.
- Reading 1 – the last reading 17 Press and release the Mbutton 8 to recall the last reading. Number «1» and a flashing «M» are displayed.
- Reading 30 – readings in succession: Press and release the M-button 8 consecutively to recall the last 30 readings in succession.
Pressing and releasing the M-button 8 after the last 30 readings have been recalled will resume the above sequence from reading 1.
Bluetooth Function
This device can be used in conjunction with a smartphone running the «Microlife Connected Health+» App. The measurement results will be automatically transferred via Bluetooth®.
Downloading the «Microlife Connected Health+» App
Download «Microlife Connected Health+» App for free from Google Play™ (Android) or App Store (iOS) and install it on your smartphone.
How the Bluetooth® Function Works
The Bluetooth® function on your device will automatically turn on and will be ready to connect with the «Microlife Connected Health+» App after the device is switched on. Your device will automatically upload the data once it is connected to the smartphone.
Bluetooth® Icon Indicator
The Bluetooth® icon indicator on your device, located in the middle left portion of the display, is designed to provide information about the connection between your device and smartphone.
 NOTE:
NOTE:
- The Bluetooth® function is enabled: The Bluetooth® icon indicator 11 appears steady on the display.
- The Bluetooth® icon indicator AK flashes, when connecting with a device or uploading data to the device.
- The Bluetooth® function is automatically switched off during measurement; after measurement the device will switch it on and upload the data to the «Microlife Connected Health+» App.
App Tutorial
To access the tutorial, select «Tutorial» in the menu of the «Microlife Connected Health+» App (located in the upper left corner on the screen).
Error Messages
- Measured temperature too high 18: Displays «H» when measured temperature is higher than 43 °C in body mode or 99.9 °C in object mode.
- Measured temperature too low 19: Displays «L» when measured temperature is lower than 34.0 °C in body mode or 0. 1°Ci n object mode.
- Ambient temperature too high 20: Displays «H» and
 when ambient temperature is higher than 40.0 °C
 - Ambient temperature too low 21: Displays «L» and
 when ambient temperature is lower than 15.0 °C in body mode or lower than 5.0 °C in object mode.
 - Error function display 22: The system has a malfunction.
- Blank display 23: Check if the batteries have been inserted correctly. Also check polarity (<+> and <->) of the batteries.
- Flat battery indicator 24: If only «
 » icon is shown on the display, the batteries should be replaced immediately.
Cleaning and Disinfecting
Use an alcohol swab or cotton tissue moistened with alcohol (70% Isopropyl) to clean the thermometer casing and the measuring sensor. Ensure that no liquid enters the interior of the device. Never use abrasive cleaning agents, thinners or benzene for cleaning and never immerse the device in water or other cleaning liquids. Take care not to scratch the surface of the sensor lens and the display.
Battery Replacement
This device is supplied with 2 new, long-life 1.5V, size AAA batteries. Batteries need replacing when this icon « » BN is the only symbol shown on the display.
Remove the battery cover 27 by sliding it in the direction shown. Replace the batteries – ensure correct polarity as shown by the symbols in the compartment.
 Batteries and electronic devices must be disposed of in accordance with the locally applicable regulations, not with domestic waste.
Guarantee
This device is covered by a 2 year guarantee from the date of purchase. The guarantee is valid only on presentation of the guarantee card completed by the dealer (see back) confirming date of purchase or the receipt.
- The guarantee covers the device. Batteries and packaging are not included.
- Opening or altering the device invalidates the guarantee.
- The guarantee does not cover damage caused by improper handling, discharged batteries, accidents or non-compliance with the operating instructions.
Please contact Microlife-service.
Technical Specifications
- Type: Non Contact Thermometer NC150 BT
Measurement: Body mode: 34.0 – 43.0 °C - Range: Object mode: 0.1 – 99.9 °C
- Resolution: 0.1 °C
- Measurement accuracy (Laboratory):
- Body mode:
±0.2 °C, 35.0~42.0 °C
±0.3 °C, 34.0~ 34.9 °C and 42.1~ 43.0 °C
Object mode:
±1.0 °C, 0.1~ 99.9 °C
Liquid Crystal Display, 4 digits plus special icons
- Body mode:
- Display:
Acoustic:- The unit is turned ON and ready for the measurement: 1 short beep.
- Complete the measurement: 1 long beep (1 sec.) if the reading is less than 37.2 °C , 10 short «beep» sounds, if the reading is equal to or greater than 37.2 °C .
- System error or malfunction: 3 short «bi» sounds.
- Memory: 30 readings recall in the memory mode with a record of both time and date.
- Backlight:
The display light will be GREEN for 1seconds, when the unit is turned ON.
The display light will be GREEN for 5 seconds, when a measurement is completed with a reading less than 37.2 °C .
The display light will be RED for 5 seconds, when a measurement is completed with a reading equal to or higher than 37.2 °C - Operating conditions:
Body mode: 15 – 40.0 °C
Object mode: 5 – 40.0 °C
30 – 75 % relative maximum humidity - Storage conditions:
–20-+60℃±2℃
91 – 95 % relative maximum humidity - Automatic Switch-off: Approx. 1 minute after last measurement has been taken.
- Communication: Bluetooth® Low Energy 4.0 (Bluetooth® Smart)
- Compatibility:
iOS: iOS 9.0 or newer
Android: Android 4.4 or newer - Battery: 2 x 1.5 V alkaline batteries; size AAA
- Battery lifetime: approx. 1500 measurements (using new batteries)
- Dimensions: 141.1 x 43.3 x 36.9 mm
- Weight: 90 g (with batteries), 67 g (w/o batteries)
- IP Class: IP21
- Reference to standards: ASTM E1965; IEC 60601-1; IEC 60601-1-2 (EMC); IEC 60601-1-11
- Expected service life: 5 years or 12000 measurements
This device complies with the requirements of the Medical Device Directive 93/42/EEC.
Technical alterations reserved.
According to the Medical Product User Act a biennial technical inspection is recommended for professional users. Please observe the applicable disposal regulations.
The Bluetooth® word mark and logos are registered trademarks owned by Bluetooth SIG, Inc. and any use of such marks by Microlife Corp. is under license. Other trademarks and trade names are those of their respective owners.
www.microlife.com
Detailed user information about our thermometers and blood pressure monitors as well as services can be found at www.microlife.com.
]]>

