FANATEC DD Pro Wheelbase User Guide
FANATEC DD Pro Wheelbase

E Translations – Page 6;
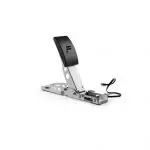
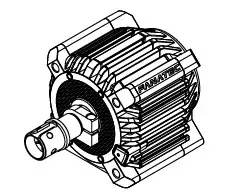
1x Gran Turismo® DD Pro
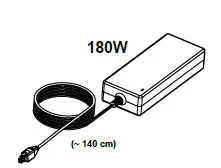
1x Boost Kit 180 Power Supply
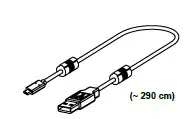
1x USB Type-A to Type-C Cable
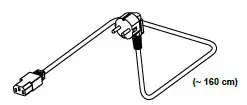
1x Power Cord (Regional)
4x M6x8 mm T-Nut

1x Button caps

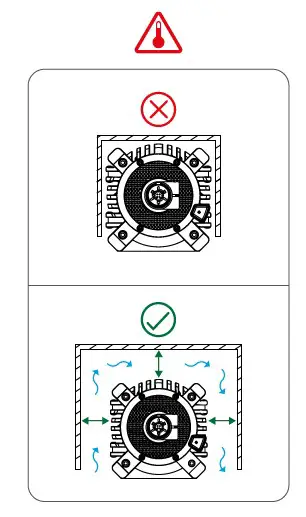
HARD-MOUNT
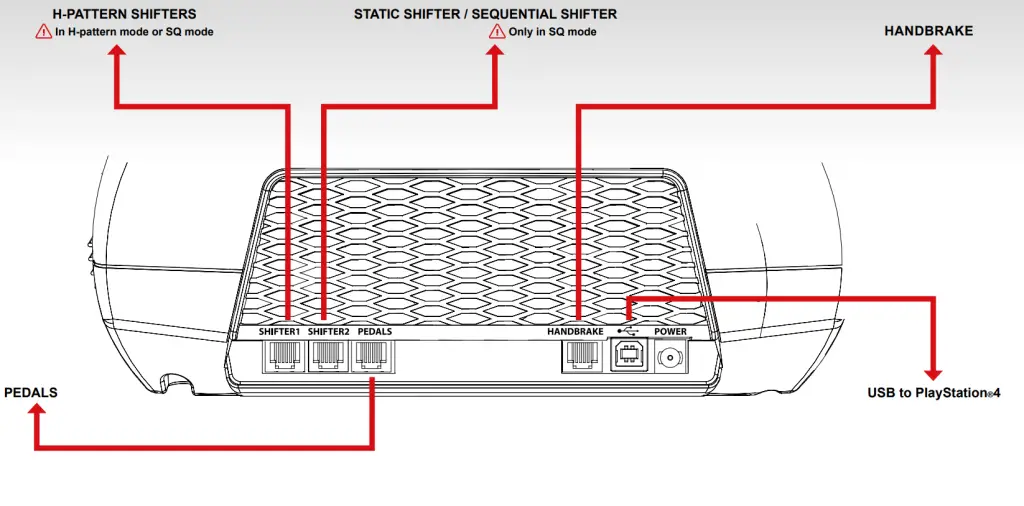
CONNECTIONS
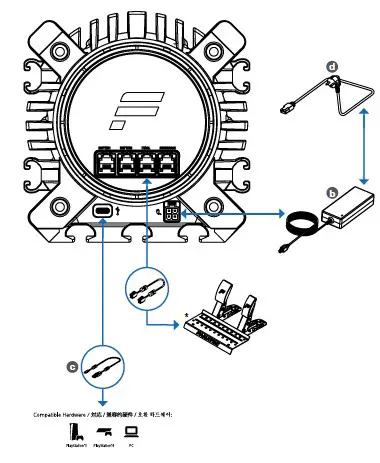
Sold separately
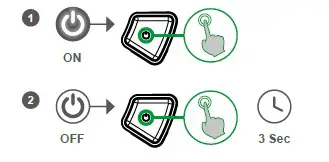
ON & OFF
MODES

SUPPORT
For detailed information, please download the user manual from fanatec.com/downloads. This Quick Guide covers basic features and is not a replacement for the full manual. The product warranty is provided by Endor AG. Refer to the included warranty sheet as well as the terms & conditions of Endor AG on fanatec.com.
China RoHS 2
 China RoHS 2 refers to the Ministry of Industry and Information Technology Order No. 32, effective July 1, 2016, titled Management Methods for the
Restriction of the Use of Hazardous Substances in Electrical and Electronic Products. To comply with China RoHS 2, we determined this product’s Environmental Protection Use Period (EPUP) to be 10 years in accordance with the Marking for the Restricted Use of Hazardous Substances in Electronic and Electrical Products, SJT 11364-2014.


Quick Guide

Fanatec®is a registered trademark of Endor AG
Designed and developed by Endor AG in Germany
Made in China
PACKAGE CONTENTS
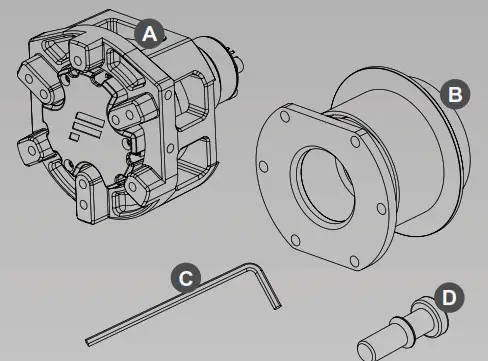
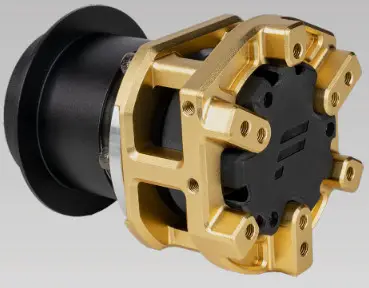
- Podium Hub A
- Quick Release Adapter B
- 2 mm Allen key C
- Safety bolt D
DATA PORT-C
The DataPort-C on the bottom of the Podium Hub is to connect compatible FANATEC ® peripherals with your wheelbase.
 ATTENTION: It is NOT a USB data port and cannot transfer any data between a PC and any attached device that is not from Fanatec®.
ANALOGUE PADDLE MODES
To switch the Mode of your Podium Advanced Paddle Module you need to enter the Tuning Menu. This can be accessed using the FanaLab software, driver or a button/display module (sold separately). For further information about the APM Modes, please read the Quick Guide or Manual for the Podium Advanced Paddle Module.
 ATTENTION: Download driver V336 or higher.
WHEEL COMPATIBILITY
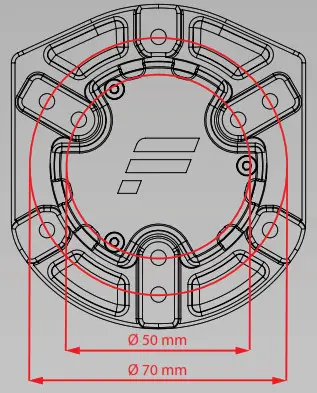
Use M5 bolts with a maximum internal reach of 16 mm in order to avoid internal damage of the Podium Hub. Fanatec Wheel Rims come with the correct bolts. If your wheel rim is not pre-drilled, you can use the drilling template for the Podium Hub.
NECESSARY FUNCTIONS
- To accept the High Torque warning message on a Podium Wheel Base, you need to turn the steering wheel 90° and wait until the bar on the wheelbase display disappears.
- Centre Calibrate by clicking on “Centre Calibration” in the driver.
- Shifter Calibrate by clicking on “Shifter Calibration” in the driver.
- To adjust the wheelbase Tuning Menu, you need to use the FanaLab software, driver or use a suitable button/display module (sold separately).
- Mode switching on wheelbases without a dedicated “Mode” button is only possible through the use of a suitable button/display module.
NOTE: The FunkySwitch™is not compatible with the Podium Hub.
 ATTENTION: Download driver V346 or higher.
ATTACHING THE PODIUM HUB
 ATTENTION: Ensure that your Fanatec wheelbase and Podium Hub firmware is updated from the downloads section of www.fanatec.com.
- Remove the storage pin.
NOTE: Keep the storage pin for future use.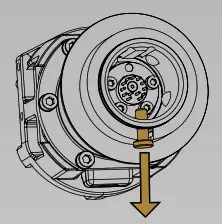
- Align wheelbase axle to correct position.
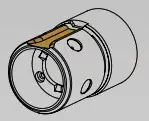
- Compress and hold the Quick Release mechanism.
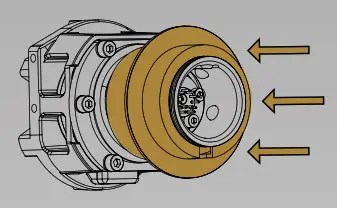
- Slide the Podium Hub onto the wheelbase axle up to the mechanical limit.
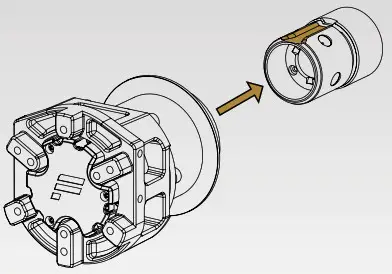
- Release the Quick Release mechanism.
DETACHING THE PODIUM HUB
- Compress and hold the Quick Release mechanism.
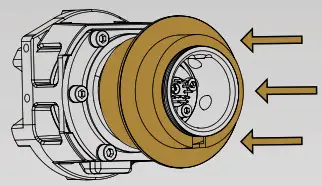
- Pull off the Podium Hub from the wheelbase axle.
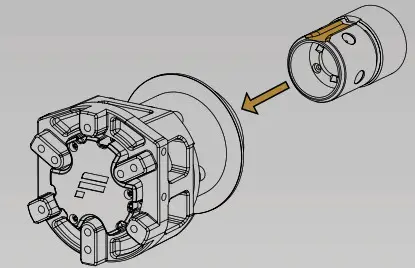
- Compress and hold the Quick Release mechanism.

- Insert the storage pin (recommended for long-term storage).
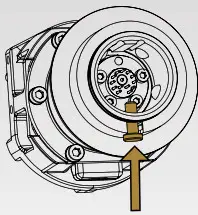
- Release the Quick Release mechanism.
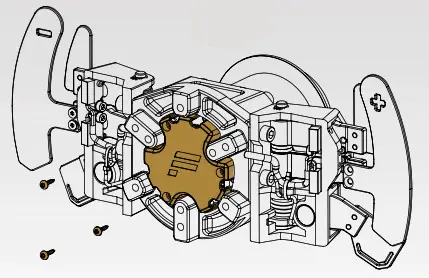
MOUNTING SHIFTER PADDLES
- Loosen the three highlighted bolts on the plastic cover. Use the included 2 mm Allen key.
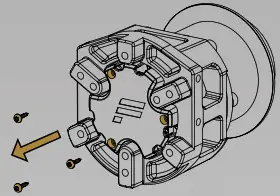
- Remove the front cover.
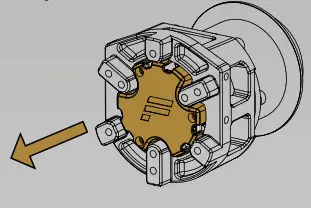
- Attach Podium Advanced Paddle Module (P APM; sold separately) using the M5x16 bolts from the package content and tighten them.
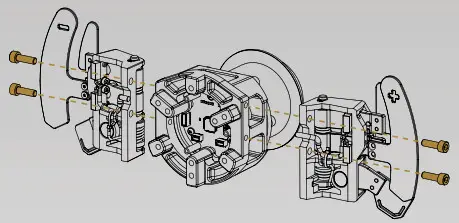
- Connect the P APM cables to the correct sockets.
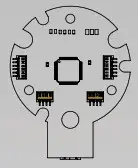
- Attach the front cover again, insert and tighten the three bolts. Position the cables carefully to avoid damage.
MOUNTING THE BUTTON CLUSTER PACK
- Loosen the three highlighted bolts on the plastic cover. Use the included 2 mm Allen key.
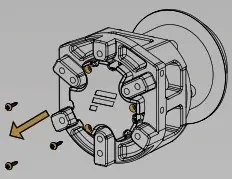
- Remove the front cover.
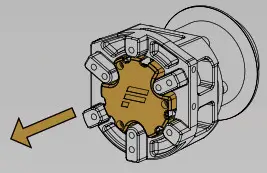
- Connect the Button Cluster cables to the correct sockets.
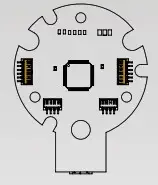
- Attach the front cover again, insert and tighten the three bolts. Position the cables carefully to avoid damage.
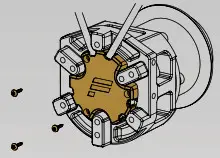
- Place the washers from the ClubSport Button Cluster Pack (BCP, sold separately) on the holes where no
Button Clusters will be mounted.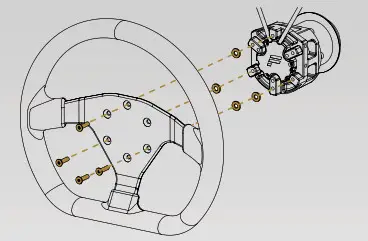
- Place the wheel rim on top of the washers, keeping it in place using all bolts except the two for the Button Clusters (one bolt for three-hole pattern, four bolts for six-hole pattern).
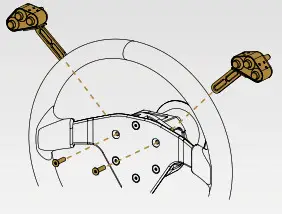
- Slide the Button Clusters in place, insert the remaining bolts, and fasten slightly in order to make final positioning adjustments, then tighten firmly.
MAPPING FOR BUTTON CLUSTER PACK
| # | Button no. PC | Function PS4 |
| 1 | 00 | SQUARE |
| 2 | 01 | CROSS |
| 3 | 02 | CIRCLE |
| 4 | 03 | TRIANGLE |
| 5 | 08 | SHARE |
| 6 | 09 | OPTIONS
(PRESS & HOLD FOR 3 SECONDS FOR PS4™SIGN-IN) |
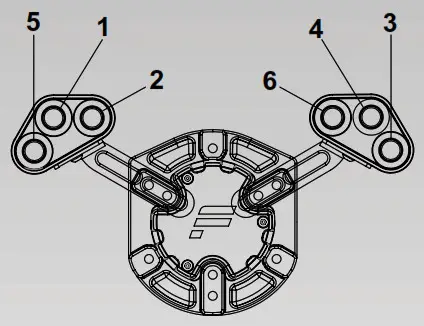
ATTENTION: A suitable button/display module such as the Podium Button Module Endurance or ClubSport Button Cluster Pack is mandatory for use on PS4. These products add a ‘PS-button’ to the Podium Hub, which must be pressed to initiate/sign-in the connected Fanatec hardware on a PS4 console. Ensure that the “PS4 Mode” is selected on the wheelbase by pressing TRIANGLE & SHARE simultaneously.

 Watch our video named “The Podium Hub – Sim Racing Wheel Adapter |
FANATEC” on the official Fanatec YouTube™ channel for further visual reference.

QuickGuide
![]()
![]() PlayStation ”, “ PS4” and
PlayStation ”, “ PS4” and ![]() are registered trademarks of Sony Interactive Entertainment Inc. All rights reserved.
are registered trademarks of Sony Interactive Entertainment Inc. All rights reserved.
All other trademarks are the property of their respective owners.
 |
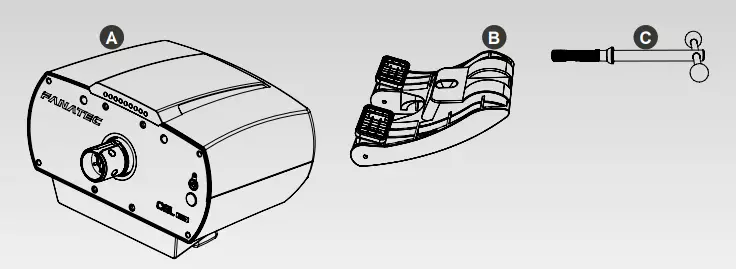 |
- CSL Elite Wheel Base + (PS4™ version) (A)
- Table clamp (B)
- Table clamp screw with handle (C)
- Power supply unit (D)
- Power cord (regional) (E)
- USB connection cable (F)
- O-Ring (G)
- PS4™ button caps for ClubSport steering wheels (H) (ClubSport steering wheels sold separately)
- Black washers (I) (for mounting ClubSport Static Shifter Paddles)
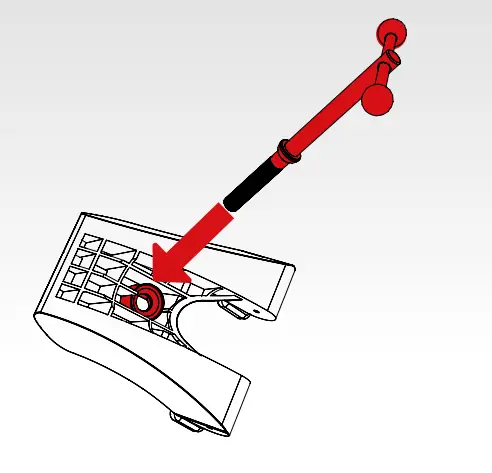
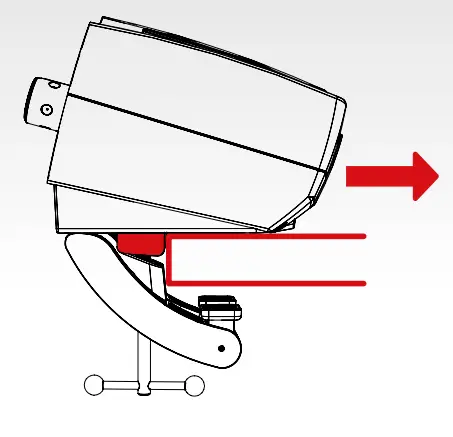
- Insert the table clamp screw with handles (C) into the table clamp (B).

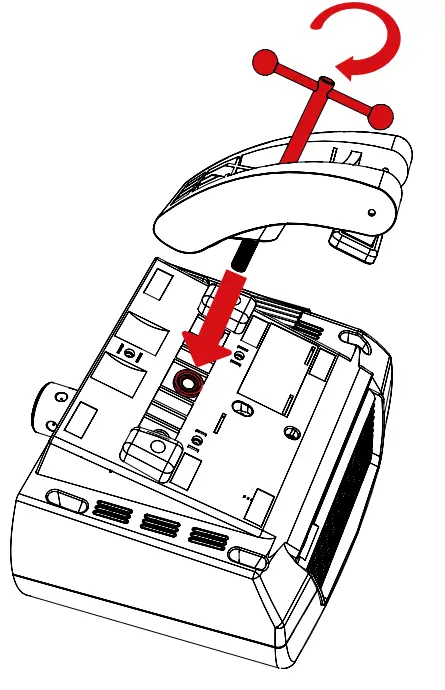
- Turn the table clamp screw (C) into the bottom center of the CSL Elite Wheel Base + (A).
- Slide the CSL Elite Wheel Base + (A) onto the tabletop until the limiter blocks stop sliding at the edge of the table.
NOTE: Table clamp (B) has to be below the tabletop.
- Tighten the table clamp (B) by turning the table clamp screw (C). Ensure that the table clamp’s feet remain well aligned with the bottom of the table plate.
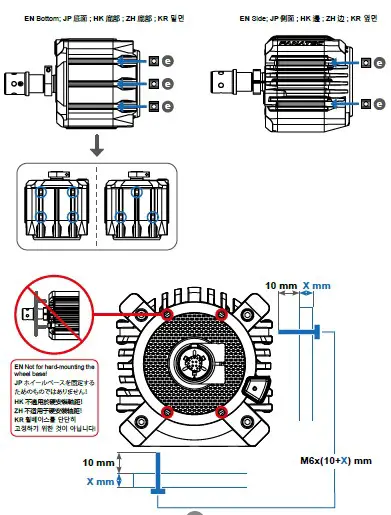
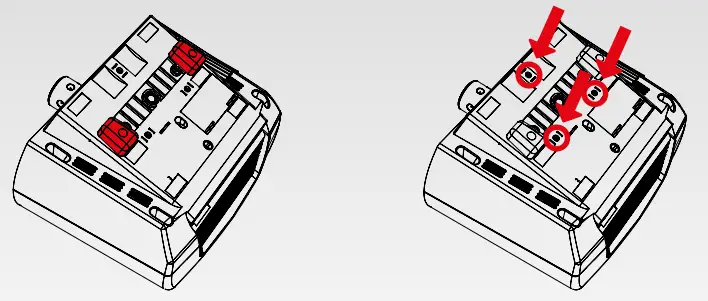
To hard-mount, the wheelbase first disassembles the two blocks from the underside (lower left picture) using a 3 mm Allen key (not included). The CSL Elite Wheel Base + offers a three-point hard-mount location on the underside (lower right picture):
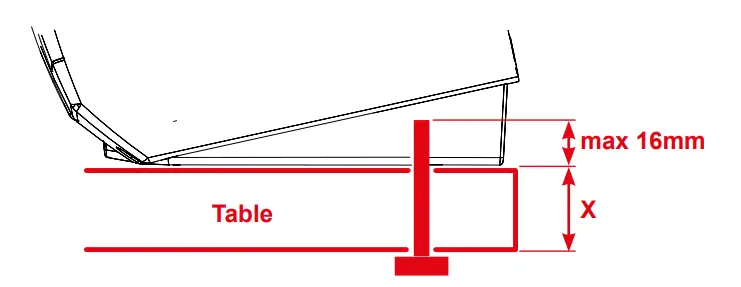
![]() IMPORTANT: Use only good quality M6 bolts. Choose the correct bolt length to prevent the thread from reaching more than 16 mm into the wheelbase.
IMPORTANT: Use only good quality M6 bolts. Choose the correct bolt length to prevent the thread from reaching more than 16 mm into the wheelbase.
Example:
If your table is 20 mm thick, the bolts must not exceed a total thread length of 36 mm! Always use all three hard-mount points as this allows for a proper and stable installation and avoids damage!
NOTE: To hard-mount the CSL Elite Wheel Base + to a table or rig with bolts please, find the printable drilling template in the download area of our website: www.fanatec.com
MODES
The CSL Elite Wheel Base + (A) will start in “PlayStation®4 Mode” by default. To switch to other modes press the “Mode” button once. The LED above the “![]() button will indicate the current operation mode:
button will indicate the current operation mode:
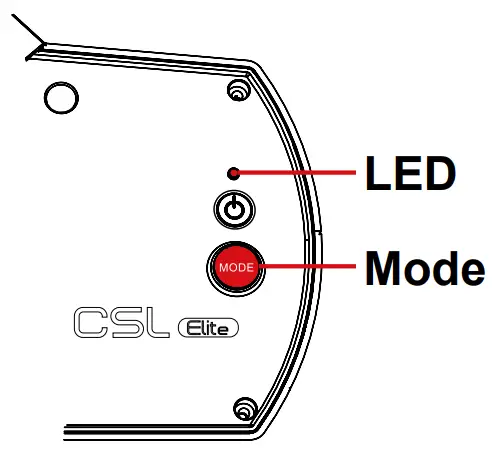
- Blue indicates “PlayStation®4 mode”
- Red indicates “PC mode”
- Purple indicates “ClubSport Wheel Base V2 Compatibility Mode”
To turn on the CSL Elite Wheel Base + (A), connect it to power and press the “![]() button on the right side of the CSL Elite Wheel Base + (A) for about one second.
button on the right side of the CSL Elite Wheel Base + (A) for about one second.
To turn off the CSL Elite Wheel Base + (A), press and hold the “![]() button for 5 seconds.
button for 5 seconds.
 NOTE: Only use the power supply (D) and power cord (E) included with this product.
When starting up the CSL Elite Wheel Base + (A) for the first time please update the firmware, which can be obtained from www.fanatec.com/downloads. Follow the instructions provided in the user manual.
Compatibility with PlayStation®4 games on a case-by-case basis. For a full list of compatible games, please visit www.fanatec.com.

![]() IMPORTANT!
IMPORTANT!
Use only the USB cable (F) with a straight plug packaged with the CSL Elite Wheel Base for PlayStation®4 to avoid damage to the USB port.
For detailed information please download the user manual from www.fanatec.com/support. This is just a QuickGuide and you will miss a lot of features if you don’t read the user manual.
This product is under the warranty of Endor AG, E.ON-Allee 3, 84036 Landshut, Germany,
Telephone: +49 (871) 9221-122, Fax: +49 (871) 9221-221,
Email: [email protected].
Refer to the chapter ‘warranty’ of the user manual as well as the terms & conditions of Endor AG on www.fanatec.com/terms-and-conditions.html.
ECOLOGY ADVICE
![]() In the European Union: At the end of its working life, this product should not be disposed of with standard household waste, but rather dropped off at a collection point for the disposal of Waste Electrical and Electronic Equipment (WEEE) for recycling.Depending on their characteristics, the materials may be recycled. Through recycling and other forms of processing
In the European Union: At the end of its working life, this product should not be disposed of with standard household waste, but rather dropped off at a collection point for the disposal of Waste Electrical and Electronic Equipment (WEEE) for recycling.Depending on their characteristics, the materials may be recycled. Through recycling and other forms of processing
Waste Electrical and Electronic Equipment, you can make a significant contribution towards helping to protect the environment.
Please contact your local authorities for information on the collection point nearest you.For all other countries: Please adhere to local recycling laws for electrical and electronic equipment.Retain this information. Colors and decorations may vary.![]() In the European Union: The packaging materials can be depolluted for recycling according to the legal regulations depending on the country responsible for the corresponding law.
In the European Union: The packaging materials can be depolluted for recycling according to the legal regulations depending on the country responsible for the corresponding law.
For all other countries: Please adhere to local recycling laws for packaging materials.
Manufactured by
![]()
Fanatec® is a registered trademark of Endor AG Designed and developed by Endor AG in Germany
E.ON-Allee 3 – 84036 Landshut – Germany
Telephone: +49 (871) 9221-122 Fax: +49 (871) 9221-221
Email: [email protected]
Website: www.fanatec.com – www.endor.ag
Licensed for sale in Europe and Australia and for use exclusively with PlayStation®4.

 Quick Guide

Rev. 08

|
|
|
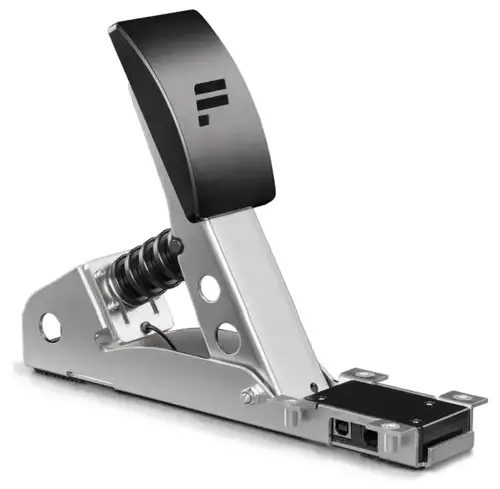
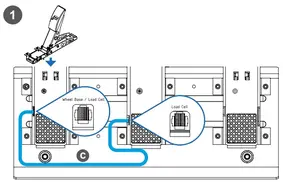
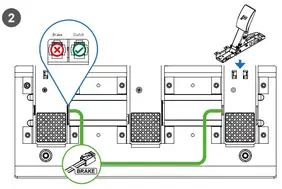
IMPORTANT! Do not connect the Pedals via RJ12 and USB at the same time!
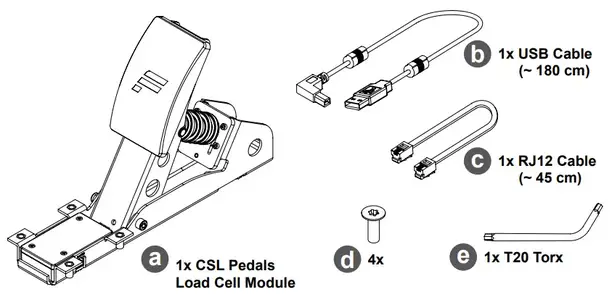
PACKAGE CONTENT
ATTACHMENT
 |
 |
 |
 |
 |
 |
CONNECTIONS
 |
|
 |
|
 |
SUPPORT
|
|
|
The product warranty is provided by Endor AG. Refer to the included warranty sheet as well as the terms & conditions of Endor AG on fanatec.com.
![]()
ENDOR products comply with the European Union Directive 2011/65/EU and its amendments, including exemptions for the use of lead such as high-temperature solder. ENDOR is working to phase out the use of these exempted substances where technically possible.
Contact
Endor AG
E.ON-Allee 3 – 84036 Landshut – Germany Telephone +49 (871)9221-122
Email: [email protected]
This product meets the requirements of the Technical Regulations which limit the use of certain hazardous substances in electrical and electronic equipment.
Manufactured and distributed by

Fanatec® is a registered trademark of Endor AG Designed and developed by Endor AG in Germany
E.ON-Allee 3 – 84036 Landshut – Germany
Telephone: +49 (871) 9221-122 Fax: +49 (871) 9221-221
Email: [email protected]
Website: www.fanatec.com
www.endor.ag
Made in China


Quick Guide
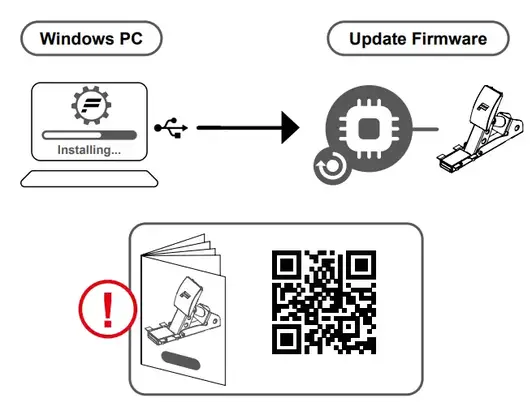
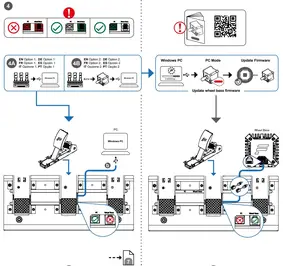
Download the latest PC driver. Follow instructions provided by the Driver & Firmware Instruction Manual found on the product page. A Windows PC is required to perform firmware updates. Ensure that PC mode is active on your wheelbase.
PACKAGE CONTENTS

QUICK-RELEASE ADAPTER ATTACHMENT
Separately sold wheel-side quick release adapter required.

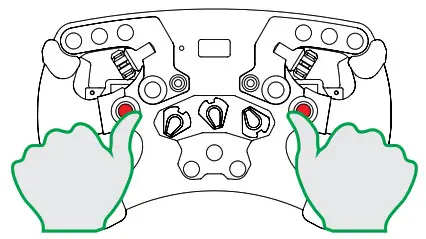
CENTRE CALIBRATION

- Turn to the center position


- Press at the same time to calibrate the steering wheel center.
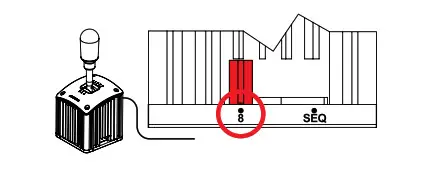
SHIFTER CALIBRATION
Optional. External H-pattern shifter required.
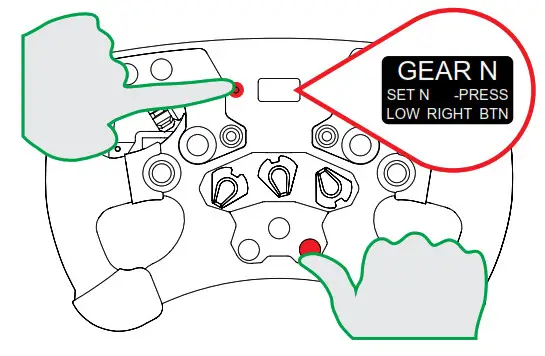
 Press the Tuning button and the highlighted button at the same time. Follow the instructions on the OLED display.
NOTE: Repeat process after firmware update.
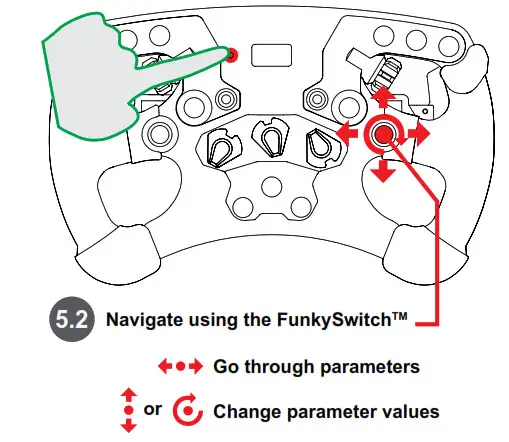
TUNING OPTIONS
Press Tuning button
Press the Tuning button to close the Tuning Menu.
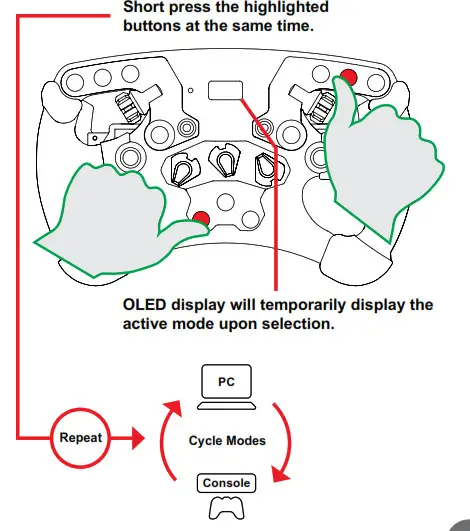
MODES
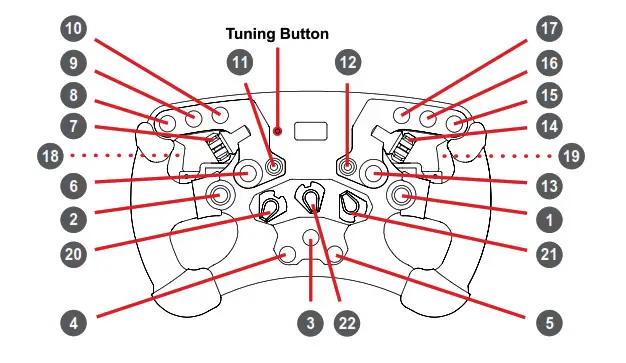
BUTTON MAPPING
| • | PC | PlayStation° |
| 1 FunkySwitch”‘ |
Up, Down, Left, Right, Press – 25 Rotate Left – 23 / Right – 24 |
Up, Down, Left, Right, Press – *GSB 1 Rotate Left – AGSB 2 / Right – °GSB 3 |
| 2 | Joystick | Joystick |
| 26 (Press) | `GSB 4 | |
| 3 | 22 | PS |
| 4 | 9 | SHARE/CREATE |
| 5 | 10 | OPTIONS |
| 6 | 11 | R3 |
| 7 | 27 (Rotate – CIN) | ‘GSB 5 |
| 21 (Rotate – CCW) | IGS8 6 | |
| 8 | 8 | 12 |
| 9 | 12 | L3 |
| 10 | 7 | R2 |
| 11 | 34 (Up) / 32 (Damn) | •GSB 7 / “GM 8 |
| 12 | 33 (Up) / 31 (Down) | •GSB 9 / •GM 10 |
| 13 | 2 | Cross |
| 14 | 36 (Rotate – CW) | *GSB 11 |
| 35 (Rotate – CCW) | 4GSB 12 | |
| 15 | 3 | Circle |
| 16 | 4 | Triangle |
| 17 | 1 | Squat |
| 18 | 6 | L1 |
| 19 | 5 | R1 |
| 20 | ENG: 37 / 38, MPS Pulse / Constant: 37 – 48 |
‘658 13 / 14 “GM 13 – 24 |
| 21 | ENG: 49 / 50, MPS Pulse / Constant: 4 9 – 60 |
*WEI 25 / 26 •658 25 – 36 |
| 22 | No output to the game | No output to the game |
GSB = Game-Specific Button
Quick Guide
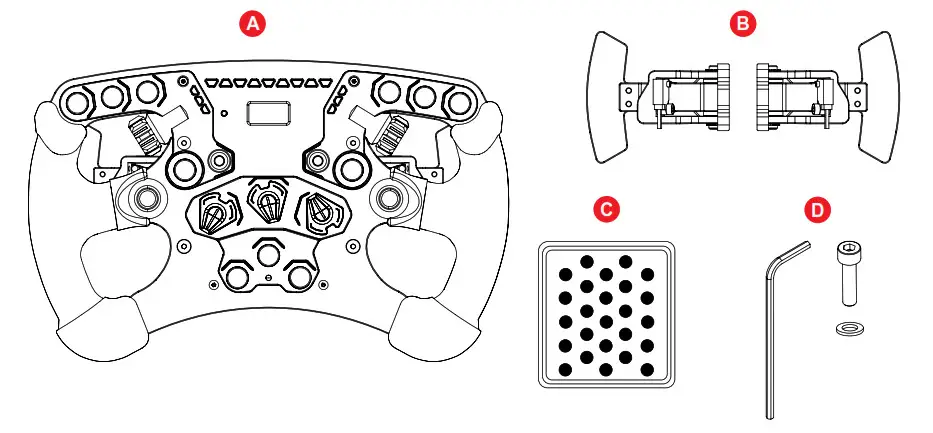
PACKAGE CONTENTS
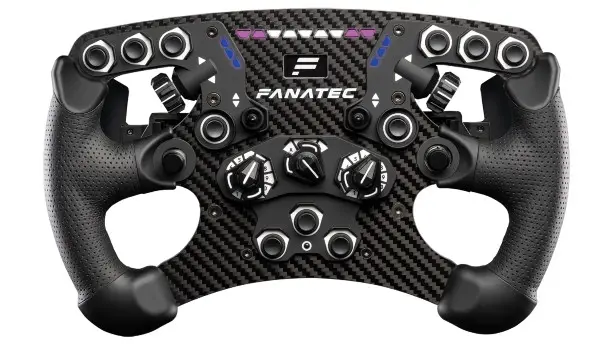
- 1x ClubSport Steering Wheel Formula V2.5
- 1x ClubSport Magnetic Paddle Module (pre-installed)
- 1x Racing Style Button Caps
- 1x Allen Key 4mm, 4x Bolts, 4x Washers (for attaching a wheel-side quick release adapter) A B C D
A separately sold wheel-side quick release adapter must be installed on this steering wheel to enable a mechanical connection with a FANATIC ® wheelbase. Read your wheel-side quick release adapter quick guide for detailed instructions.
CENTRE CALIBRATION
Press the Tuning button in order to enter the Tuning Menu. Press the highlighted buttons simultaneously in order to calibrate the steering wheel center.
SHIFTER CALIBRATION
Simultaneously press the Tuning button and the highlighted button. Follow the instructions on the OLED display.
TUNING OPTIONS
press the Tuning button. Navigate using the FunkySwitch TM
 Go through parameters
 Change parameter values
Read the manual or quick guide of your Fanatec wheelbase for more information.
BUTTON MAPPING
SUPPORT
Our Support Team is ready to help you! Visit fanatec.com/support/faq for assistance.
Download our app:

fanatec.com/support/faq
VIDEO
Watch our video guide:

Fanatec.com/QR/CS-F-V2.5
The product warranty is provided by Endor AG. Refer to the included warranty sheet as well as the terms & conditions of Endor AG on fanatec.com
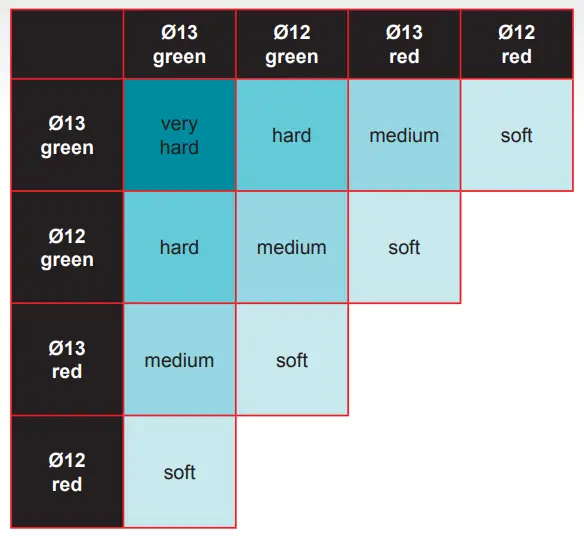
HARDNESS COMPARISON
There are many possible combinations of Elastomer springs (A) – (D). This comparison table may give you a better idea of the effects when combining the different Elastomer springs:
PACKAGE CONTENT
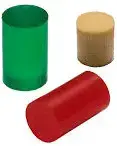
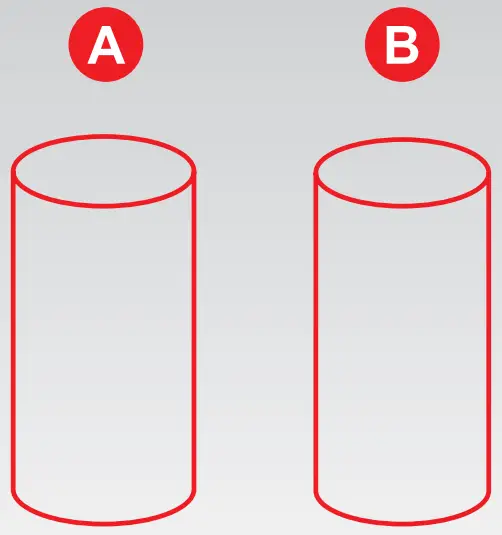
- 2x Elastomer spring red Ø13 x 20 mm (A)
- 1x Elastomer spring red Ø12 x 20 mm (B)
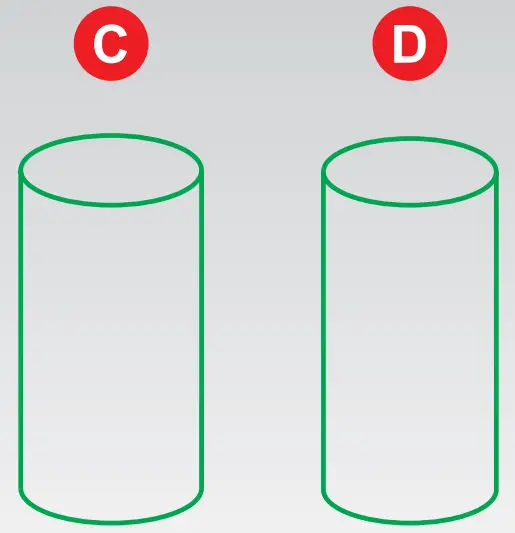
- 2x Elastomer spring green Ø13 x 20 mm (C)
- 1x Elastomer spring green Ø12 x 20 mm (D)
- 1x Polyurethane spring (PU foam) Ø13,5 x 15 mm (E)

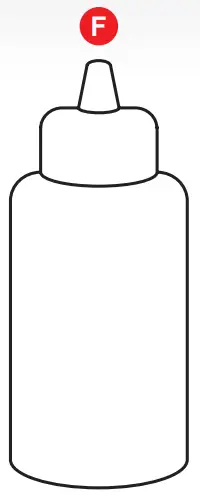
- 1x Lithium grease (F)
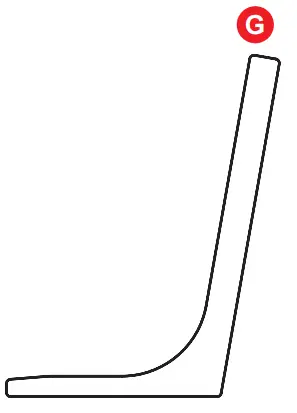
- 1x Installation tool (Fix-1) (G)
![]() NOTE:
NOTE:
Required tools are not included in package content
MANUAL
![]() IMPORTANT:
IMPORTANT:
We strongly recommend reading the more detailed description about the Club Sport Pedals V3 Damper Kit inside the Club Sport Pedals V3 user manual! This contains important notes and more detailed instructions to avoid damages and achieve the best performance.
For detailed information please download the manual from www.fanatec.com/support. This is just a Quick Guide and you will miss a lot of features if you don’t read the manual.
ASSEMBLY
![]() IMPORTANT: Please follow these steps carefully to avoid damages due to assembly mistakes which cannot be covered by warranty.
IMPORTANT: Please follow these steps carefully to avoid damages due to assembly mistakes which cannot be covered by warranty.
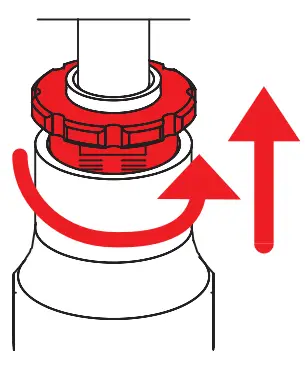
- Turn the brake preload screw to backside end position (lowest preload).
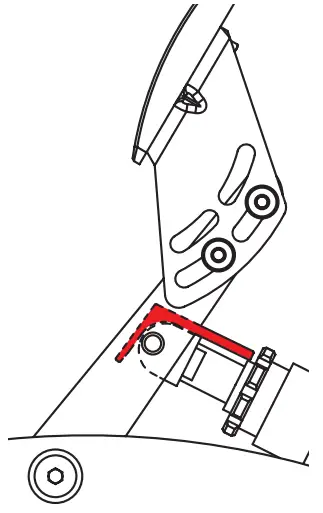
- To avoid pinching the vibration motor cable, insert the included installation tool (Fix-1) ‘behind’ the brake assembly.
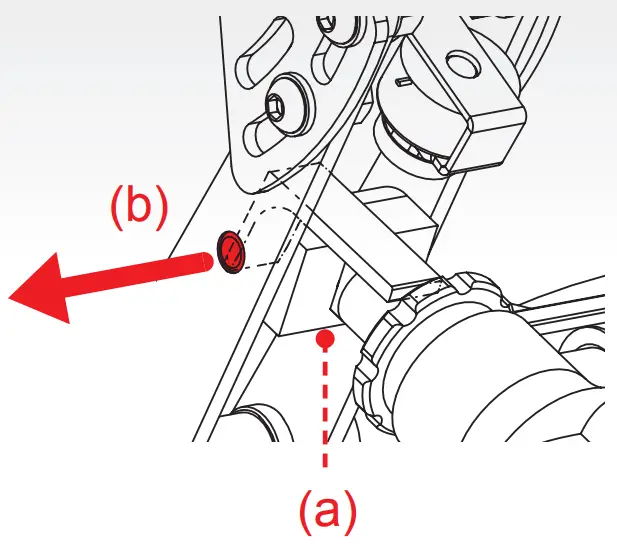
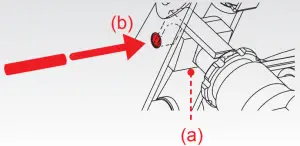
- Loosen the small screw (a) with Allen Key 2,5 mm, then remove the thin bolt (b) from the brake pedal lever.
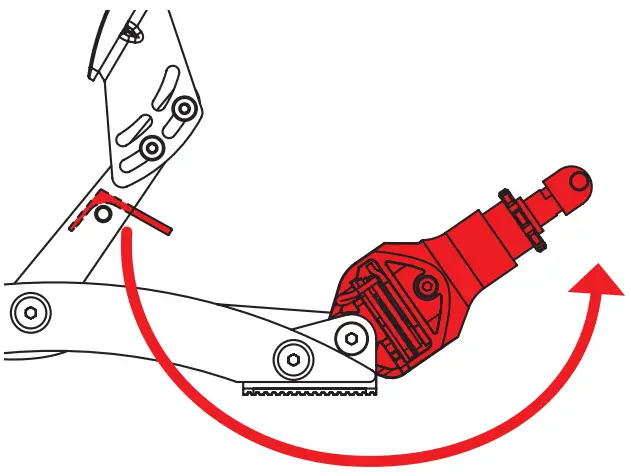
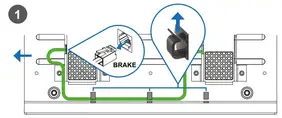
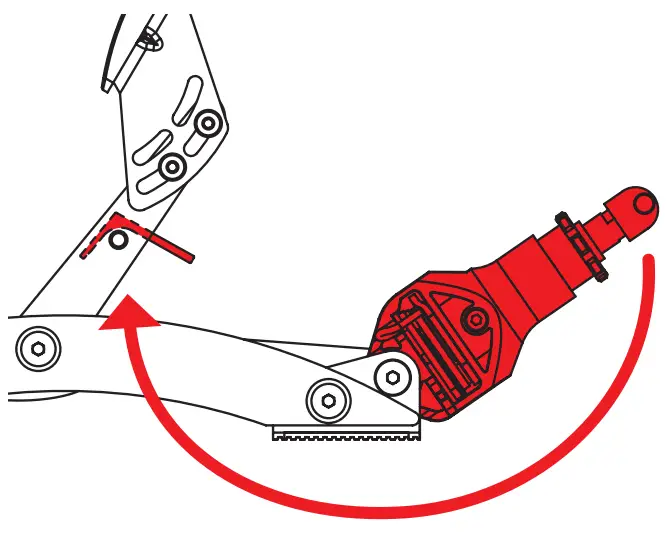
- Disconnect the load cell cable from ‘Brake’ port at the mainboard and take it out of the cable clips. Then turn the brake assembly downwards out from the brake pedal lever.

 IMPORTANT: Take care of the cables to avoid damages!
 - Remove the brake pedal bolt.
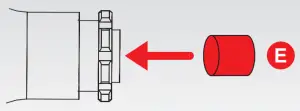
- Remove the original Polyurethane springs and store them safely and light-protected for later use.
- Insert the small Polyurethane spring (E) from Brake Performance Kit package content into the preload screw:

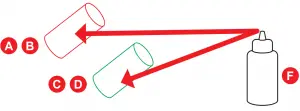
- Select two pieces of the Elastomer springs (A) – (D) from Brake Performance Kit package content according to your preferences (refer to ‘hardness comparison’ of this Quick Guide) and apply Lithium grease (F) to their surface.

- Insert the selected two pieces of the Elastomer springs (A) – (D) into the preload screw.
- Insert the brake pedal bolt into the preload screw.
- Turn back the brake assembly into the brake pedal lever (using the installation tool again), then reconnect the load cell cable to the ‘Brake’ port.
 IMPORTANT: Take care of the cables to avoid damages
 - Insert the thin bolt (a) into the brake pedal lever through the black block at the brake bolt, then tighten the small screw (b) with Allen Key 2,5 mm with moderate force again.
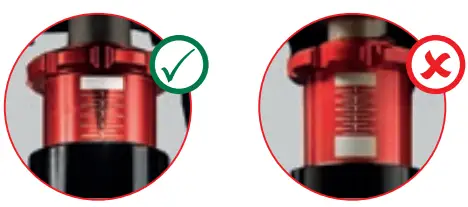
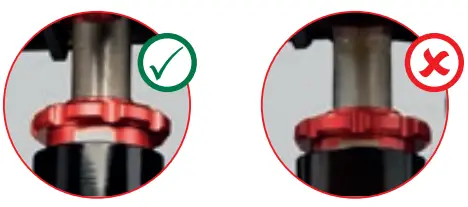
- Adjust the preload screw so that the scale is within the correct use range and there is no mechanical play in brake pedal. Note: Preload screw cannot be used in the full range as before, its use is limited only to eliminate the mechanical play.

- Minimum preload setting for brake pedal.

- Maximum preload setting for brake pedal.

- Minimum preload setting for brake pedal.

Quick Guide
Download the latest PC driver. Follow instructions provided by the Driver & Firmware Instruction Manual found on the product page. A Windows PC is required to perform firmware updates. Ensure that PC mode is active on your wheelbase.
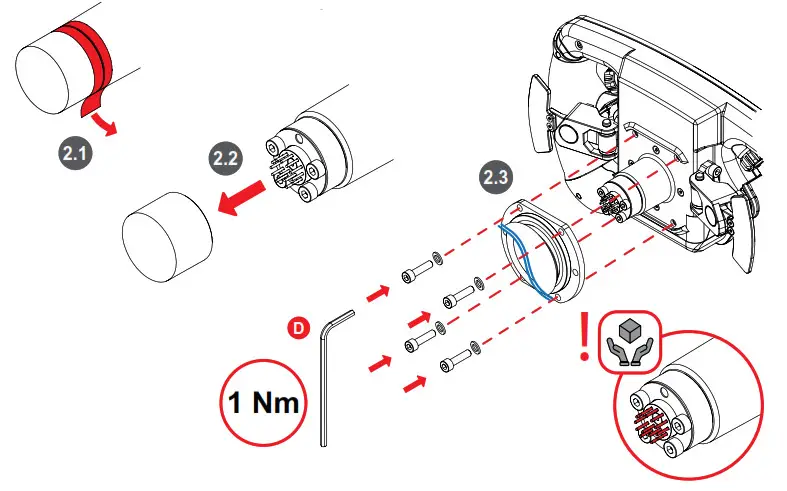
PACKAGE CONTENTS

QUICK-RELEASE ADAPTER ATTACHMENT
Separately sold wheel-side quick release adapter required.
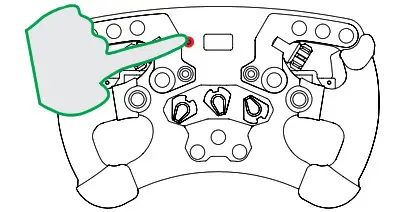
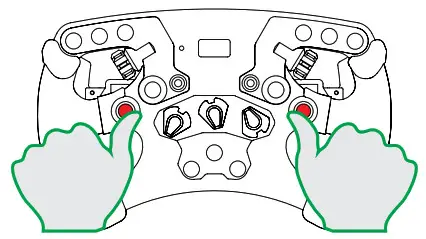
CENTRE CALIBRATION
- Turn to the center position

- Press at the same time to calibrate the steering wheel center.
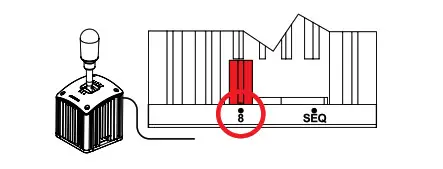
SHIFTER CALIBRATION
Optional. External H-pattern shifter required.
 Press the Tuning button and the highlighted button at the same time. Follow the instructions on the OLED display.
NOTE: Repeat process after firmware update.
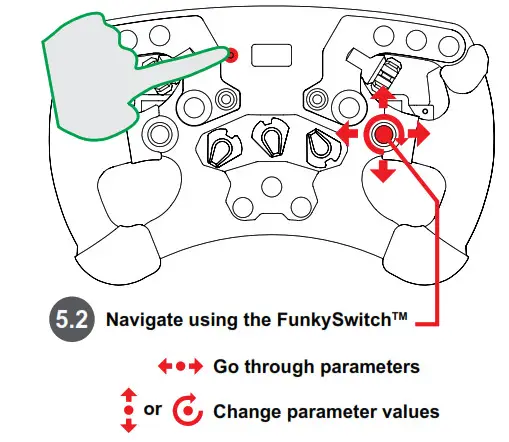
TUNING OPTIONS
Press Tuning button
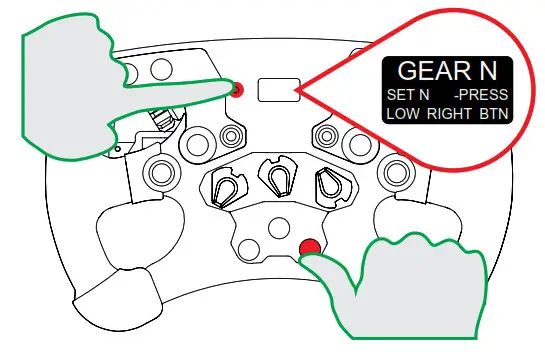
Press the Tuning button to close the Tuning Menu.
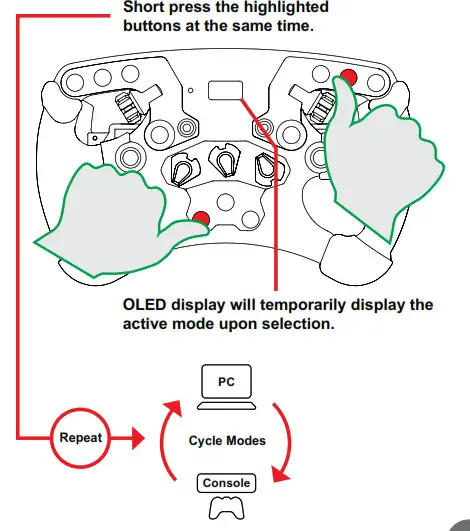
MODES
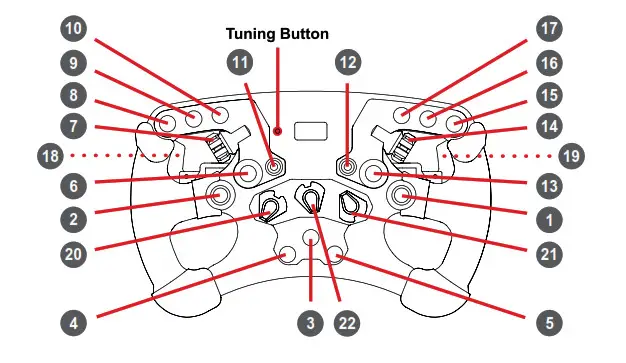
BUTTON MAPPING
| • | PC | PlayStation° |
| 1 FunkySwitch”‘ |
Up, Down, Left, Right, Press – 25 Rotate Left – 23 / Right – 24 |
Up, Down, Left, Right, Press – *GSB 1 Rotate Left – AGSB 2 / Right – °GSB 3 |
| 2 | Joystick | Joystick |
| 26 (Press) | `GSB 4 | |
| 3 | 22 | PS |
| 4 | 9 | SHARE/CREATE |
| 5 | 10 | OPTIONS |
| 6 | 11 | R3 |
| 7 | 27 (Rotate – CIN) | ‘GSB 5 |
| 21 (Rotate – CCW) | IGS8 6 | |
| 8 | 8 | 12 |
| 9 | 12 | L3 |
| 10 | 7 | R2 |
| 11 | 34 (Up) / 32 (Damn) | •GSB 7 / “GM 8 |
| 12 | 33 (Up) / 31 (Down) | •GSB 9 / •GM 10 |
| 13 | 2 | Cross |
| 14 | 36 (Rotate – CW) | *GSB 11 |
| 35 (Rotate – CCW) | 4GSB 12 | |
| 15 | 3 | Circle |
| 16 | 4 | Triangle |
| 17 | 1 | Squat |
| 18 | 6 | L1 |
| 19 | 5 | R1 |
| 20 | ENG: 37 / 38, MPS Pulse / Constant: 37 – 48 |
‘658 13 / 14 “GM 13 – 24 |
| 21 | ENG: 49 / 50, MPS Pulse / Constant: 4 9 – 60 |
*WEI 25 / 26 •658 25 – 36 |
| 22 | No output to the game | No output to the game |
GSB = Game-Specific Button
Quick Guide
PACKAGE CONTENTS
- 1x ClubSport Steering Wheel Formula V2.5
- 1x ClubSport Magnetic Paddle Module (pre-installed)
- 1x Racing Style Button Caps
- 1x Allen Key 4mm, 4x Bolts, 4x Washers (for attaching a wheel-side quick release adapter) A B C D
A separately sold wheel-side quick release adapter must be installed on this steering wheel to enable a mechanical connection with a FANATIC ® wheelbase. Read your wheel-side quick release adapter quick guide for detailed instructions.
CENTRE CALIBRATION
Press the Tuning button in order to enter the Tuning Menu. Press the highlighted buttons simultaneously in order to calibrate the steering wheel center.
SHIFTER CALIBRATION
Simultaneously press the Tuning button and the highlighted button. Follow the instructions on the OLED display.
TUNING OPTIONS
press the Tuning button. Navigate using the FunkySwitch TM
 Go through parameters
 Change parameter values
Read the manual or quick guide of your Fanatec wheelbase for more information.
BUTTON MAPPING
SUPPORT
Our Support Team is ready to help you! Visit fanatec.com/support/faq for assistance.
Download our app:

fanatec.com/support/faq
VIDEO
Watch our video guide:

Fanatec.com/QR/CS-F-V2.5
The product warranty is provided by Endor AG. Refer to the included warranty sheet as well as the terms & conditions of Endor AG on fanatec.com

